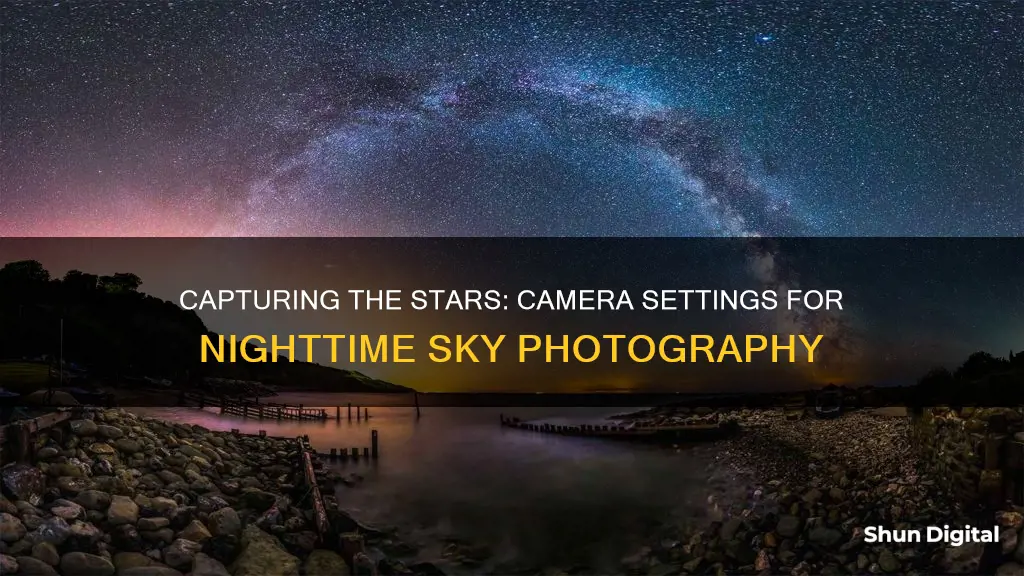
Capturing the beauty of the night sky is a challenging yet rewarding endeavour. The right equipment and settings are crucial to achieving success in star photography. Here is a comprehensive guide to help you master the art of photographing the stars.
Equipment
- A sturdy tripod is essential to stabilise your camera and prevent blurry images caused by camera shake.
- A camera with manual mode is ideal, allowing independent control of shutter speed, f-stop, and ISO. Full-frame cameras, such as the Nikon Z7, are recommended for their larger sensor size, which captures more light and reduces noise in high ISO images.
- A wide-angle lens with an aperture ranging from f/2.8 to f/4 is best suited for star photography, providing a wider field of view and allowing more light to reach the sensor.
- Additional equipment, such as a remote shutter release, light pollution filter, and intervalometer (for star trails), can further enhance your setup.
Settings
- Use a wide aperture (low f-stop value) to let more light into the camera. The ideal range is f/1.4 to f/2.8, with f/4 being the minimum acceptable value.
- Set a high ISO value to increase the camera's sensitivity to light. Values between ISO 1600 and ISO 3200 are typical, but during a new moon, you may need to go up to ISO 6400 or higher.
- Choose a slow shutter speed, generally between 15 and 30 seconds, to capture enough light. Be mindful that exposures longer than 30 seconds can result in star trails due to the Earth's rotation.
Focus and Composition
- Manual focus is crucial as autofocus struggles in low-light conditions. Set the focus to infinity and fine-tune as needed. Using Live View to zoom in on a bright star or distant light source can help achieve sharp focus.
- Include foreground elements like trees or buildings to add interest and perspective to your images.
- Plan your composition during the daytime to familiarise yourself with the location and potential subjects.
Post-Processing
- Utilise photo editing software to enhance your images. Adobe Photoshop is commonly used for blending multiple exposures and creating stunning composites.
- Experiment with different techniques, such as image stacking, to improve the overall quality of your night sky photographs.
| Characteristics | Values |
|---|---|
| Camera type | DSLR, mirrorless, or smartphone |
| Camera mode | Manual |
| Aperture | f/1.2 to f/5.6 (the smaller the number, the better) |
| ISO | 1600-6400 |
| Shutter speed | 10-20 seconds |
| White balance | Daylight |
| Exposure length | 15-30 seconds |
| Tripod | Sturdy carbon fibre |
| Location | Away from light pollution |
What You'll Learn
- Camera settings: A high ISO, open aperture and slow shutter speed are ideal for night photography
- Camera equipment: A camera with good ISO capabilities, a wide-angle lens and a sturdy tripod are essential
- Focusing: Switch to manual focus and rotate the focus ring to infinity
- Light pollution: Use a light pollution filter or travel to a location with minimal light pollution
- Composition: Include the surrounding landscape in your photograph to add a unique element to your images

Camera settings: A high ISO, open aperture and slow shutter speed are ideal for night photography
Capturing the night sky in all its glory is no easy feat. The right camera settings are essential to achieving a successful shot. Here are the ideal camera settings for photographing the night sky:
ISO
A high ISO is crucial for night photography as it increases the camera's sensitivity to light. For star photography, an ISO of 3200-4000 is recommended, though this may vary depending on your camera model and lighting conditions. It's important to note that higher ISO values can introduce noise and grain to your image, so finding the right balance is key.
Aperture
A wide aperture, such as f/2.8 or f/4, is ideal for night photography. This allows your camera to capture more light in a short amount of time, resulting in brighter and sharper images. While wider apertures can be more challenging to focus, they are essential for capturing the beauty of the night sky.
Shutter Speed
When it comes to shutter speed, the sweet spot for night photography is typically between 15 and 30 seconds. This longer exposure time allows enough light to enter the camera, creating a brighter image. However, it's important to strike a balance, as too slow a shutter speed will result in blurry stars due to the Earth's rotation. The "500 Rule" is a helpful guideline for calculating the maximum shutter speed you can use without star trails.
Additional Tips
In addition to these settings, there are a few other considerations to keep in mind:
- Use a sturdy tripod to keep your camera steady during long exposures.
- Set your camera to manual mode to have full control over the settings.
- Shoot in RAW format to capture a wider range of tones and better handle digital noise.
- Use a wide-angle lens to capture more of the sky and reduce star trails.
- Find a location away from city lights to minimise light pollution and reveal fainter stars.
LG Smart TVs: Built-In Cameras or Not?
You may want to see also

Camera equipment: A camera with good ISO capabilities, a wide-angle lens and a sturdy tripod are essential
Capturing the night sky in all its glory is no easy feat, but with the right camera equipment, you can achieve stunning results. Here's a detailed guide on the essential camera gear you'll need to create breathtaking astrophotography:
Camera Body:
A DSLR (Digital Single-Lens Reflex) or mirrorless camera is a must. These cameras offer manual mode, allowing you to control settings like shutter speed, aperture, and ISO manually. Look for models with good low-light performance and high ISO capabilities. Examples include the Canon EOS Ra, Canon EOS Rebel T7i, Canon 6D, Nikon D750, and Sony Alpha 7S.
Lens:
A wide-angle lens is essential for astrophotography. It allows you to capture more of the night sky in a single shot and is more forgiving when it comes to star trailing. Look for lenses with large apertures (f/2.8 or wider) to collect as much light as possible. Examples include the Rokinon 14mm f/2.8, Canon EF 24-105mm, and Sigma 14mm f/1.8.
Tripod:
A sturdy and stable tripod is crucial for sharp images. Look for a tripod that can support the weight of your camera and lens setup. Carbon fiber tripods are excellent for reducing vibration and providing sharp results. Examples include the Feisol Tournament CT-3342 tripod and the Peak Design Travel Tripod.
With this essential camera equipment, you'll be well on your way to capturing breathtaking images of the night sky. Remember to experiment with different settings, plan your shoots, and scout for dark sky locations away from light pollution. Happy shooting!
Viewing FLIR Camera Clips: A Step-by-Step Guide
You may want to see also

Focusing: Switch to manual focus and rotate the focus ring to infinity
Focusing on the stars can be one of the most challenging aspects of night photography. The autofocus system often fails to focus in the dark, resulting in blurry or out-of-focus images. However, with a few simple steps, you can easily achieve sharp focus for your night sky shots.
First, switch your lens to manual focus mode. This will allow you to have more control over the focus and make the necessary adjustments. Then, rotate the focus ring to infinity. The infinity symbol (∞) on your lens marks the approximate infinity focus point. However, you may need to fine-tune the focus slightly beyond this mark to ensure your image is perfectly sharp.
At this point, it is a good idea to take a test shot to evaluate the focus. If needed, make small adjustments to the focus until you achieve the desired sharpness. You can use the display on your camera to zoom in on any bright stars and adjust the focus until they appear sharp.
Once you are happy with the focus, you can use a piece of tape or a marker to mark this spot on your lens. This will make it easier for you to find the sharpest focus point again in the future.
Another option for focusing is to take advantage of distant light sources within your frame, such as a bright star or a distant street light. Use the Live View mode on your camera to zoom in on this light source and rotate the focus ring until the light appears at its smallest and sharpest. Take a test shot to evaluate the focus and make any necessary adjustments.
By following these steps, you will be able to achieve sharp and precise focus for your night sky photography, ensuring that your images of the stars are clear and detailed.
MacBook Camera Range: How Far Can It See?
You may want to see also

Light pollution: Use a light pollution filter or travel to a location with minimal light pollution
Light pollution is a major challenge for astrophotographers, and it can be difficult to capture clear images of the night sky in light-polluted areas. However, there are ways to mitigate the effects of light pollution and capture impressive images of the stars. Here are some tips to help you combat light pollution and improve your astrophotography:
Use a Light Pollution Filter
Light pollution filters are designed to reduce the amount of artificial light that reaches your camera sensor, allowing you to capture clearer images of the night sky. These filters can be attached directly to your camera lens or telescope, depending on your setup. When using a light pollution filter, you may need to increase your exposure time and make adjustments to your camera settings to compensate for the reduced light. Additionally, keep in mind that light pollution filters can alter the colour balance of your images, so you may need to fine-tune your white balance settings or make adjustments during post-processing.
Travel to a Location with Minimal Light Pollution
Sometimes, the best way to avoid light pollution is to simply get away from sources of artificial light. Plan your astrophotography sessions in areas that are far from cities or towns, as these locations will have darker skies and less light pollution. You can use resources like light pollution maps to find areas with minimal light pollution. Keep in mind that moonlight can also affect your images, so it's best to plan your shoots during the new moon phase or when the moon is not in the sky.
In addition to these strategies, there are other techniques you can employ to improve your astrophotography in light-polluted areas. Experiment with different camera settings, such as aperture, ISO, and shutter speed, to find the optimal combination for your specific conditions. Additionally, consider using a star tracker or an equatorial mount to compensate for the Earth's rotation and allow for longer exposures without star trails. Post-processing techniques can also help enhance your images and reduce the impact of light pollution.
By using a combination of these techniques, you can improve your chances of capturing stunning images of the night sky, even in light-polluted areas. Remember to be patient, experiment with different methods, and always scout your locations in advance to give yourself the best chance of success.
Walgreens Surveillance: Are Shoppers Being Watched?
You may want to see also

Composition: Include the surrounding landscape in your photograph to add a unique element to your images
Capturing the beauty of the night sky is a unique challenge that requires a different approach to daytime photography. One way to enhance your images is to include the surrounding landscape, adding a creative element to your photographs of the stars.
- Scout your location during the day: It's much easier to find a good composition when you can see your surroundings clearly. Visit your chosen location in daylight to explore the area and take test shots. This will give you a better idea of how to incorporate the landscape into your night sky images.
- Use foreground elements: Rocks, trees, buildings, or other objects in the foreground can add depth, texture, and interest to your photos. Experiment with different focal lengths and shutter speeds to find what works best for your composition.
- Play with angles and perspectives: Try getting down low to include more of the foreground landscape or to create dramatic silhouettes against the starry sky. Move around to shoot from multiple locations, revealing different compositions throughout the night.
- Consider the horizon: A distant horizon can be useful for focusing your camera, especially when photographing planets. It can also add context and interest to your images, so consider including some of the horizon in your frame.
- Look for storytelling opportunities: Use the landscape to tell a story or convey a particular mood or atmosphere. For example, a cracked earth landscape can evoke a sense of desolation or a mysterious forest can add an air of enchantment to your starry sky images.
- Experiment with light painting: Using a light source, such as a flashlight or headlamp, can add drama and depth to your night sky photos. Illuminate foreground elements or paint light streaks across the sky to create unique effects.
Remember, including the landscape in your night sky photography is all about creativity and experimentation. So, get out there, explore different locations, and don't be afraid to try new techniques. With practice, you'll be able to capture stunning images that showcase the beauty of both the night sky and the surrounding landscape.
Accessing Axis Cameras Remotely: Internet Viewing Guide
You may want to see also
Frequently asked questions
To see stars on camera, you will need a camera with manual mode, a tripod, a remote shutter release, and a lens with a wide aperture.
The best camera settings for star photography are a shutter speed of 10-20 seconds, an aperture of f/1.2 to f/5.6, and an ISO of 1600-64000.
It is difficult for cameras to autofocus on stars due to the darkness. To focus on stars, switch to manual focus mode and rotate the focus ring to infinity. Take a test shot and adjust as needed until the stars are in focus.
The best time to photograph stars is during a new moon, between midnight and 5 am, and away from light pollution in the countryside or wilderness areas.


