If you're experiencing issues with your Samsung Galaxy S6 camera, you may need to remove the lens. This could be due to a broken lens, black spots on your photos, or blurry images. Before attempting any repairs, it's important to identify the cause of the problem and gather the necessary tools and replacement parts. Keep in mind that removing the camera lens involves delicate procedures, so proceed with caution to avoid further damage to your device.
What You'll Learn

Removing the back cover
To remove the back cover of a Samsung Galaxy S6, you will need to proceed with caution as the back cover is fragile and can break easily. You will also need tweezers, a hair dryer, and a suction cup.
Start by heating the rear glass with a hair dryer. This will loosen the adhesive around the edges of the glass. Once the glass is hot to the touch, apply a suction cup near the bottom edge of the glass. Lift the suction cup to create a small gap underneath the rear glass, and insert the tweezers into the gap. Be careful not to scratch the metal ring with the sharp tweezers.
Next, slide the tweezers along the bottom edge of the phone to slice through the adhesive securing the rear glass. Reheat the rear glass as needed to prevent the glue from cooling and hardening. Repeat the heating and cutting procedure for the remaining three sides of the phone. Leave the tweezers under each edge to prevent the adhesive from resealing.
Finally, use the tweezers to remove the back cover. Be gentle, as the back cover is fragile and prone to breaking.
Finding Your Smart TV's Camera: A Step-by-Step Guide
You may want to see also

Using tweezers to remove the camera lens ring
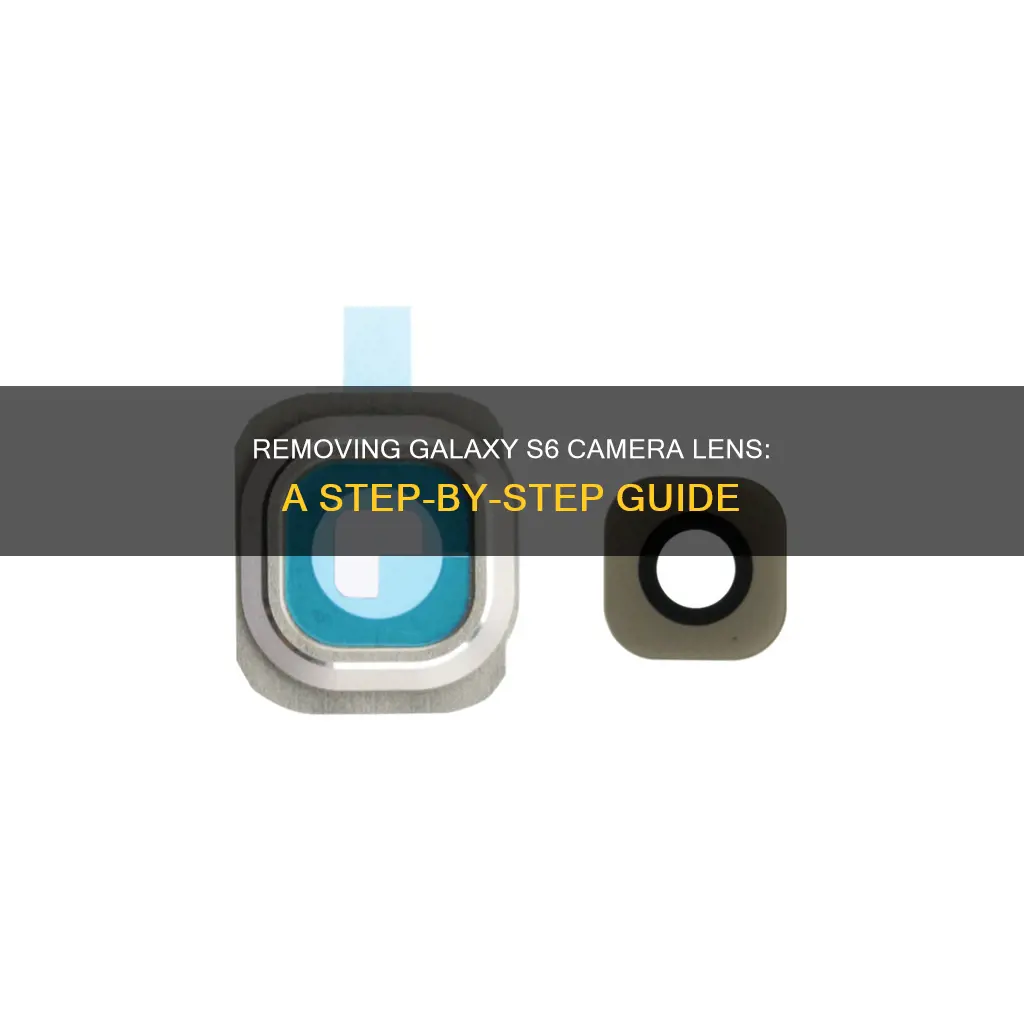
To remove the camera lens ring on a Galaxy S6 using tweezers, you will first need to remove the back cover. This should be done carefully, as it is fragile.
Once the back cover is off, you can use the tweezers to pry up the camera lens ring from the bottom right corner. Be cautious not to scratch the metal ring with the tweezers, as there is some adhesive underneath.
After removing the camera lens ring, you can push the camera lens glass out with your finger or a spudger.
When installing the new camera lens, peel off the upper film and assemble the glass with the ring. Then, peel off the bottom film and stick the new camera lens assembly back on.
It is recommended to use a new back cover sticker, as the old one may not be reusable.
Unlocking Your HD Action Camera from its Waterproof Prison
You may want to see also

Removing the camera lens glass
The following is a step-by-step guide on how to remove the camera lens glass on a Samsung Galaxy S6.
Step 1: Remove the back cover
Use tweezers to carefully remove the back cover of your Samsung Galaxy S6. Be cautious, as the back cover is fragile and can break easily.
Step 2: Pry up the camera lens ring
Using tweezers, gently lift the camera lens ring from the bottom right corner. Be careful not to scratch the metal ring with sharp tweezers. There is adhesive underneath the ring, so take your time with this step.
Step 3: Remove the camera lens glass
With your finger or a spudger, push out the camera lens glass and remove it. Be cautious not to apply too much force, as the glass may shatter. If the lens is heavily broken, remove it carefully, ensuring you do not damage the camera or scratch the metal ring.
Step 4: Clean the remaining adhesive
Use tweezers to remove any remaining glass fragments and old adhesive from the camera lens area. You can use an iOpener to soften the glue and make it easier to remove. It is important to create a clean and flat surface for the new lens glass.
Step 5: Prepare the new camera lens glass
Peel off the protective plastic from both sides of the new camera lens glass. This step is crucial, as forgetting to remove the plastic may cause the new lens to come off.
Step 6: Install the new camera lens glass
Using tweezers or a small suction tool, carefully place the new camera lens glass inside the camera dome. Ensure that the edge of the lens glass is flush or slightly lower than the edge of the dome. Apply gentle pressure to secure the lens in place.
Step 7: Reassemble the device
To finish the process, simply follow the disassembly steps in reverse order. Ensure that all components are properly aligned and secured before turning on your device to test the new camera lens.
Hisense Smart TV Camera Location Explained
You may want to see also

Placing the new camera lens
Now that you've removed the old lens, it's time to place the new one.
First, peel off the upper film on the new lens and assemble the glass with the ring. Then, peel off the bottom film and stick the new camera lens assembly back onto the phone. You may need a new back cover sticker as the old one may not be usable anymore.
If your S6 camera lens was heavily broken, place the sticker on the camera ring first, and then stick on the new camera glass.
To reassemble your device, follow these instructions in reverse order.
The Evolution of Smartwatch Cameras: Where Are They Now?
You may want to see also

Reassembling the device
To reassemble your device, follow these instructions in reverse order. When reinstalling the rear glass, refer to the rear glass adhesive replacement guide.
Firstly, connect the dock connector to the logic board again. Fold it over and put it in the frame. Make sure the cables don't get under the logic board. Check whether your logic board is positioned correctly.
Now reconnect all the connectors: Battery, Display, Earpiece, Home Button, and Antenna connectors.
Now put the front camera in its original location. Then, connect the connector to the logic board.
Attach the outer frame to the main component again. Start at the dock connector and firmly press the two frame components together. Then screw them together with 13 x 3.3mm Phillips screws.
As a last step, attach the back cover again. The old glue is usually still sticky enough. Put the back cover back on, heat it slightly, and then use a little force to press it onto the smartphone for a while.
Finding Cameras on Your Network: A Comprehensive Guide
You may want to see also
Frequently asked questions
The plastic protection foil is glued onto the lens, so it is not easy to remove. You will need a little light, a toothpaste tube of plastic, and a steady hand. Set the Samsung Galaxy S6 on a soft but stable surface, then take the toothpaste tube and rotate it so that the flattened end can be used to remove the foil.
Insert a paper clip or SIM eject tool into the hole in the SIM card slot on the power button side of the phone. Remove the SIM card tray from the phone. Lay a heated iOpener over the rear panel for about two minutes to loosen the adhesive around the edge of the glass. Once the rear glass is hot to the touch, apply a suction cup near the bottom edge of the glass. Lift on the suction cup to create a small gap underneath the rear glass, and insert an opening pick to slice through the adhesive.
Be careful when removing the back cover as it is fragile. Use tweezers to pry up the camera lens ring from the bottom right corner. There is some adhesive underneath, so avoid scratching the metal ring with sharp tweezers.
After removing the back cover, push the camera lens glass with your finger or a spudger to remove it.


