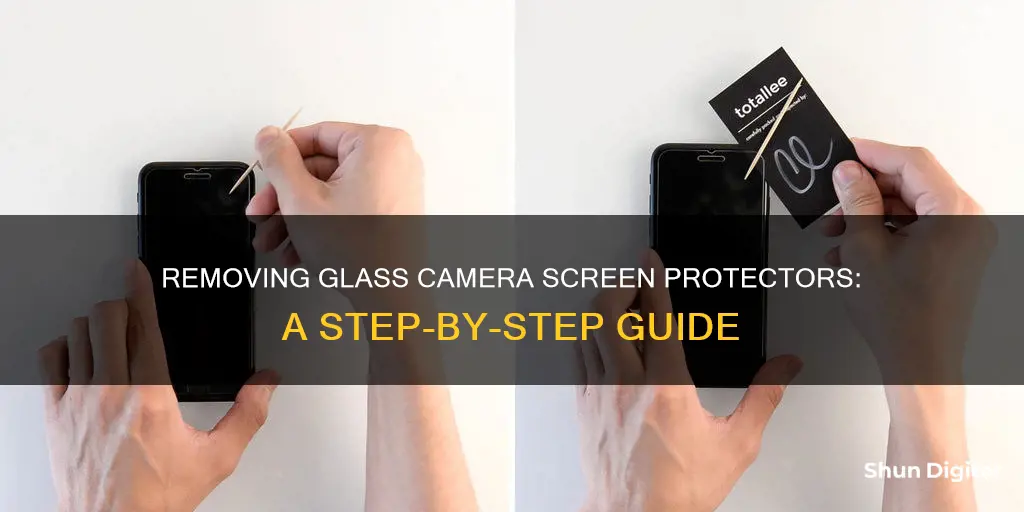
Removing a glass camera screen protector can be a tricky task, and it's important to do it right to avoid damaging your device. Many people have shared their methods online, including using dental floss, a hairdryer, tweezers, a pocket knife, or a laminated card. Some people have also suggested using a needle or duct tape, but these methods may be riskier and could potentially damage your device. It's always a good idea to do some research and be cautious when attempting to remove a glass camera screen protector to ensure you don't accidentally scratch your lens or phone.
How to Remove a Glass Camera Screen Protector
| Characteristics | Values |
|---|---|
| Tools | Pocket knife, laminated card, needle, dental floss, hair dryer, tweezers |
| Techniques | Stab and lift at an angle, poke and lift, slide floss at the side of the protector, warm and screw off |
What You'll Learn

Using dental floss
Dental floss is a handy tool to have when removing a camera screen protector. It is a simple and effective method, but it is important to be gentle to avoid damaging your device. Here is a step-by-step guide on how to do it:
Step 1: Prepare the Necessary Tools
Before you begin, make sure you have everything you need within reach. In addition to the dental floss, you will also require a thin plastic card (such as a credit card), a hairdryer, and a microfiber cloth. It is also recommended to wear protective gloves and eyewear for safety.
Step 2: Clean the Camera Lens Protector
Use a microfiber cloth to gently wipe down the camera lens protector and the surrounding area. This will remove any dirt or debris that could interfere with the removal process.
Step 3: Heat the Screen Protector
Turn on your hairdryer and set it to medium heat. Hold it about 6 inches (15 cm) away from the screen protector and move it in a circular motion around the edges for 30 seconds to one minute. This will help soften any adhesive or UV glue, making the protector easier to remove.
Step 4: Lift the Edge of the Protector
Take the thin plastic card and gently insert it between the screen protector and your device at one of the corners. Carefully lift the corner to create a small gap between the protector and the screen.
Step 5: Slide the Dental Floss Under the Protector
Now, take the dental floss and insert it into the gap you created. Hold each end of the floss with one hand and gently slide it back and forth, working your way around the edges of the screen protector. This will help separate the protector from the screen. Be careful not to apply too much pressure to avoid damaging your device.
Step 6: Remove the Screen Protector
As you work the dental floss around the edges, the screen protector should start to lift off the screen. Carefully lift it away from your device, ensuring that you do not apply too much pressure.
Step 7: Clean Your Device
Once the screen protector is removed, use a microfiber cloth to gently clean your device. If there is any remaining adhesive or UV glue residue, you can dampen the cloth with isopropyl alcohol (70% or higher) to help remove it. Make sure to clean the entire surface thoroughly.
Step 8: Inspect Your Device
Finally, inspect your device for any damage or leftover residue. If everything looks good, you can now apply a new screen protector if desired.
By following these steps, you can successfully remove a camera screen protector using dental floss. Remember to always work carefully and slowly to achieve the best results without damaging your device.
Viewing Camera Footage on Your Echo Show
You may want to see also

Warming the lens with a hairdryer
Firstly, set your hairdryer to a low or medium heat setting. High temperatures can damage the camera lens and other components. You want to avoid overheating the device, so keep the hairdryer moving and maintain a safe distance of a few inches from the lens.
Direct the warm air onto the camera lens for around 15 seconds. This will heat up and loosen the adhesive underneath the glass screen protector. The exact time may vary depending on the strength of your hairdryer and the type of adhesive used.
Once the adhesive is warm, try lifting one corner of the glass screen protector gently with your fingernail. If this corner does not lift easily, try another corner, as sometimes one side may be more willing to budge. If all corners are firmly stuck, apply heat from the hairdryer again for a few more seconds.
When you have successfully lifted one corner, carefully slide your fingernail or a thin, blunt tool, such as a toothpick, underneath the protector. Gently pry the protector away from the lens, slowly working your way around the edges. Be cautious not to apply too much force, as tempered glass is delicate and prone to breaking.
If the glass protector is cracked, take extra care to avoid it breaking into smaller pieces. Slide your hand underneath the protector as you lift it to provide support and prevent fragmentation.
Once removed, you can use a microfiber cloth to wipe away any adhesive residue left on the camera lens.
This method is a safe and effective way to remove a glass camera screen protector without causing damage to the device.
Using Altec Lansing Cameras on PC: A Guide
You may want to see also

Using a pocket knife
Firstly, make sure you have the right tools. In this case, you'll need a pocket knife with a sharp blade. You may also want to prepare some additional tools, such as a hairdryer, a credit card, and a microfiber cloth.
Now, let's get started with the removal process:
- If your screen protector is cracked, take extra caution to avoid getting cut. You can stick some tape along the cracks to secure the glass as you remove it. Rubber gloves can also provide an extra layer of protection.
- If your screen protector is intact, you can use a hairdryer to soften the adhesive. Set the hairdryer to its lowest heat setting and move it back and forth to avoid creating hot spots. Hold it close to the screen protector for about 15 seconds to loosen the adhesive.
- Now, take your pocket knife and carefully insert the blade under one of the corners of the screen protector. Gently lift the blade to slightly lift the corner of the protector.
- Once you have lifted a corner, move your knife along the edge of the protector, gently lifting as you go. Be careful not to apply too much force, as you don't want to damage the screen underneath.
- Continue working your way around the perimeter of the screen protector, lifting gently as you go. If the protector is in multiple pieces, tackle one piece at a time.
- Finally, lift the screen protector off in one piece and safely dispose of it.
It's important to note that you should be gentle and cautious throughout the process to avoid damaging your device's screen. Additionally, always clean your device's screen after removing the protector to get rid of any adhesive residue or gunk.
Eliminating Camera Shake for Sharper Photography
You may want to see also

Using duct tape
To use duct tape, first tear off a piece of duct tape and roll it around two fingers with the sticky side facing outwards. Next, press the duct tape onto the corner of the screen protector and roll it away slowly. The duct tape should stick to the screen protector, allowing you to pull it up and off.
If you can't get a corner of the screen protector up, you can use duct tape to create a tab. Press the duct tape onto the corner of the screen protector and then pull the duct tape up to create a tab. Once you have a tab, you can use your fingernail or a credit card to lift the corner of the screen protector.
Cameras: Always Watching, Your Privacy at Stake?
You may want to see also

Using a needle
Prepare the Needle:
- Choose a needle that is thin and sharp enough to slide under the screen protector without causing damage.
- Ensure the needle is clean and free of any debris that could scratch the lens.
Lift the Protector:
- Gently insert the needle under the edge of the screen protector, starting at one corner.
- Angle the needle upwards, away from the lens, to avoid any contact with the camera.
- Carefully lift the needle to create a small gap between the protector and the lens.
Remove the Protector:
- Once you have lifted a corner, slowly work your way around the edges of the protector, gently prying it up as you go.
- Be cautious and patient throughout this process, as forcing the needle can cause scratches or damage to the lens.
- If the protector is glued on, you may need to apply gentle heat with a hairdryer on a low setting for a few seconds to soften the adhesive before continuing to lift it with the needle.
Clean the Lens:
After removing the protector, use a microfiber cloth to gently wipe down the lens, removing any dust or residue left behind.
Remember to work slowly and carefully throughout the entire process to avoid any accidental damage to your camera lens.
Viewing the Raspberry Pi Camera's Perspective
You may want to see also
Frequently asked questions
You can use dental floss to fit between the camera and the screen protector to separate the two.
You can use a pocket knife, a plastic guitar pick, a laminated card, or tweezers.
Warm the lens slightly with a hairdryer and then use tweezers to remove the protector.
You can use dental floss to separate the camera and the screen protector.


