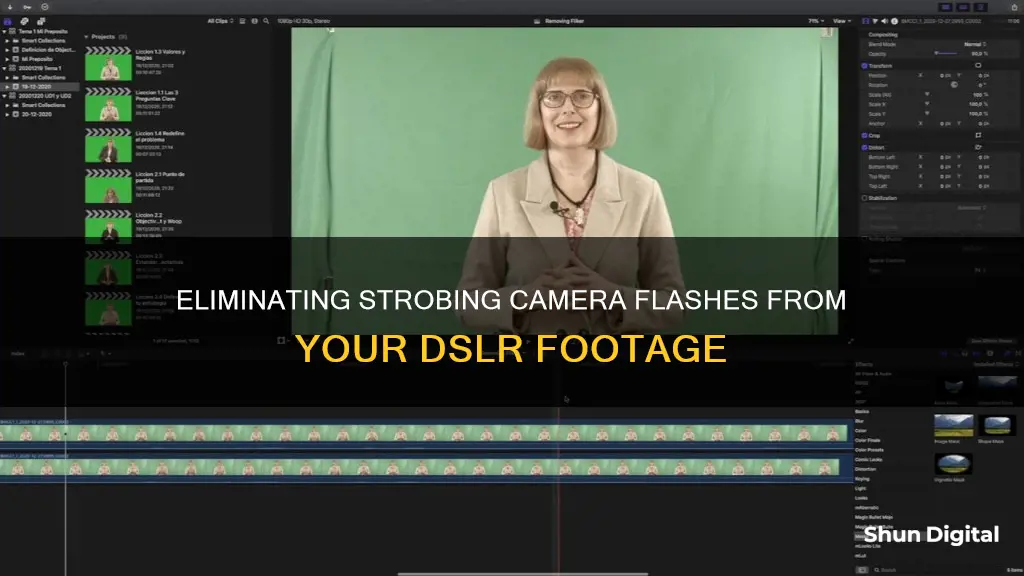
Strobing camera flashes on DSLR footage can be a frustrating issue to deal with, but understanding the underlying causes can help you effectively address this problem. The strobing effect, also known as flickering, occurs when the LED lights you're filming under refresh at a different rate than your video, resulting in an unpleasant viewing experience. This issue is particularly noticeable when filming under fluorescent bulbs, neon lights, or low-quality LED lights that pulse with light at a rapid rate. To resolve this issue, you can employ several strategies, including adjusting your camera settings, such as shutter speed and frame rate, using natural lighting, or investing in video repair tools and plugins to fix the footage in post-production.
| Characteristics | Values |
|---|---|
| Cause of strobing | Strobing is caused by the frame rate of the camera being incompatible with the frequency of the light source. |
| Light sources that cause strobing | Fluorescent lights and LEDs are more likely to cause strobing due to the way they pulse with light. |
| Camera settings to prevent strobing | Set the shutter speed to roughly double the frame rate. For example, if the frame rate is 25 FPS, the shutter speed should be 1/50. |
| Alternative light sources to prevent strobing | Incandescent lights, natural daylight, and video lights designed for videography. |
| Post-production solutions | Flicker reduction plugins for video editing software, such as Digital Anarchy's Flicker Free or GBDeflicker. |
What You'll Learn

Check shutter speed and frame rates
Strobing camera flashes in footage are often caused by differences in the frequency of the lights and the frame rate of the camera. To avoid this issue, you should check and adjust your shutter speed and frame rate.
The frame rate refers to the number of individual frames or images displayed per second of film or video. It is expressed as frames per second (fps). The standard frame rates are 24fps for cinematic film and television, 30fps for live TV, and 60fps for slow-motion video. The frame rate you choose will depend on the type of content you are creating. For example, 24fps is standard for cinematic film and television as it has a more natural look, while 30fps is common for live TV as it gives a smoother feel. 60fps is often used for slow-motion video as it captures more frames per second, resulting in ultra-realistic footage when played back at normal speed.
The shutter speed refers to the length of time the camera's shutter is open, exposing light from the outside world onto the camera sensor. It is typically measured in seconds or fractions of a second. A faster shutter speed will freeze motion, resulting in very crisp individual images. However, when played back at standard video frame rates, the action can appear hyper-realistic and jittery. On the other hand, slower shutter speeds can create motion blur, giving the footage a smoother, more cinematic look.
To avoid strobing camera flashes, you should ensure that your frame rate and shutter speed are appropriately matched. The specific settings will depend on your camera model and the type of content you are creating. Here are some general guidelines:
- For a cinematic look, use a frame rate of 24fps and a shutter speed of 1/48 second.
- For live TV, use a frame rate of 30fps and a shutter speed of 1/60 second.
- For slow-motion video, use a frame rate of 60fps or higher and adjust your shutter speed accordingly.
- If you are experiencing strobing due to LED lights, set your camera to 50Hz, a frame rate of 25fps, and a shutter speed of 1/50.
- If you are in North or South America, set your camera to 60Hz and try a frame rate of 30fps, 60fps, or 120fps.
- Experiment with different shutter speeds and frame rates to find the best combination for your specific camera and lighting setup.
Removing Ford Emblem: Tailgate Camera Guide
You may want to see also

Find the right light source
Strobing camera flashes in DSLR footage can be caused by LED lights refreshing at a different rate to your video. This is an issue with the frequency between the camera and the light source being out of sync. To resolve this, you need to ensure that the frame rate of your camera matches the frequency of the lights in your location.
Use Natural Light
If possible, filming during the day can help you take advantage of natural light sources, such as the sun. Cloudy and snowy days are great for portrait photos as the clouds act as giant diffusers, providing soft and well-diffused light. When shooting outdoors, avoid placing your subject directly under the sun as it can create harsh light and heavy shadows. Instead, look for shaded areas or places with reflective surfaces, such as a lake, to provide diffused light onto your subject's face. Early mornings and late afternoons are also ideal for portraits as the light is softer during these times.
Adjust Your Lighting Setup
When filming indoors, you have more control over the lighting setup. If you have a diffuser, such as a softbox or an octabox, you can place the light at a 45-degree angle, right over the subject's head, facing down. This will create a dramatic look with one side of the subject more lit than the other. For a more neutral look, place the light directly above the subject's head to create even lighting.
Use Professional Video Lights
Consider investing in professional video lights, such as LED video lights, to eliminate the strobing effect. These lights are designed to match the frame rate of your camera, preventing the flickering issue. Using daylight for your videos is another option to avoid the strobing effect caused by artificial lighting.
Match the Light Source to Your Camera Settings
Ensure that your camera settings are compatible with the light source you are using. Adjust the frame rate, shutter speed, and ISO to match the lighting conditions. For example, if you are filming at 24 frames per second, set your shutter speed to 1/48 or 1/50. If you are shooting at 60fps, use a shutter speed of 1/120. When shooting indoors with low light, use a higher ISO (greater than 640) to brighten the image. Keep your ISO number low when shooting in broad daylight or under bright studio lights.
By following these tips and adjusting your lighting setup, you can effectively reduce or eliminate strobing camera flashes from your DSLR footage.
The Human Eye's Perspective: Camera Angle Insights
You may want to see also

Choose manual settings
Strobing camera flashes, or flickering, in DSLR footage can be prevented by choosing manual settings. This is because the issue is often caused by a mismatch between the frame rate of the camera and the frequency of the light source.
To resolve this, you should set your camera to manual mode and adjust the shutter speed and frame rate accordingly. The shutter speed needs to be compatible with the corresponding frame rate. For example, in the UK, you can set your camera system to 50Hz, the frame rate to 25fps, and the shutter speed to 1/50. In North America, where the power frequency is 60Hz, you can set the frame rate to 30, 60, or 120 fps.
It is important to note that the specific settings may vary depending on your camera model. Therefore, it is recommended to refer to your camera's instruction manual to understand how to adjust these settings. Additionally, some cameras may have a Flicker-less or Flicker-free setting, which can be found under the Exposure Setup, that can be enabled to mitigate this issue.
Smart TV Cameras: Are You Being Watched?
You may want to see also

Fix flicker in post-production
If you notice strobing camera flashes in your DSLR footage, there are several ways to fix this issue in post-production.
Firstly, it is important to understand the cause of the flicker. Flicker is caused by a mismatch between the frequency of the light source and the frame rate of the camera. For example, if you shoot a video under a fluorescent light that cycles at 60 Hz, and your camera records at 24 fps, the light will appear to be flickering on and off 60 times per second, and the camera will capture it at different phases of the cycle.
To fix this issue, you can use post-production tools such as Adobe Premiere Pro, which has a Flicker Free plugin that can detect and remove flicker from your video. This plugin analyzes the video and applies a temporal smoothing algorithm to even out the brightness and colour variations. Other post-production tools, such as DaVinci Resolve or Final Cut Pro, have similar options or plugins that can help reduce flicker.
If you are editing without plugins, one solution is to duplicate the offending clip in your timeline, move it forward by one frame, and set the opacity of the duplicate clip to 50%. This method can create a bit of motion blur and is not always effective, but it is a quick fix.
Another option is to use filters to reduce flicker. Filters are attachments placed in front of the lens to modify the light entering the camera. A neutral density filter, for example, can reduce exposure and smooth out brightness variations caused by flicker. A colour correction filter can balance the colour cast of the light source, and a polarizing filter can reduce glare and reflections that amplify the flicker effect.
Finally, if you encounter flicker issues, it is important to fix them as soon as possible, as every setup is different, and there is no perfect science to resolving the issue.
Viewing Blue Iris Cameras on Echo Show Devices
You may want to see also

Stay steady with gimbals and sliders
Gimbals and sliders can help you capture smooth, stable footage with your DSLR camera. They are especially useful if you're shooting handheld or doing "run and gun" style filming, where you need to physically follow your subject.
Gimbals use gyroscopic sensors and motorized pan, tilt, and roll axes to stabilize your camera and smooth out deliberate camera movements. They offer different shooting modes, such as Pan Follow, Follow, and POV modes, allowing you to create super-smooth panning and tracking shots.
When choosing a gimbal, consider the weight, size, battery life, and versatility. You want to find a gimbal with good balance, as this will determine the quality of your footage and ease of use. Also, make sure the gimbal is compatible with your DSLR camera and can handle its weight.
- DJI RS 2: Offers industry-leading stabilization with an impressive weight-to-payload ratio. It has a long battery life of up to 12 hours and is compatible with various mounting options.
- MOZA Aircross 2: Premium quality at an affordable price. It has a robust and lightweight design with a maximum payload of 7.05 lb. The Inception Mode 3.0 and motion mimicking technology make recording stable footage a breeze.
- Manfrotto MVG220: A versatile gimbal compatible with a wide range of mirrorless and DSLR cameras. It has a lightweight design with a payload of 2.2 kg, making it ideal for everyday vloggers and videographers. The detachable arm allows for shooting from unique angles.
- FeiyuTech G6 Max: A lightweight and stable gimbal packed with features. It has a payload of 2.65 lb, making it ideal for smaller cameras. The multi-function Magic Focus Ring and interactive OLED screen allow for precise control over various settings.
- Letus Helix Jr.: A professional-level, two-handed gimbal designed for cinematographers. It features a unique, optically centred design that reduces sensor movement for more natural-looking footage. The flat-bottom design and intuitive controls make shooting a comfortable and seamless experience.
In addition to gimbals, you can also consider using camera sliders. Sliders provide smooth, linear camera movements and are great for creating cinematic shots. They come in various sizes and can be mounted on tripods or other support systems. When choosing a slider, consider the length, weight capacity, and ease of use.
Setting Up a Camera Live Feed to Your TV
You may want to see also
Frequently asked questions
To prevent strobing, you need to ensure that the frame rate of your camera matches the frequency of the lights in your location. The frame rate should be divisible by the number of light pulses. For example, in North and South America, where lights operate at 60Hz, you can set the frame rate to 30, 60, or 120 fps. In Europe, Africa, and Asia, where lights operate at 50Hz, ideal frame rates are 25, 50, or 100 fps. If your camera doesn't support these frame rates, you can try changing the shutter speed instead.
Strobing occurs when the frame rate of your camera and the frequency of the lights are out of sync. This causes the camera to capture the light source when it is "off", creating an uneven lighting effect.
You can use flicker reduction plugins, such as Digital Anarchy's Flicker Free or GBDeflicker, to fix strobing in post-production. These tools work by examining your footage, spotting the strobing, and adjusting exposure or colour across a series of frames.
To prevent strobing when filming with your phone, you can try turning off portrait mode, replacing LED lights with natural light, force restarting your phone, or disabling 60 FPS video recording.


