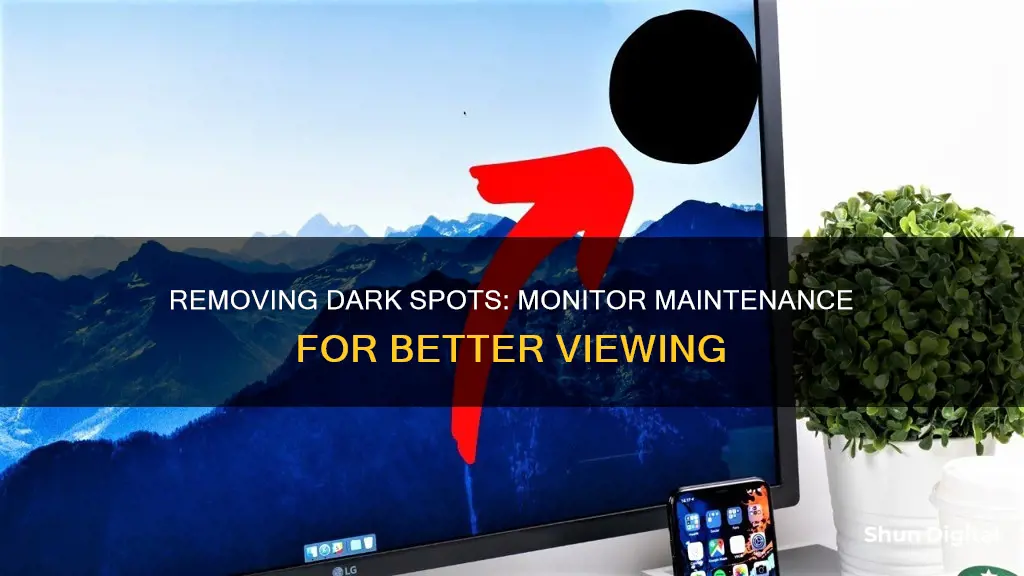
Dark spots on a monitor can be extremely distracting and can be caused by a variety of factors, including dead pixels, dirt, voltage changes, physical damage, and manufacturing defects. While some of these issues may require technical expertise to address, there are several DIY solutions that can be explored to remove dark spots from your monitor. This article will outline the potential causes of dark spots on a monitor and provide step-by-step guidance on how to address and prevent them.
| Characteristics | Values |
|---|---|
| Causes of black spots on monitor | Changes in voltage, stuck or dead pixels, dirt or dribs on the screen, exposure to high temperature, manufacturing defect, physical damage to the body, inclement weather |
| Ways to determine black spots on monitor | Manually inspecting the display screen, using dead pixel test |
| Solutions to fix black spots on monitor | Online tools & software, physical methods (pressure approach, tapping method, etc.), contacting customer support, going to a service center, cleaning the inside of the laptop, replacing the laptop screen |
| Preventive measures | Maintaining cleaning habits, using a laptop desk, avoiding direct sunlight, maintaining consistent temperatures |

Dead pixels
Online Tools and Software
There are online tools and software programmes that can help fix dead pixels. These include:
- Dead Pixel Fixer Tool
- Aurelitec's PixelHealer software
- LCD Repair website
- JScreenFix website
These tools work by flashing colours or bright images on your screen to locate and fix the dead pixel.
Diagnostics
Both mobile devices and computers tend to have built-in diagnostics tools in the settings or boot menu. Running diagnostics on your display will help identify the issue and may provide a solution.
Physical Methods
If the above methods do not work, you can try applying gentle pressure to the dead pixel. Here are some suggested methods:
- Use a pencil with an eraser and push on the pixel, massaging it with relatively hard pressure but not enough to cause damage.
- Apply pressure to the black spot using a cloth or soft rubber-backed paper. Ensure that the pressure is applied evenly and not too hard.
- Use the tapping method with an eraser or pen that has a soft-bristled tip to gently scratch away at the stain until it disappears.
- Wrap your index finger with a piece of microfiber and press on the spot where the dead pixel is located while turning on the monitor. Do this very delicately so as not to damage your screen.
- Use a pen cap, marker, the tip of a makeup brush, or another blunt narrow object instead of your finger.
- Place a hot washcloth in a hermetic bag and apply it to the defective area for a few seconds at a time.
It is important to note that physical methods may cause permanent damage to your screen and void your warranty, so proceed with caution.
Customer Support and Service Centres
If none of the above methods work, you may need to contact customer support or take your monitor to a service centre for professional assistance.
RDX's Blind Spot Monitoring: A Comprehensive Overview
You may want to see also

Stuck dirt or debris
Dirt or debris stuck on the screen is one of the most common causes of black spots on your monitor. If you have a lot of dust and crumbs on the screen or haven't cleaned it in a while, they can get stuck and not come off with a simple wipe.
To fix this, start by cleaning the screen with a soft cloth or paper towel. Make sure to apply only gentle pressure and use a soft, lint-free cloth to avoid scratching the screen. You can also try using a screen cleaner or a slightly damp cloth to help lift off any stubborn dirt or debris.
If the dirt or debris is stuck in a hard-to-reach area, you can try using a can of compressed air to blow it away. This is especially useful for cleaning the edges of the screen or any tight spaces where the dirt might be lodged. Be careful not to get too close to the screen with the compressed air, as the force could damage the pixels.
In some cases, the dirt or debris might be stuck inside your laptop screen. If this is the case, you will need to open up your laptop and clean it from the inside. First, make sure your laptop is turned off and unplugged, then use a can of compressed air to blow out any dust or dirt that's inside the screen. Again, be very careful not to touch the screen with the compressed air as this could damage it.
To prevent dirt or debris from building up on your screen in the future, it's important to develop good cleaning habits. Use a soft, dry cloth to gently wipe down your screen regularly, and try to keep your laptop away from dusty or dirty environments. Additionally, avoid eating or drinking near your laptop to minimise the risk of crumbs or spills.
Asus Monitor Warranty: Shipping Cost Coverage?
You may want to see also

Power supply issues
A monitor requires a steady power supply to function well and without errors. A sudden change in the flow of current or voltage can cause the display to shut off entirely or partially, resulting in black spots in the latter case. If you are experiencing dark spots on your monitor due to power supply issues, here are some steps you can take to address the problem:
Check Power Cable and Connections:
- Ensure that the power cable is securely connected to the monitor and the power outlet. A loose connection could cause a sudden drop in voltage.
- Try plugging the monitor into a different power outlet to rule out any issues with the outlet itself.
- If you're using a power strip or extension cord, connect the monitor directly to the wall outlet to ensure sufficient power delivery.
Verify Power Settings:
- Check your monitor's power settings to ensure they are correctly configured. Incorrect settings may cause fluctuations in power delivery.
- Look for any power-saving modes or settings that may be affecting the monitor's performance.
Update Display Drivers:
Dark spots could also be related to software issues. Updating your display drivers to the latest version may help resolve any power-related problems.
Contact Manufacturer:
If the issue persists, contact the monitor manufacturer's customer support. They can provide guidance specific to your monitor model and recommend further steps or repairs.
Seek Professional Help:
If the problem cannot be resolved through the above steps, consider seeking assistance from a professional technician. They will have the expertise to diagnose and address any power-related issues with your monitor.
Monitoring Internet Usage: Tracking Activity by IP Addresses
You may want to see also

Physical damage
If your monitor screen has suffered physical damage, there are a few options to consider for repair or replacement. Firstly, it is important to determine the extent of the damage. Minor cracks or tears may be repairable, while more extensive damage may require a complete screen replacement. If the damage is limited to a small area, you could attempt a DIY repair using a screen repair kit, which typically costs between $30 and $80. However, it is important to note that repairing a cracked screen can be challenging and may require technical skills and precision.
The repair process typically involves carefully removing the damaged screen, ordering the correct replacement screen for your specific model, and then installing the new screen while ensuring all connections are secure. It is crucial to follow instructions specific to your device model, work in a clean and well-lit area, and keep track of all screws and small components during the process. Additionally, it is important to take anti-static precautions to protect the sensitive electronics of your device.
While DIY repairs can be cost-effective, there is a risk of further damaging the screen if the repair is not performed correctly. Therefore, if you are not comfortable with the process or suspect more complex issues, it is advisable to seek professional help. Look for certified technicians or authorized repair centers that specialize in your device brand. Professional repairs typically cost between $100 and $300 or more, depending on the issue and the type of monitor.
In some cases, physical damage to an LCD screen may be unrepairable, especially if there is damage to the LCD elements themselves. In such cases, the only option may be to replace the entire LCD panel. Additionally, it is important to be aware that physical damage to the protective layer of an LCD panel can lead to the development of dark spots or further deterioration of the screen. Therefore, if your screen has suffered a significant impact, it is crucial to have it assessed by a professional as soon as possible to prevent further damage.
LCD Monitor Picture Quality: Semi-Glare Impact
You may want to see also

Humid environment
Dark spots on your monitor can be caused by a variety of factors, including dirt, dust, debris, dead pixels, or physical damage. These issues can be exacerbated in humid environments, as condensation and conductivity issues can occur if a moist cloth is used to wipe down the monitor. To effectively address dark spots in a humid environment, follow these detailed steps:
Identify the Cause:
Before attempting any fixes, it's important to identify the root cause of the dark spots. They could be due to external factors such as dirt, dust, or debris buildup on the screen, or internal issues like dead or trapped pixels.
Clean the Screen:
Start by gently cleaning the monitor with a soft, microfiber cloth. Ensure that the cloth is slightly damp with water or a screen-safe cleaning solution. Turn off the monitor and unplug it before cleaning. Wipe the screen gently, using light pressure and moving from the top of the screen to the bottom. For stubborn smears, wipe in circular motions without applying excessive pressure or using cleaning solutions.
Try Quick Fixes:
- Restart your monitor: Turn it off, unplug it, wait a couple of minutes, and then turn it back on.
- Change the input source: Switch to a different input, such as a DVD player or an internal app, to determine if the issue is specific to a particular source.
- Check cables: Turn off the power and firmly reconnect all cables to ensure a proper connection.
Adjust Display Settings:
Dark spots may be related to display settings. Adjust the backlight settings by navigating to the picture settings menu and reducing the backlight in small increments until the clouding disappears. Additionally, ensure that the light sensor setting is turned on, as it adjusts the brightness according to the ambient light in the room.
Manage Humidity:
As the issue is more prevalent in humid environments, consider taking steps to manage the humidity levels in the room. Use a dehumidifier to reduce moisture in the air, as high humidity can contribute to condensation and conductivity issues on the monitor.
Software Reset:
If the dark spots persist, try performing a full software reset on your monitor. This can help eliminate issues related to leftover data, bugs, or memory problems. Before performing the reset, ensure you back up important data, as a factory reset will wipe all information from the device.
Professional Diagnosis and Repair:
If none of the above methods resolve the issue, it may be time to seek professional help. Contact a certified technician or the manufacturer's customer service for a thorough assessment and appropriate repair options. They can diagnose any underlying issues and provide suitable solutions.
Monitoring RF Usage: Powercell Insights and Strategies
You may want to see also
Frequently asked questions
Dead pixels can appear as black spots on your screen. Each individual pixel on an LCD screen is made up of three diodes -- one red, one blue, and one green. If all three fail, the pixel will appear as a permanent black dot.
Dead pixels are usually caused by a manufacturing defect, but they can also be caused by physical damage to the screen, sudden voltage drops, excessively hot or cold temperatures, or a humid environment.
There are a few ways to potentially fix a dark spot on your monitor:
- Adjust your screen resolution, refresh rate, brightness, and contrast settings.
- Use a recovery application on your monitor, which forces the pixels to change rapidly, potentially reawakening faulty diodes.
- Massage the spot with a soft object.
- Apply gentle pressure with a pencil eraser for about 10 seconds, then release and repeat 15-20 times.


