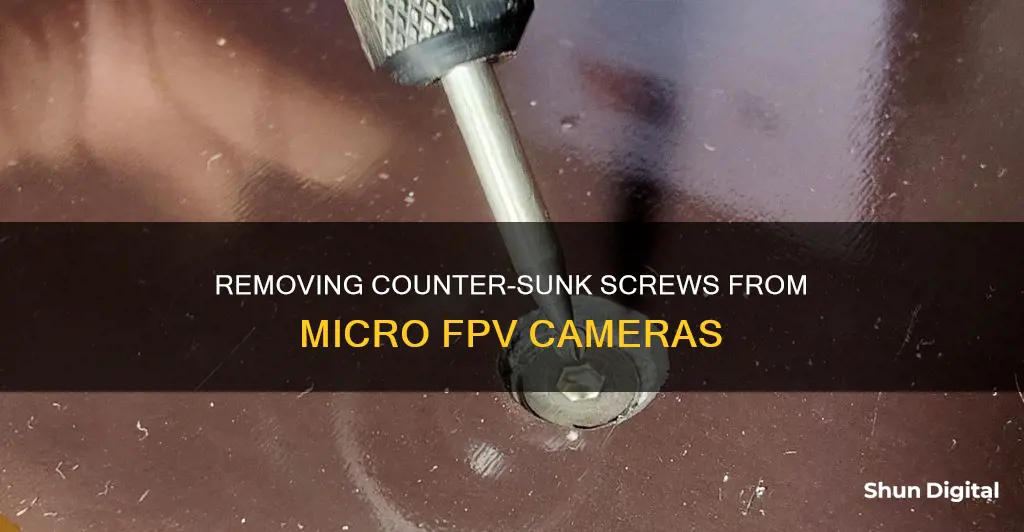
Removing a stripped countersunk screw from a micro FPV camera can be a challenging task, but with the right tools and techniques, it is certainly possible. One common suggestion is to use a rubber band to fill the gap between the mangled screw socket and the screwdriver tip's profile, providing enough grip to turn the screwdriver anticlockwise and remove the stripped fastener. Another option is to use glue, such as superglue or hot glue, to provide additional grip for the screwdriver. For severely damaged screws, cutting a new slot into the screw head using a Dremel tool or a file can be effective, although this may not be possible with smaller screw heads. Finally, a screw extractor set can be used to drill a pilot hole into the screw head and gently tap an appropriately sized extractor tool into the hole to remove the screw.
| Characteristics | Values |
|---|---|
| Screw extractor | Use a screw extractor to deal with any type of stuck fastener. |
| Drill a pilot hole | Drill a pilot hole into the head of the screw. The diameter of the drill bit should be smaller than the screw shank to prevent the screw head from snapping off. |
| Use a center punch | Use a center punch to create a divot in the screw head if you are apprehensive of the drill bit slipping off. |
| Cut a slot into the head | Cut a brand-new slot into the screw head using hand tools such as a hacksaw or power tools such as a Dremel tool. |
| Friction | Use a rubber band, steel wool or abrasive powders to give the screwdriver tip something substantial to grab onto. |
| Glue | Use superglue or hot glue to give the screwdriver more grip. |
| Nut | Glue a nut onto the exposed screw head and use a socket wrench to apply torque. |
What You'll Learn

Using a rubber band to fill the gap between the screw and screwdriver
If you're trying to remove a stripped screw from a micro FPV camera, one method you can try is using a rubber band to fill the gap between the screw and the screwdriver. This is a simple and economical way to grip and remove the stripped screw. Here's what you need to do:
Firstly, choose a rubber band that is wider than the screw. It needs to cover the opening in the screw head. A single, thick rubber band is usually best for this. If the rubber band is too small, it won't fill the space in the opening, and you won't be able to get a good grip on the screw threads with your screwdriver. If you don't have a rubber band, you could try using steel wool or the green, abrasive side of a sponge instead.
Next, position the rubber band over the stripped screw. Press part of it flat against the screw head and hold it firmly in place with one hand. Make sure the item with the screw is positioned so that you have easy access to it. The entire rubber band doesn't have to be over the screw, and you may find it easier if the band has already broken open.
Now, push the screwdriver into the rubber band and screw head. Make sure the rubber band goes inside the opening on the screw head so that it moulds with the screw threads and creates leverage for the screwdriver. Hold the screwdriver steady, and if the rubber band falls out, just put it back in place. Press down firmly, but be careful not to break through the rubber band.
Finally, turn the screwdriver counter-clockwise to remove the screw. Work slowly, as the screw will still be difficult to turn. Maintain firm pressure on the rubber band and gradually turn it. You should feel the screw begin to turn and come loose. If necessary, reposition the rubber band and continue until you can remove the screw.
If the screwdriver penetrates the rubber band, move the band so that you can use an unbroken section. Even if you do everything right, you may not be able to remove the screw this way. If that's the case, try using other tools such as a drill.
Self-Checkout Cameras: What Are They Watching?
You may want to see also

Using glue to fuse the screwdriver to the screw
If you are unable to remove a stripped screw from your micro FPV camera, one method you can try is to use glue to fuse the screwdriver to the screw. Here is a step-by-step guide on how to do this:
Step 1: Choose the Right Glue
Select a strong adhesive that will create a secure bond between the screwdriver and the screw. An epoxy glue or a super glue that bonds metal surfaces is a good option. Make sure the glue you choose is suitable for the specific type of metal your screwdriver and screw are made of.
Step 2: Prepare the Screw
Before applying the glue, ensure that the screw is clean and free of any debris or residue. Use a small brush or cotton swab to remove any dust or grease from the screw head. It is important to have a clean surface for the glue to adhere properly.
Step 3: Apply the Glue
Place a small amount of glue on the tip of the screwdriver. You only need a thin layer of glue to create a strong bond. Carefully insert the glued tip of the screwdriver into the screw head, making sure it is centred and firmly in place. Hold it steady for a few seconds to allow the glue to set initially.
Step 4: Let the Glue Dry
Depending on the type of glue you are using, the drying time may vary. Refer to the instructions on the glue packaging for specific drying times. Typically, epoxy glues take longer to dry, while super glues have shorter setting times. Wait patiently for the glue to dry completely before proceeding.
Step 5: Unscrew
Once the glue has dried and the screwdriver is securely fused to the screw, slowly and carefully begin to unscrew it in a counterclockwise direction. Apply gentle and steady pressure while turning the screwdriver. The fused connection between the screwdriver and the screw should provide enough grip to allow you to unscrew it successfully.
Step 6: Clean Up
After removing the screw, you can use a glue remover or solvent to dissolve the glue and clean the screwdriver and screw head. This will ensure that both tools are ready for future use without any glue residue interfering.
Unlocking Camera Privacy: Identify Apps Accessing Your Camera
You may want to see also

Gluing a nut onto the screw head
If you're trying to remove a countersunk screw from a micro FPV camera, one method you can try is gluing a nut onto the screw head. Here's a step-by-step guide on how to do this:
First, make sure you have the appropriate tools and materials. You'll need a strong adhesive, such as epoxy or superglue, and a nut that is the right size to fit the screw. You may also want to use a pair of locking pliers, such as Vise-Grips, to help grip the nut and provide extra torque when turning.
Before gluing the nut, it's a good idea to clean the screw head to ensure that the adhesive will bond properly. You can use a small brush or cotton swab to remove any dirt or debris from the surface. If the screw is rusty, you may need to use a rust penetrant or lubricant to help break down the rust.
Once the screw head is clean and dry, apply a small amount of adhesive to the nut, making sure to cover the threads evenly. Then, quickly screw the nut onto the screw by hand, being careful not to cross-thread it. Wipe away any excess glue that may have squeezed out.
Allow the adhesive to cure according to the manufacturer's instructions. This may take several minutes or even hours, depending on the type of glue you're using.
Once the glue is fully cured, you can try to unscrew the nut using your fingers or a tool. If the nut is difficult to turn, you can use a pair of locking pliers to get a better grip and provide more torque. Be careful not to apply too much force, as you don't want to strip the threads or break the nut.
Turn the nut counter-clockwise to unscrew it. Remember, most standard screws and nuts are turned counter-clockwise to loosen them. However, some fasteners have left-hand threads, so if the nut seems particularly stubborn, double-check the thread direction before applying too much force.
If the glued nut method doesn't work, there are other techniques you can try to remove the countersunk screw. These include using a rubber band to provide friction, cutting a new slot in the screw head with a Dremel or hacksaw, or drilling out the screw head with a small drill bit. Remember to always work slowly and carefully to avoid damaging the camera or surrounding components.
Woman Man Camera TV: Sarah Cooper's Guide to Chaos
You may want to see also

Cutting a slot into the screw head
If you're dealing with a particularly mangled screw, you can salvage the situation by cutting a new slot into the screw head. While hand tools such as a hacksaw will work on screw heads that protrude out of the screw hole, countersunk fasteners are best tackled with power tools. These include rotary cutting equipment, such as a Dremel tool.
When using a Dremel tool, it's important to select the right attachment for the size of the screw. For large countersunk screws, where the head is big enough to accommodate the cutting tool, an abrasive cutting disc designed for metals should be used. This will allow for a straight cut that is big enough for a flathead screwdriver to fit into. However, for smaller screw heads, a finer cutting accessory, such as a fine engraving tip, should be used to cut a slot into the stripped fastener.
Before using power tools, it's crucial to take safety precautions. Be sure to wear eye protection and mask off sensitive PCBs or exposed conductors to prevent metal shavings and fragments from causing damage. Once the screw has been removed, clean the device with compressed air to remove any remaining debris.
In addition to a Dremel tool, other power tools can also be used for cutting a slot into the screw head. A rotary tool, for example, can be fitted with a fine cutting accessory to create a new slot in the screw head.
By following these steps and selecting the appropriate tools for the size of the screw, you can effectively cut a slot into the screw head of a counter-sunk screw in a micro FPV camera.
Removable Lenses: Are They Truly Professional Cameras?
You may want to see also

Using a screw extractor
Firstly, assess the type and size of the screw. Check your device manufacturer's support website for a service manual to correctly identify the screw type and size. This is important to ensure you are using the right tool for the job.
Next, prepare your tools. A screw extractor set typically comes with a range of extractor sizes and a T-handle chuck to make the process easier. Choose an appropriately-sized screw extractor tool and, if necessary, drill a pilot hole into the head of the screw. The diameter of the drill bit should be smaller than that of the screw shank to prevent the screw head from snapping off. Use a centre punch to create a divot in the screw head to prevent the drill bit from slipping off.
Now, it's time to use the screw extractor. Gently tap the chosen extractor tool into the pilot hole and use the T-handle chuck to twist and remove the screw. If the screw is particularly stubborn, try enlarging the pilot hole and retrying with a larger extractor bit. Some screw extractors have left-handed drill bits at the opposite end, which cut a hole that matches the extractor bit when the drill is run in reverse.
If the screw still won't budge, you may need to apply additional methods. Try using a small amount of adhesive, such as superglue or hot glue, to the screw head or the screwdriver prior to insertion. This will provide extra grip and help loosen the screw.
Remember to work patiently and carefully throughout the process to avoid damaging the camera or the screw head further.
Golf Ball Tracking: TV Cameras' Secrets Revealed
You may want to see also
Frequently asked questions
Removing a countersunk screw from a micro FPV camera can be challenging, but here are some methods that can help:
To remove a stripped countersunk screw, you can try using a screw extractor, which is a special hand tool designed to remove stuck fasteners. You can also try cutting a slot into the head of the screw using a rotary tool like a Dremel, or creating friction by placing a rubber band between the screwdriver and the screw head.
To prevent screw stripping, it is recommended to use higher-quality stainless steel fasteners and invest in a toolkit with precision-machined hardened screwdriver bits. Stainless steel fasteners are more resistant to stripping, and precision-machined bits minimize the risk of stripping.


