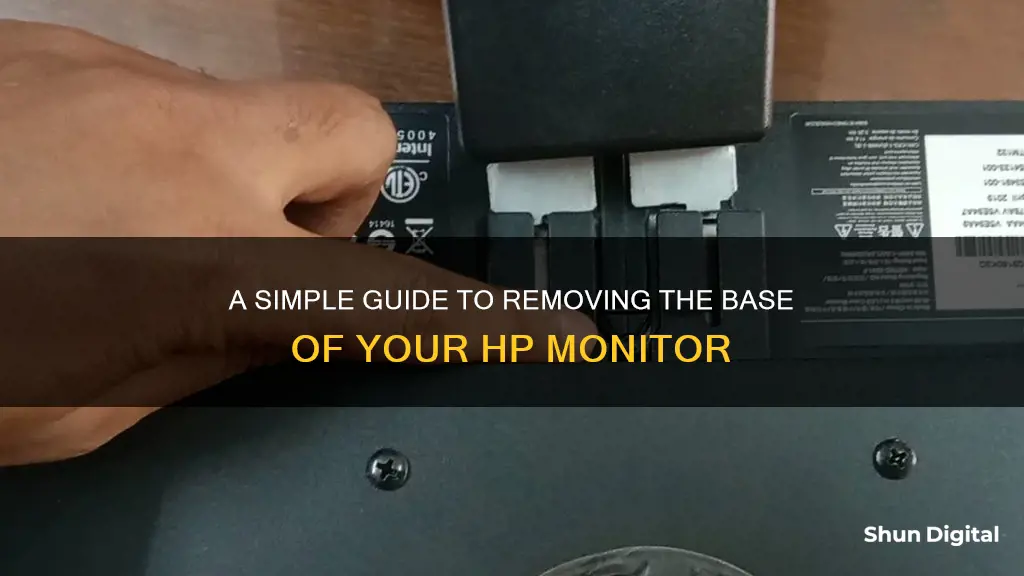
If you want to remove the base from your HP monitor, you may be planning to mount it on a wall, swing arm, or another fixture. Before you begin, make sure that the monitor is turned off and that all power, signal, and audio cables are disconnected. It's also important to lay the monitor face down on a soft, flat surface to prevent scratches or breakage. Once you've done that, you can start by removing the stand cap from the top of the pedestal pillar. Then, you can pivot the stand and remove the mounting screws. Finally, lift the stand off the monitor.
What You'll Learn

Ensure the monitor is turned off and cables are disconnected
Before you begin to disassemble your HP monitor, it is important to take some safety precautions. Start by ensuring that the monitor is turned off. Look for the power button and press it to turn off the monitor if it is not already switched off. Next, check the back of the monitor for any cables that might be connected. You will typically find power and signal cables attached to the monitor. If your monitor has a connected audio cable, make sure to disconnect that as well. Carefully disconnect and remove all the cables from the monitor. This step is crucial as it ensures your safety and prevents any potential damage to the equipment.
Once you have confirmed that the monitor is turned off and all cables are disconnected, you can proceed to the next step. It is important to lay the monitor down carefully on a suitable surface. Choose a flat surface and cover it with a clean, dry cloth. This will protect the monitor from scratches or other types of damage during the disassembly process. Place the monitor face down on the prepared surface.
At this point, you can begin the process of removing the monitor base. The specific steps may vary depending on your HP monitor model, but the general idea is to remove the screws that secure the base to the monitor. You may need a screwdriver to carefully unscrew and detach the base. Make sure to keep track of the screws and place them in a safe location so that you can easily reassemble the monitor if needed.
Removing the monitor base is often done to mount the monitor on a wall, a swing arm, or another type of mounting fixture. By detaching the base, you can create a more streamlined setup or explore alternative mounting options. Remember to refer to your specific HP monitor's user manual for detailed instructions on removing the base and ensuring a safe and proper disassembly process.
Always prioritize your safety when working with electronic equipment. If you are unsure about any steps or procedures, consult a professional or seek advice from HP support services to ensure that you are following the correct guidelines for your particular monitor model.
Blind Spot Monitoring: Is it Available in Dodge Grand Caravan?
You may want to see also

Remove the stand cap from the top of the pedestal pillar
To remove the stand cap from the top of the pedestal pillar of an HP monitor, you must first ensure that the monitor is turned off and that the power and signal cables are disconnected. If your monitor has a connected audio cable, this should also be disconnected.
It is important to lay the front bezel of the monitor down on a soft area to prevent it from getting scratched, defaced, or broken. With the monitor safely positioned, you can then proceed to remove the stand cap.
The specific procedure for removing the stand cap may vary depending on the model of your HP monitor. For example, for the HP EliteDisplay, you would need to pivot the stand 45 degrees clockwise and remove the lower right mounting screw from the back of the monitor. You would then pivot the stand 45 degrees counter-clockwise and remove the lower left mounting screw.
Other models may have different procedures, so it is recommended to refer to the user manual for your specific HP monitor model for detailed instructions on removing the stand cap.
Monitoring App Bandwidth: A Comprehensive Guide to Track Usage
You may want to see also

Disconnect USB cables
To disconnect USB cables from your HP monitor, you should first ensure that the monitor is turned off and that the power and signal cables are disconnected.
Then, locate all USB cables connected to the monitor and disconnect them. This may involve removing any devices connected to the monitor via USB, such as a mouse or keyboard. Once all USB cables have been disconnected, you can proceed with removing the base of the monitor.
It is important to note that you should not remove the base of the monitor while it is in the upright position. Instead, lay the monitor face down on a flat, clean, dry surface to prevent it from getting scratched or damaged.
If you are experiencing issues with USB-C monitors disconnecting and reconnecting, there are a few troubleshooting steps you can try. First, try reinstalling the Universal Serial Bus Controllers Driver. You can do this by opening Device Manager, finding the Universal Serial Bus controllers option, and uninstalling the relevant driver. Then, restart your computer to allow Windows to reinstall the drivers automatically.
Another solution is to turn off the Power Saving Option. To do this, open Device Manager, right-click on the relevant USB device, and choose Properties. Then, switch to the Power Management section and uncheck the "Allow the computer to turn off this device to save power" option. This will ensure that the USB device remains active even when not in use for an extended period.
Monitor Pixel Perfection: Understanding Screen Resolution
You may want to see also

Lay the monitor face down on a soft, flat surface
To remove the base from an HP monitor, you must first lay the monitor face down on a soft, flat surface. This is an important step to ensure that the monitor is not damaged during the disassembly process. Choose a clean, dry cloth and lay it on a table or another flat surface. Ensure that the cloth is large enough to cover the entire surface area of the monitor's screen. Gently place the monitor face down on the cloth, being careful not to apply pressure to the screen.
Once the monitor is in this position, you can begin the process of removing the base. This will involve a series of steps to detach the various components that secure the base to the monitor. It is important to follow the specific instructions provided by HP for your monitor model, as the exact steps may vary.
While the monitor is in this orientation, you will have access to the various screws and connectors that attach the base to the monitor. You will likely need a screwdriver to remove these screws, so ensure you have the appropriate tools before proceeding. It is also important to keep track of the removed screws and components to facilitate the reassembly process if needed.
Laying the monitor face down on a soft, flat surface is a crucial first step in removing the base. This position provides stability and ensures that the monitor is secure during the disassembly process. It also allows for easy access to the necessary screws and connectors, making the removal process more efficient and reducing the risk of accidental damage to the monitor.
Internet Monitoring: How Often Are We Tracked Online?
You may want to see also

Remove mounting screws
To remove the mounting screws from your HP monitor, you will first need to ensure that the monitor is turned off and that the power and signal cables are disconnected. If your monitor has a connected audio cable, be sure to disconnect this as well. Once you have done this, lay the monitor face down on a flat surface covered by a clean, dry cloth. This will prevent the front bezel from getting scratched, defaced, or broken.
Now, you are ready to begin removing the mounting screws. First, pivot the stand 45 degrees clockwise and remove the lower right mounting screw from the back of the monitor. Then, pivot the stand 45 degrees counter-clockwise and remove the lower left mounting screw. After this, remove the two upper mounting screws.
Once all four mounting screws have been removed, you can lift the stand off of the monitor.
Monitoring Home Electricity Usage: A UK Guide
You may want to see also
Frequently asked questions
First, make sure the monitor is turned off and that the power, signal, and audio cables are disconnected. Then, lay the front bezel down on a soft area to prevent scratching. Next, remove the stand cap from the top of the pedestal pillar. Finally, disconnect and remove the cables from the back of the monitor.
Yes, laying the monitor on a soft surface will help prevent it from getting scratched, defaced, or broken.
No, do not remove the base from the monitor while it is in the upright position.
If your monitor has a connected audio cable, be sure to disconnect it before removing the base.
You may be removing the base from your HP monitor to mount it on a wall, swing arm, or other mounting fixture.


