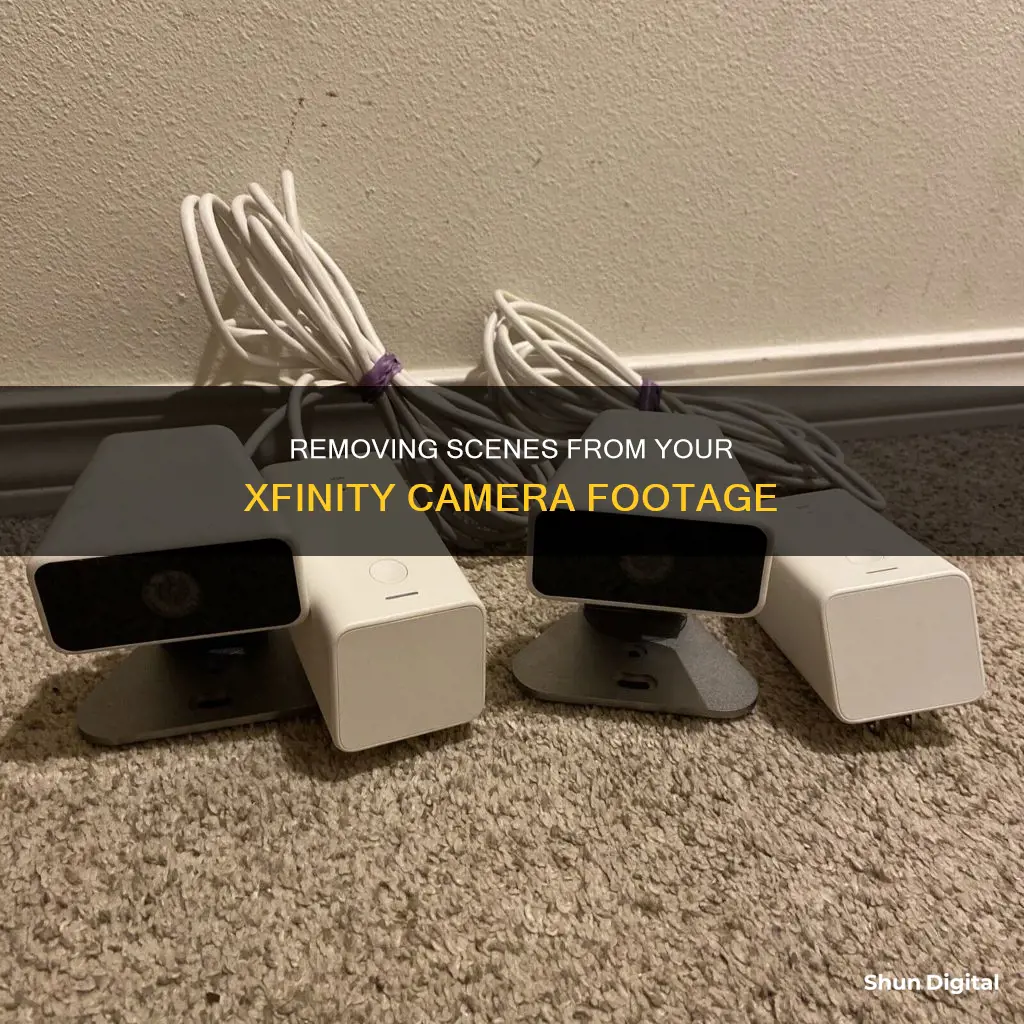
If you want to remove a camera from your Xfinity Home system, you'll need access to your touchscreen or the Xfinity Home app, as well as your Master Keypad Code. The process differs depending on your camera model, so be sure to identify your camera model before proceeding. Once you've identified your camera model, you can follow the appropriate instructions to remove it from your system. The step-by-step process is outlined on the Xfinity website, with instructions on how to navigate to the Camera screen, select the camera you want to remove, and confirm the deletion.
| Characteristics | Values |
|---|---|
| What you need to remove a camera from your Xfinity Home System | Access to your touchscreen or Xfinity Home app, your Master Keypad Code |
| Difficulty level | Easy |
| Step 1 | Identify your camera model |
| Step 2 | Follow the appropriate instructions for your camera model |
| Removing a camera using the touchscreen | Tap the gear icon, then tap Devices. If your home screen is different, tap the Settings icon |
| Step 4 | Enter your Master Keypad Code |
| Step 5 | On the Categories screen, tap Home Devices |
| Step 6 | On the Home Devices screen, tap Cameras |
| Step 7 | On the Camera screen, tap Delete a Camera |
| Step 8 | Tap the camera you want to remove |
| Step 9 | Tap Yes to confirm |
What You'll Learn

Identify your camera model
To identify your Xfinity camera model, you can start by examining the camera itself. Look for any labels, stickers, or markings on the camera body that may indicate the model number or name. This information is usually located on a sticker or plaque attached to the camera, often near the base or the mounting area.
In some cases, the model number may be embossed or engraved directly on the camera housing. This could be located on the front, back, top, or sides of the camera, so be sure to inspect all surfaces carefully. The model number or name may consist of a combination of letters, numbers, and/or dashes, and it may be preceded by the brand name, such as "Xfinity" or "Comcast."
If you have the original box or packaging for your Xfinity camera, you can also refer to this for model information. The box may have the model name or number printed on it, along with other specifications and features of the camera. Look for any labels or stickers on the box, as well as on the sides or bottom, where product information is typically listed.
Another way to identify your Xfinity camera model is by checking your purchase history or receipts. If you still have the receipt or invoice from when you bought the camera, it should include the model name or number. This information may also be available in your online account or order history if you purchased the camera from an online retailer.
Finally, if you have an Xfinity mobile app or web portal associated with your camera, you may be able to find the model information there. Log in to your account and navigate to the device settings or camera information section. The model number or name should be listed, along with other relevant details about your camera.
Capturing the Stars: Camera Settings for Nighttime Sky Photography
You may want to see also

Access touchscreen or Xfinity Home app
To remove a camera from your Xfinity Home System, you will need access to either your touchscreen or the Xfinity Home app. The first step is to identify your camera model, as this will determine the method you use to remove it from your system.
Accessing the Touchscreen
If your home screen has a gear icon, tap it and then tap 'Devices'. If not, tap the Settings icon. From there, continue with the following steps:
- Enter your Master Keypad Code.
- On the Categories screen, tap 'Home Devices'.
- On the Home Devices screen, tap 'Cameras'.
- On the Camera screen, tap 'Delete a Camera'.
- Tap the camera you want to remove and then tap 'Yes' to confirm.
Using the Xfinity Home App
Alternatively, you can use the Xfinity Home app to remove the camera. The steps for this process are not outlined, but it likely involves similar steps to accessing the touchscreen.
By following these steps, you will be able to successfully remove a camera from your Xfinity Home System.
Amcrest Camera Access: No Family Plan Needed
You may want to see also

Enter Master Keypad Code
To remove a scene from your Xfinity Camera, you must first understand the role of the master keypad code. Here's a step-by-step guide on how to navigate this process:
In order to make changes to your Xfinity Camera system, you will need access, which is granted by entering the correct Master Keypad Code. This code acts as a security measure, ensuring that only authorized individuals can make adjustments to your camera settings. It is usually a four-digit code that you created during the initial setup of your Xfinity system. If you haven't changed the default Master Code, it might be "1234" or "0000."
Now, to enter the code and access the camera settings:
Locate the Xfinity Home Touchscreen or the Xfinity Home app:
- If you have the Touchscreen: Proceed to the device and unlock it by entering your Master Code. This will grant you access to the system settings.
- If you're using the Xfinity Home app: Open the app on your mobile device and sign in with your Xfinity username and password. Then, navigate to the "Security" tab at the bottom of the screen.
Navigate to the "Cameras" section:
- On the Touchscreen: From the main menu, select "Cameras." This will display a list of all the cameras connected to your Xfinity system.
- On the Xfinity Home app: After accessing the "Security" tab, locate and select the camera for which you want to remove a scene.
Choose the camera you want to edit:
- If you're using the Touchscreen: Scroll through the list of cameras and select the one you want to modify by pressing the corresponding number on the keypad.
- On the app: You should see a list of scenes or clips associated with that camera.
Remove the scene:
- On the Touchscreen: After selecting the camera, you should see an overview of its settings. Locate and select the "Scenes" option, and then choose the scene you want to remove. Press the "Delete" button on the keypad, and then confirm your choice.
- On the app: Find the scene you wish to remove and long-press on it. This should bring up options, including "Delete." Tap on "Delete," and then confirm your action.
Remember that deleting a scene cannot be undone, so ensure you truly want to remove those specific camera settings before proceeding. Always ensure that you keep your Master Keypad Code secure and safely stored, as it is essential for making changes to your Xfinity Camera system.
Mastering Camera Apertures: Where to Find and How to See
You may want to see also

Tap 'Delete a Camera'
To remove a camera from your Xfinity Home System, you will need access to your touchscreen or the Xfinity Home app, as well as your Master Keypad Code. The process differs depending on your model of camera and touchscreen.
Removing a Camera Using the Touchscreen
First, identify what your touchscreen looks like. If your home screen has a gear icon, tap that, then tap 'Devices'. If not, tap the Settings icon. From there, both processes are the same: enter your Master Keypad Code, then on the Categories screen, tap 'Home Devices'. Next, tap 'Cameras' on the Home Devices screen, and then on the Camera screen, tap 'Delete a Camera'. You will then need to tap the camera you want to remove, and then tap 'Yes' to confirm.
Removing a Camera Using the Xfinity Home App
If you are using the Xfinity Home app, the process is similar. First, enter your Master Keypad Code, then on the Categories screen, tap 'Home Devices'. Next, tap 'Cameras' on the Home Devices screen, and then on the Camera screen, tap 'Delete a Camera'. You will then need to tap the camera you want to remove, and then tap 'Yes' to confirm.
The Evolution of TV Studio Cameras: Why So Big?
You may want to see also

Confirm removal
To confirm the removal of a camera from your Xfinity Home system, you will need access to your touchscreen or the Xfinity Home app. Firstly, identify your camera model to ensure you follow the correct instructions.
If you are using the touchscreen, start by tapping the gear icon or the Settings icon, depending on your home screen. Next, enter your Master Keypad Code. From the Categories screen, tap 'Home Devices', then 'Cameras' on the subsequent screen. You should now see the option to ''Delete a Camera'. Tap this, then tap the camera you want to remove, and finally, tap 'Yes' to confirm.
If you are using the Xfinity Home app, the process is similar. Start by opening the app and logging in, if necessary. From the home screen, tap 'Settings' or the gear icon, then enter your Master Keypad Code when prompted. Navigate to the 'Devices' section and select 'Home Devices', followed by 'Cameras'. At this point, you should see a list of all the cameras connected to your Xfinity Home system. Tap 'Delete a Camera', select the camera you want to remove, and confirm the deletion by tapping 'Yes'.
Once you have completed the above steps, your camera will be successfully removed from your Xfinity Home system. You will no longer have access to the footage or recordings from that particular camera, so ensure you have any necessary data backed up before proceeding with the removal.
Accessing Live Camera Feeds on Your Mobile Device
You may want to see also
Frequently asked questions
You will need access to your touchscreen or Xfinity Home app and your Master Keypad Code. First, identify your camera model, then follow the appropriate instructions. If using the touchscreen, tap the gear icon, then tap Devices. Enter your Master Keypad Code, then on the Categories screen, tap Home Devices. From there, tap Cameras, then Delete a Camera, and select the camera you want to remove.
Tap the Settings icon and continue with the remaining steps.
You can use the Xfinity Home app on your mobile device.


