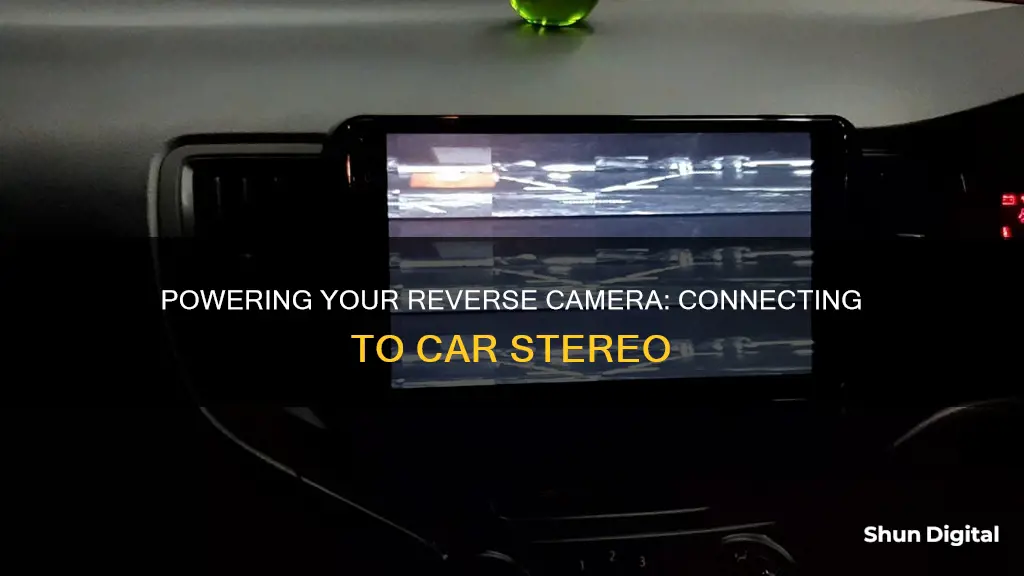
Reverse cameras are a great addition to any car, offering increased safety and convenience. When reversing, the camera feed is automatically displayed on the car's stereo screen, giving drivers a clear view of what's behind them. This article will provide a step-by-step guide on how to power a reverse camera and connect it to your car's stereo system. It will cover the tools and equipment needed, the wiring process, and offer troubleshooting tips for common issues.
| Characteristics | Values |
|---|---|
| Camera Power Source | Connect to Reverse Light Positive (+12V) and Negative/Ground terminals |
| Video Signal Transfer | RCA Cable with Male RCA connectors on both ends |
| Reverse Trigger Wire | Connect to Reverse Positive (+12V) |
| Camera Wiring | 2 small Red cables on each end with RCA plugs |
| Car Head-Unit | Switches to reverse mode when it receives a reverse signal |
| Wire Colour for Android Head Unit | PINK 'REV' wire |
| Wire Colour for Camera Signal | Yellow RCA plug |
| Wire Colour for Camera Power | Black |
What You'll Learn

Connect the camera to the reverse light positive and negative terminals
To connect the camera to the reverse light positive and negative terminals, you will need to follow these steps:
Firstly, identify the positive and negative wires from your reverse light source using a multimeter. This is important as you will need to link the positive and negative camera wires to the corresponding wires from the light source. The positive wire is usually red, and the negative wire is typically black.
Once you have identified the correct wires, you can proceed to link them together. This can be done through splicing or by using a Posi-Tap connector. If you choose to splice the wires, it is recommended to use a military splice as it does not require soldering.
- Use a wire stripper to hold the positive light wire and remove the plastic coating to expose the copper wiring underneath.
- Split the exposed copper section into two parts.
- Feed the positive camera wire through the gap between the copper wiring.
- Wrap and twist the positive camera wire around the light wire to create a sturdy connection.
- Secure the connection with electrical tape or shrink wrap.
- Repeat this process for the negative wire.
Alternatively, if you are using a Posi-Tap connector, simply follow the instructions provided with the connector to link the wires together securely.
After connecting the wires, you will need to test your setup. Put your car in reverse and check if the monitor switches on and displays the rear video feed. If it works, turn off your vehicle. If it doesn't work, carefully review the steps and check your connections.
Finally, tidy up any excess wire with electrical tape, zip ties, or velcro. Reinstall any components or panels that you removed during the installation process.
The Evolution of Cameras: From Concept to Creation
You may want to see also

Transfer the video signal via an RCA cable
To transfer the video signal via an RCA cable, you will need an RCA cable with male RCA connectors on both ends. One end of the cable will connect to the camera, while the other end will connect to the reverse camera input cable at the back of the head unit.
The RCA cable typically has a yellow wire at the stereo end, which is the "fly lead" for power. This yellow wire connects to the 12V power supply from the stereo, providing power to the camera.
When connecting the RCA cable to the camera and head unit, ensure that the red and black wires are connected correctly. The red wire typically connects to the reverse light positive terminal (+12V), while the black wire connects to the negative or ground terminal.
Some cameras may have a 4-pin connector towards the camera end and an RCA socket at the head unit end. In this case, you will need to solder the connections or use an RCA adapter.
It is important to note that some head units require the reverse camera option to be enabled in the settings. Additionally, always refer to the documentation for your specific head unit and vehicle when performing any wiring modifications.
Car Cameras in Alaska: Are They Legal?
You may want to see also

Wire the camera to the car head-unit
To wire a reverse camera to a car head unit, you will need to identify the camera input on the head unit. This is usually labelled as "Camera In" or "AV In" and may be in the form of an RCA input or a specific connector. Once you have located the camera input, you can connect the camera's video cable to it. The video cable will typically have a yellow RCA connector that plugs into the corresponding input on the head unit. If the head unit has a specific connector, you may need an adapter or harness.
Next, you will need to prepare the wiring by connecting the power cable of the backup camera to a power source, such as the reverse lights. This will provide power to the camera when the vehicle is in reverse. The video signal from the camera is transferred via an RCA cable, which has male RCA connectors on both ends. One end of the RCA cable connects to the camera, while the other end connects to the reverse camera input cable at the back of the head unit. Some cameras may have a 4-pin connector towards the camera end and an RCA socket at the head unit end.
It is important to route the cables away from any moving parts or areas that could cause damage. You can use existing wire looms or conduit to protect the camera wiring. Once the wiring is in place, start the vehicle and put it in reverse. The head unit's screen should automatically switch to the camera input, displaying the live feed from the backup camera. If it doesn't switch automatically, you may need to manually switch to the camera input by following the instructions in the head unit's manual.
Finally, secure the wiring using zip ties or tape, ensuring that it is tidy and out of the way. It is recommended to consult a professional car audio installer if you are not confident in your abilities or if you encounter any issues during the installation process.
Rear Car Camera Placement: Centered or Offset?
You may want to see also

Ground the black wire
To ground the black wire, you must first identify the negative wire at the reverse light. This is usually the black wire, but it can also be the ground wire, which is typically black or bare copper. Once you have located the negative or ground wire, connect the black wire from the reverse camera to it. This will provide a ground connection for the camera and ensure that it functions properly.
It is important to note that the black wire should be connected to the negative or ground wire at the reverse light, and not directly to the metal bodywork of the car. While grounding to the metal bodywork may work in some cases, it is not the correct way to ground the reverse camera and may result in increased "noise" or "interference" in the video signal.
Additionally, make sure that you do not connect the black wire to the positive wire at the reverse light, as this could damage the camera or cause electrical issues. The positive wire is typically red and should be connected to the red wire from the camera.
By following these steps, you will ensure that your reverse camera is properly grounded and will function as intended when your car is in reverse.
Charging the Eufy 2C: Know When It's Ready
You may want to see also

Connect the red wire to the red lead
To connect the red wire to the red lead, you must first identify the red wire. This wire is typically labelled as "reverse camera +12V" or "rear camera +12V". It may also be labelled as “BACK” or “REVERSE”. Once you have located the red wire, you can proceed to connect it to the red lead.
The red wire is typically connected to the reverse light positive terminal, which is usually located in the rear light cluster or near the reverse lamp in the rear cluster loom. The red wire can also be connected to the backup light wire or the red wire on the camera end of the RCA cable. Ensure that you connect the red wire to a power source that is live only when reverse gear is selected. This will provide power to the camera and trigger the head unit to switch to the reverse camera mode.
It is important to note that the connection between the red wire and the red lead should be insulated to prevent any potential electrical issues. You can use electrical tape or heat-shrink tubing to insulate the connection.
Additionally, it is recommended to ground the black wire, which is typically connected to the negative or ground terminal. This can be done by connecting it to the bare metal on the body or frame of the vehicle.
Before proceeding with the installation, it is strongly advised to refer to the instructions provided with your specific reverse camera and car stereo. If you are unsure about the wiring process, it is best to seek the services of a qualified car audio installer to ensure a safe and proper installation.
Mastering Night Portrait Mode: Camera Setting Explained
You may want to see also
Frequently asked questions
The reverse camera is powered by connecting it to the reverse light positive (+12V) and negative/ground terminals. The red wire is connected to the positive terminal and the black wire to the negative terminal.
The video signal from the reverse camera is transferred to the car stereo via an RCA cable. One end of the RCA cable is connected to the camera, and the other end is connected to the reverse camera input cable at the back of the car stereo.
There could be a few reasons why your reverse camera is not working. Ensure that the camera is properly connected to the power source and that the power source is functioning correctly. Check that the camera is triggered by the reverse gear by connecting the reverse trigger wire to the reverse light positive terminal. Also, verify that the car stereo is set to automatically switch to the camera view when the vehicle is in reverse.


