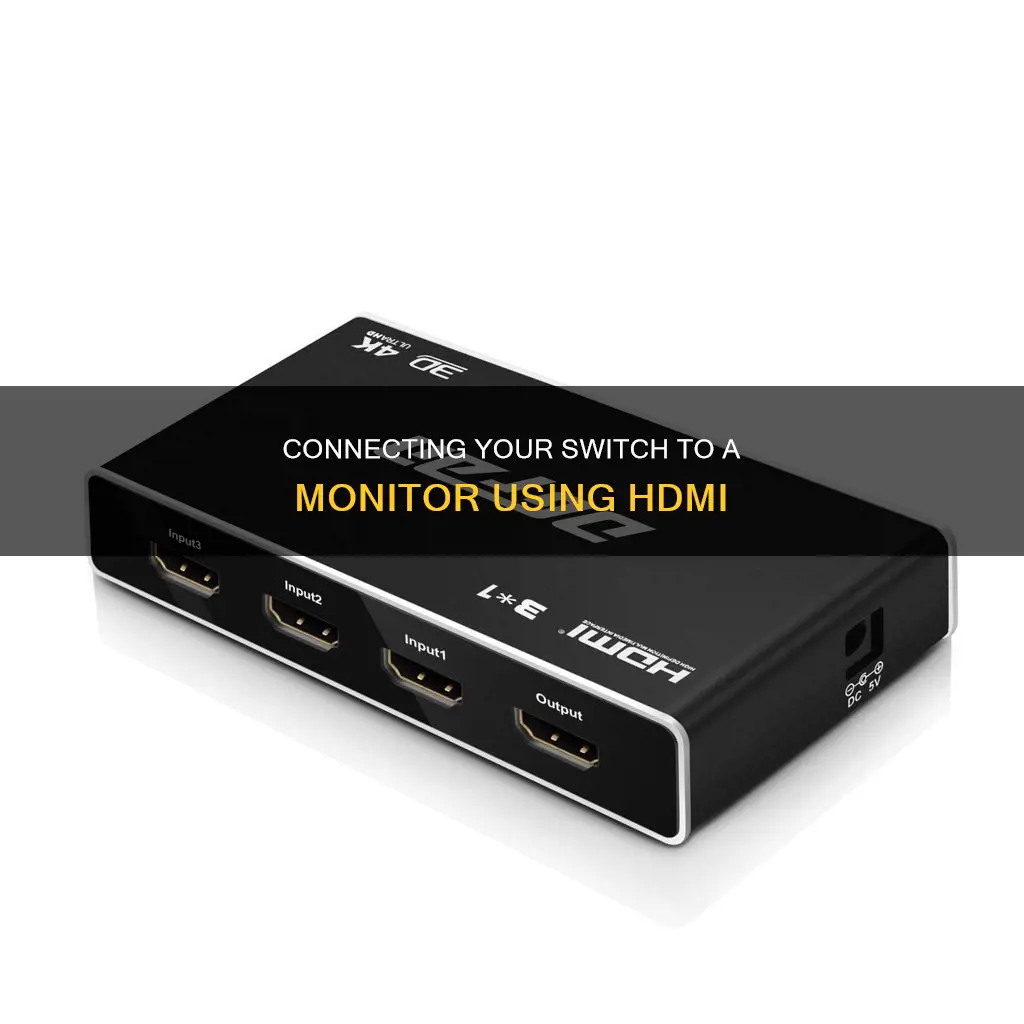
If you're looking to connect your Nintendo Switch to a monitor, there are two ways to do it. You can either use the HDMI port on the Nintendo Switch dock or use a USB Type-C video cable to connect directly to the monitor. For the first method, you'll need the Nintendo Switch dock, a power supply, and an HDMI cable. Connect the dock to the power supply and the monitor, then place the Switch into the dock. For the second method, you'll need a USB-C cable and a monitor with a USB-C port that supports DisplayPort (DP Alt) mode and power delivery (PD) charging. Simply connect the Switch to the monitor using the USB-C cable, ensuring the monitor can supply enough power to the console.
What You'll Learn

Connect the Switch Dock
To connect your Nintendo Switch to a monitor using the Switch Dock, you will need the following:
- A Nintendo Switch TV Dock with a power supply
- A gaming monitor with an HDMI 1.4 connector
- An HDMI 1.4 cable (included in the Nintendo Switch box)
Step 1: Connect the Switch Dock
Open the back of the Switch Dock and connect the HDMI cable and USB-C end of the power cable. The USB-C port for the power supply is labelled 'AC Adapter' and is located at the top of the dock, while the HDMI port is found at the bottom.
Step 2: Connect the Switch Dock to your monitor
Plug the other end of the HDMI cable into the HDMI port of your monitor. Make sure to check whether you are using HDMI 1 or HDMI 2, so you know which source to select on your monitor. Ensure that the HDMI cable is not too tight or trapped behind the monitor, as this can damage the cable and cause a bad signal or image loss.
Step 3: Connect the Switch to the dock
Place the Switch into the dock. Turn on the Switch and hold your console so that the + and - buttons are at the top. Lower the Switch carefully into the dock until you feel it click. When done correctly, the display of your Switch will move to the monitor.
Step 4: Select the right source
If the Nintendo Switch does not work after connecting and turning on your console, you may have selected the wrong source. Select the correct HDMI input via the OSD of your monitor. You can open the OSD using the buttons on your monitor. Choose the tab that allows you to select an input source, often indicated by a square with an arrow inside. Then, select the HDMI port you plugged the cable into.
Choosing the Right Monitor: Size Considerations
You may want to see also

Connect the Switch Dock to your monitor
To connect your Nintendo Switch Dock to a monitor, you will need the following:
- A Nintendo Switch TV Dock with a power supply
- A monitor with an HDMI 1.4 connector
- An HDMI 1.4 cable (included in the Nintendo Switch box)
Firstly, connect the Switch Dock. You can transmit the signal to the monitor via this dock, instead of connecting the Switch directly to the monitor. Open the back of the dock and connect the HDMI cable and USB-C end of the power cable. The USB-C port for the power supply is labelled 'AC Adapter' and is located at the top of the dock. The HDMI port is at the bottom.
Next, connect the Switch Dock to your monitor. Plug the other end of the HDMI cable into the HDMI port of your monitor. Make sure to check whether you use HDMI 1 or HDMI 2, so you know which source to select on your monitor. Ensure the HDMI cable is not too tight or trapped behind the monitor, as this can damage the cable and cause a bad signal or image loss.
Now, connect the Switch to the dock. Place the Switch into the dock, ensuring the + and - buttons are at the top. Lower the Switch carefully until you feel it click. The display of your Switch will now move to the monitor.
Finally, select the right source via the OSD of your monitor. If the Nintendo Switch doesn't work after connecting and booting your console, you've probably selected the wrong source. A monitor often has more than one port, so you'll need to select the correct HDMI input. You can do this via the OSD of your monitor, which you can open via the buttons on your monitor. Choose the tab that allows you to select an input source, often indicated with a square with an arrow inside. Select the HDMI port you've plugged the cable into.
Monitor Calibration: Essential for Accurate Photography Colors
You may want to see also

Connect the Switch to the Switch Dock
To connect your Nintendo Switch to a monitor using HDMI, you will need a Nintendo Switch dock, a Nintendo Switch AC adapter, and an HDMI cable.
Step 1: Connect the Switch Dock
Firstly, connect the Switch Dock to the power supply and your monitor. Open the back of the dock and connect the HDMI cable and the USB-C end of the power cable. The USB-C port for the power supply is labelled 'AC Adapter' and is located at the top of the dock. The HDMI port can be found at the bottom of the dock.
Step 2: Connect the Switch Dock to your Monitor
Plug the other end of the HDMI cable into the HDMI port of your monitor. Ensure that you note which HDMI port you are using (HDMI 1 or HDMI 2) so that you can select the correct source on your monitor. Make sure that the HDMI cable is not too tight and that it is not trapped behind the monitor, as this can cause damage and result in a bad signal or image loss.
Step 3: Connect the Switch to the Dock
Now that the dock and monitor are connected, carefully place the Switch into the dock. Ensure that the console screen faces the same direction as the front panel on the dock. Turn on the Switch and hold the console so that the + and - buttons are at the top. Gently lower the Switch into the dock until you feel it click into place. If you have inserted the Switch correctly, the display will move from the Switch to the monitor.
Step 4: Select the Correct Source on your Monitor
If the Nintendo Switch does not appear on your monitor after connecting and turning on your console, you may have selected the wrong source. To select the correct source, use the buttons on your monitor to access the OSD (on-screen display). Choose the tab that allows you to select an input source, often indicated by a square with an arrow. Select the HDMI port that the cable is plugged into.
Troubleshooting
If you are still having issues, ensure that your monitor supports HDMI input and that you are using the correct cables. Additionally, confirm that your Switch is turned on when connecting the HDMI cable.
Monitoring Memory Usage: Cisco RV325 Guide
You may want to see also

Select the right source
Now that you've connected your Nintendo Switch to a monitor, it's time to select the correct source on the monitor to start displaying your gameplay. This process will vary depending on the type of monitor you have.
If you're using a simple computer monitor, it's usually a straightforward plug-and-play setup. However, if your monitor has multiple HDMI ports, you'll need to ensure you select the correct input source. This can be done via the OSD (On-Screen Display) of your monitor, which can be accessed using the buttons on your monitor. Look for a tab or icon that allows you to select the input source, often indicated by a square with an arrow inside. Choose the HDMI port into which you plugged the cable.
If you're using a PC, you may need to turn off your computer and power on the Switch while it's docked. This will prompt the monitor to search for a signal, and if the Switch is the only device connected, it will display its content. If this doesn't work, ensure that your PC is not only an HDMI output device and that your Switch is connected correctly.
For a Nintendo Switch, the display on the console will shut off once it's docked. At this point, turn on your TV or monitor and select the correct HDMI input. This will vary depending on the HDMI port you used—HDMI 1 or HDMI 2.
Ford Models: Blind Spot Monitoring Features and Functionality
You may want to see also

Check your monitor has an HDMI input port
To plug in a Nintendo Switch to your monitor using an HDMI cable, you will need to check that your monitor has an HDMI input port. Not just an HDMI output port—they are different. An HDMI output port can only output its display to a different screen and not accept input from another device.
If your monitor only has an HDMI output port, you won't be able to connect your Nintendo Switch to it. In this case, you may need to consider using a different monitor that has an HDMI input port, or you could look into alternative methods of connecting your Switch, such as using a USB Type-C cable.
If your monitor does have an HDMI input port, make sure it is compatible with HDMI 1.4. Once you've confirmed that your monitor has the correct type of HDMI port, you can proceed with the rest of the setup process.
To connect your Nintendo Switch to your monitor, you will need the following:
- A Nintendo Switch TV Dock with power supply
- An HDMI 1.4 cable (included in the Nintendo Switch box)
With these items, you can follow the steps to connect your Switch to your monitor:
- Connect the Switch Dock to a power supply and your monitor using the HDMI cable.
- Connect the Switch to the Switch Dock.
- Select the correct input source on your monitor.
LCD Screens: Benefits of a Modern Display
You may want to see also
Frequently asked questions
You will need a Nintendo Switch TV Dock with a power supply, a gaming monitor with an HDMI 1.4 connector, and an HDMI 1.4 cable (included in the Nintendo Switch box). First, connect the Switch Dock to a power source and the monitor. Then, connect the Switch to the Switch Dock. Finally, select the right source via the OSD of your monitor.
No, you can connect your Nintendo Switch to a monitor without a dock by using a USB Type-C video cable.
Before connecting, confirm that your monitor supports PD charging and DP alt mode. Also, check that the accessories and cables are compatible and that your Switch is turned on.
Yes, you can play your Switch while charging, regardless of whether you are using a dock or a USB Type-C cable.


