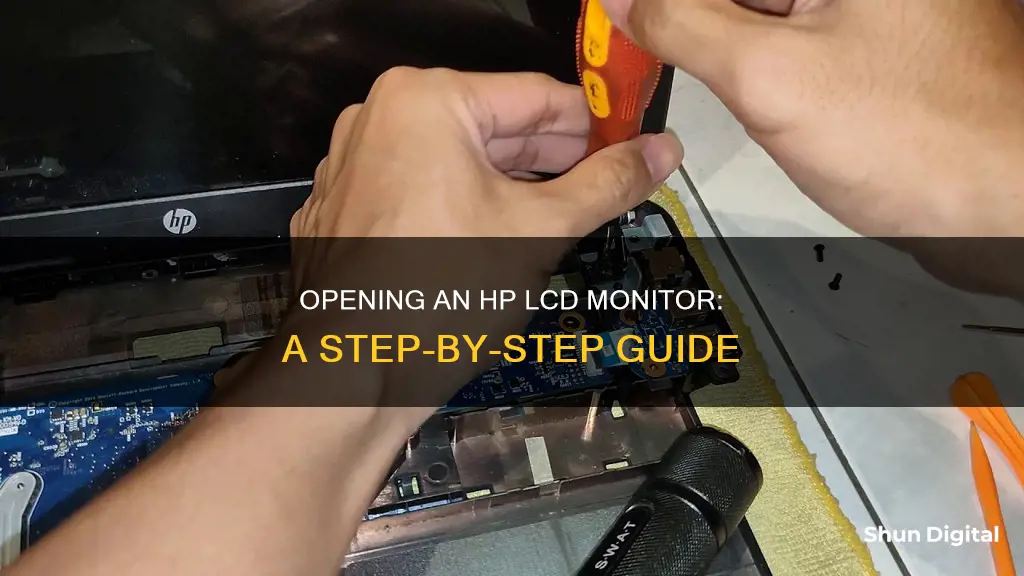
If you're looking to open up your HP LCD monitor, you may be able to do it yourself without the help of a repairperson. Before you begin, make sure you disconnect your monitor from its power source and your computer. Then, grab a Phillips-head screwdriver and remove the screws on the perimeter of the back of the monitor. Place these screws somewhere safe, like a small plastic bag, as you'll need them again later. Next, gently pry up one corner of the bezel and pull off the rest, setting it aside. You should now see the exposed display and metal brackets. Remove the brackets and then the inverter cable. Finally, carefully lift out and remove the screen. Now that your HP LCD monitor is open, you can run any tests or diagnostics.
| Characteristics | Values |
|---|---|
| Monitor model | HP LCD Monitor |
| Tools required | Phillips-head screwdriver |
| First step | Disconnect the monitor from the power supply and the computer |
| Second step | Remove screws from the perimeter of the monitor |
| Third step | Remove the bezel |
| Fourth step | Remove the metal brackets |
| Fifth step | Disconnect the inverter cable |
| Sixth step | Lift out the screen |
What You'll Learn

Disconnect the monitor from the power supply and computer
Before you start to open up your HP LCD monitor, it is important to disconnect the monitor from its power supply and your computer. This is a crucial safety measure that must not be overlooked.
First, locate the power cable and unplug the monitor from the wall outlet or power strip that it is connected to. Make sure that the power cable is completely removed from the power source. If the power cable is difficult to access, you may need to carefully move the monitor to reach it. Ensure that the monitor is handled with care and that no damage is inflicted on the screen or any other components.
Next, check if the monitor is still connected to your computer. If it is, you should disconnect the cable that links the monitor to your computer. This cable could be a VGA, DVI, HDMI, or DisplayPort cable, depending on your setup. Gently pull the cable out of the corresponding port on the back of the monitor. Be sure to grip the connector itself rather than the cable to avoid any damage.
Once you have finished disconnecting the cables, set the monitor aside in a safe place where it will not be disturbed. Now you can proceed with opening the monitor, starting with removing the screws along the perimeter of the back of the monitor.
Monitoring Memory Usage: NRPE Nagios Guide
You may want to see also

Remove the perimeter screws with a Phillips-head screwdriver
To remove the perimeter screws with a Phillips-head screwdriver, first disconnect your HP LCD monitor from the wall outlet or surge protector it is currently plugged into. This is an important safety measure that must be taken before proceeding. Also, disconnect the monitor from your computer if it is still plugged in.
Next, locate the screws arrayed along the perimeter of the back of the HP LCD monitor. Using your Phillips-head screwdriver, carefully remove these screws one by one and place them in a safe location. It is a good idea to put them in a small plastic bag or container to ensure they are not lost, as you will need them again later when reassembling the monitor.
Make sure to keep the screws organised and separate from other screws you may remove during the disassembly process. This will make it easier when it comes time to put everything back together.
With the perimeter screws removed, you can now begin to separate the monitor bezel from the rest of the unit. This will give you access to the internal components of the monitor for further disassembly or repairs.
Relion Glucose Monitor: Battery Size Requirements
You may want to see also

Gently pry up one corner of the bezel
To gently pry up one corner of the bezel, you will need a plastic pry tool. This is an essential tool to prevent damage to the bezel and other components. You can use a plastic pry tool from a spudger set, which is ideal for safely separating the screen bezel.
Start by disconnecting the monitor from the power source and your computer. This is a critical safety step. Once this is done, you can begin to remove the screws holding the bezel in place. Keep track of the screw locations and sizes as you remove them and place them in a safe container, such as a small plastic bag.
Now, you can gently pry up one corner of the bezel with your plastic pry tool. Work slowly and carefully to avoid damaging the bezel or the monitor itself. Once one corner is loose, you can pull off the rest of the bezel and set it aside.
With the bezel removed, you will be able to access the screen and proceed with your repairs or maintenance. Remember to keep your workspace organised and be gentle with the components to avoid any accidental damage.
Opening a BenQ LCD Monitor: A Step-by-Step Guide
You may want to see also

Remove the metal brackets and inverter cable
To remove the metal brackets and inverter cable, follow these steps:
- Remove the screws from each of the brackets using your Phillips-head screwdriver.
- Remove the brackets and set them aside in your plastic bag.
- Notice the inverter cable, which lies at the bottom of the screen. It plugs into the inverter cable connector to its left.
- Unplug it from the cable connector by setting the connector into its unlocked, vertical position. Then, pull out the cable.
ASCR ASUS Monitors: Unlocking the Ultimate Competitive Advantage
You may want to see also

Lift out the screen and set it aside
Lifting out the screen is the next step after disconnecting the inverter cable. This is a delicate process, so it is important to be careful and gentle. The screen of an HP LCD monitor is large and fragile, so both hands should be used to lift it out. Place the screen down on a soft surface to avoid any scratches or damage. It is best to lay the screen flat, rather than propping it up against anything. With the screen removed, the back of the monitor will now be fully exposed. This is the perfect opportunity to run any tests or diagnostics, as the monitor is now fully disassembled.
When placing the screen down, ensure that it is laid flat, preferably on a soft surface such as a towel or blanket. This will prevent any pressure points from forming and reduce the risk of damage to the screen. It is also important to be aware of your surroundings and avoid placing the screen near any objects that could potentially cause damage.
Once the screen is safely set aside, you can proceed with further disassembly or begin your repairs. If you are not planning to work on the monitor immediately, it is a good idea to cover the screen with a soft cloth to protect it from dust and scratches. This will ensure that the screen remains in good condition until you are ready to work on it again.
Remember to handle the screen with care at all times, as it is a delicate component. By following these steps, you can safely lift out and set aside the screen of your HP LCD monitor during the disassembly process.
How Multiple Monitors Affect CPU Usage and Performance
You may want to see also
Frequently asked questions
First, disconnect your HP LCD monitor from the power outlet and your computer. Then, use a Phillips-head screwdriver to remove the screws on the perimeter of the monitor's back. Gently pry up one corner of the bezel and pull off the rest, setting it aside. Remove the metal brackets on each side of the screen and set them aside as well. Finally, unplug the inverter cable from the cable connector and lift out the screen.
You will need a Phillips-head screwdriver to remove the screws from the monitor.
It is recommended to place the screws in a small plastic bag or container for safekeeping, as you will need them again later when reassembling the monitor.


