Studio monitor placement is crucial to creating an accurate mixing environment. The ideal listening experience is influenced by several factors, including the listening area, wall reflections, and radiation space around the monitors. The goal is to find the best configuration for your room and your needs. One key consideration is to ensure that your speakers are away from walls and corners to prevent sound waves from reflecting back and causing phase cancellation. Another important factor is the height of the monitors – the tweeters should be positioned at the listener's ear level. Additionally, the monitors should be angled or toed-in to create a sweet spot, where the stereo image is at its best. It is also recommended to use monitor stands or isolation pads to reduce vibrations and improve sound clarity. When dealing with subwoofers, it is crucial to consider the room's resonance and place them accordingly to achieve a flat response.
| Characteristics | Values |
|---|---|
| Speaker placement | Speakers should be placed away from walls and corners. |
| Speaker orientation | Speakers should be placed to form an equilateral triangle with the listener's head. |
| Speaker height | The high-frequency driver should be at the listener's ear height. |
| Speaker symmetry | Speakers should be placed symmetrically in the room. |
| Speaker distance | Speakers should be at least one metre from walls to avoid sound pressure maxima. |
| Speaker angle | Speakers should be angled towards the listening position. |
| Subwoofer placement | Subwoofers should be placed close to walls, preferably along the front wall. |
| Wall reflections | Reflections from nearby hard surfaces should be avoided. |
What You'll Learn

Use monitor stands or wall mounts
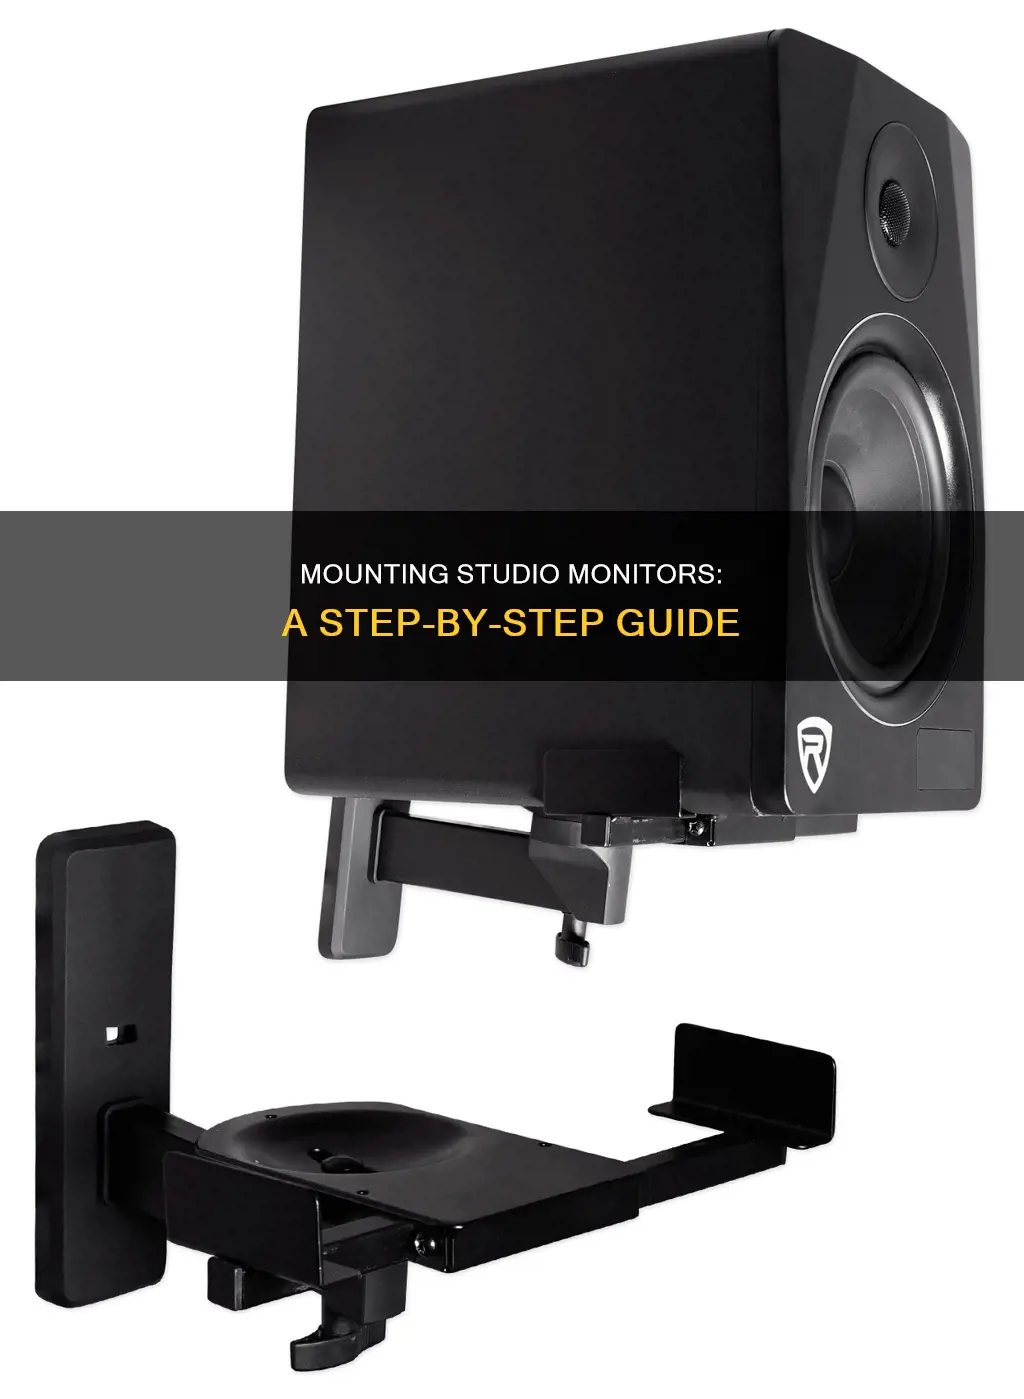
Using monitor stands or wall mounts is a great way to ensure your studio monitors are placed correctly for optimal sound dispersion. They also help you save space in your studio by keeping your monitors off the ground and out of the way.
Monitor Stands
Monitor stands are available in different materials, such as metal and plastic, and can be placed on the floor or on your desktop. Metal stands are durable but heavier, making them ideal for permanent placement. Plastic stands are more lightweight and perfect if you need to move your monitors around.
When choosing a monitor stand, ensure it can support the weight of your studio monitors. Some stands also offer height and tilt adjustments, allowing you to position your monitors at the perfect height and angle for optimal sound. Additionally, consider stands with internal cable routing to keep your studio organised and neat.
Wall Mounts
Wall mounts are an excellent option if you want to save floor space and keep your studio monitors out of the way. They can be attached to walls or ceilings, depending on your preference. Wall mounts usually have swivel and tilt adjustments, allowing you to angle your monitors for the best sound dispersion.
When purchasing wall mounts, ensure they are compatible with your studio monitors and can support their weight. Also, consider the type of wall you have and choose a mount with the appropriate hardware.
Monitoring Data Usage on Your iPhone: A Quick Guide
You may want to see also

Avoid corners and walls
When mounting studio monitors, it is important to avoid placing them in corners or too close to walls. This is because sound waves will reflect off walls and bounce back, causing phase cancellations and other unwanted acoustic interactions. This is especially true for corners, where two reflective surfaces meet, causing bass buildups and issues in the lower end of the spectrum.
The ideal distance between studio monitors and walls depends on the size of the room and the specific monitor setup. A good rule of thumb is to maintain a minimum distance of 20 to 30 cm (8 to 12 inches) between the monitors and walls, which is usually enough to reduce sound waves reflecting back to the listening position. However, if possible, a greater distance of up to 60 to 90 cm can be beneficial.
It is also important to ensure that the monitors are not placed symmetrically in the room, creating a corner with the listening position. The distance between the monitors and the side and back walls should be different to avoid this issue. For example, if the left monitor is 6 feet from the left wall, it should not also be 6 feet from the back wall.
In addition to the distance from walls, the orientation of the studio monitors is crucial. They should be angled towards the listening position, forming an equilateral triangle, with the monitors separated from the setup. The high-frequency driver or tweeter should be at the same height as the listener's ears to ensure the most accurate sound reproduction.
To achieve the best sound quality and avoid unwanted reflections, it is recommended to use monitor stands or isolation pads to raise the monitors off the desk or console. This will also help to prevent vibrations and rattling from the monitors being transmitted to the surface they are resting on.
IPS Monitor Back Bleed: Quick Detection Tips
You may want to see also

Create a 'sweet spot'
Creating a "sweet spot" is crucial to achieving a balanced stereo image and ensuring you are hearing your music accurately. Here are some tips to create the ideal "sweet spot" for your studio monitors:
Firstly, find the right room position for your workstation and speakers. Place your monitors away from walls, preferably eight to twelve inches, to prevent sound waves from reflecting back to you and causing phase cancellation and frequency buildup. Centering your monitors and listening position between the sidewalls is important for a balanced stereo image. Avoid sitting in the exact centre of the room, as this can cause frequency cancellation and a dip in bass response. If your room is small, try centering the monitors along the widest wall to minimise side wall reflections.
Secondly, form an equilateral triangle with your studio monitors and listening position. This is the ideal setup for correct stereo imaging. Angle or "toe-in" each speaker so that they are the same distance from your head, creating a triangle. This ensures the best imaging and a mix that translates well to other systems.
Thirdly, position the monitor tweeters at ear level. High-frequency content is more directional than low-frequency content, so directing the tweeters at ear level will allow you to hear higher frequencies more accurately. You can tilt the monitors down if the tweeters are too high.
Lastly, consider using studio monitor stands to raise the monitors to ear level and prevent early reflections from interfering with your listening environment. Monitor stands also isolate the monitors from the surface, reducing vibrations and unwanted noise. If you are unable to use stands, place the monitors on your desk as close to the front edge as possible, and consider using isolation pads or foam blocks to minimise coupling with the desk.
Ankle Monitors: Beeping, Tracking, and Freedom
You may want to see also

Position tweeters at ear level
To achieve the best sound, it is important to position the tweeters of your studio monitors at ear level. This means that the speakers should be positioned so that your ears are directly in front of them. The directional pattern of sound emanating from the speaker, known as horizontal and vertical dispersion, varies as you move from the front and centre of the speaker. Therefore, facing the speakers at ear level will give you the most consistent and best sound.
If your setup does not allow you to get your monitors up to ear level, you can use speaker stands to elevate them. For example, the IsoAcoustics ISO-155 isolation stand can be used to raise your monitors and adjust their vertical angle. Monitor stands can also help to prevent early reflections from interfering with your listening environment.
If you are working in a tight space or on a tight budget, you may need to place your speakers on your desk. In this case, isolation pads such as the PreSonus ISPD-4 can be used. These are foam or rubber stands that help to mitigate the vibrations and sympathetic resonance that can occur when a speaker is placed on a hard surface. Isolation pads also decouple the speakers from the desk, allowing the monitor's vibrations to travel harmlessly into a flexible, absorbent material instead of through your desk.
In addition to using stands or pads to achieve the correct height, you can also try inverting your monitor speakers so that the tweeters are on the bottom. This may look unusual, but it can be an effective solution to ensure that the tweeters are at ear level.
Best Monitor Sizes for Bartop Arcade Cabinets
You may want to see also

Avoid hard surfaces
When mounting studio monitors, it is important to avoid placing them on hard surfaces such as a desk or table. This is because sound waves travel fast through wood and other hard materials, which can result in muffled or smeared audio. Studio monitors also transmit their vibrations to surfaces they are resting on, which can lead to rattling noises that interfere with your mix. In addition, desks and tables often have a resonant frequency, so when you turn up your monitors, the desk itself will boost particular frequencies by sympathetically resonating with the vibrations of the monitors.
To avoid these issues, it is recommended to use monitor stands to raise the speakers closer to ear level and prevent early reflections from interfering with your listening environment. If you are working with a tight space or budget, isolation pads made of foam or rubber can be used to mitigate vibrations and sympathetic resonance. These pads also provide some method of adjusting the vertical angle of the monitors.
Another option is to place the monitors on a soft material such as open-cell neoprene, which can help to maximise isolation. However, stands are generally the preferred option as they allow for height and position adjustments to achieve optimal placement.
Connecting Toughbook to a Monitor: A Comprehensive Guide
You may want to see also
Frequently asked questions
It is recommended to place your studio monitors 8 to 12 inches away from the wall to prevent sound waves from reflecting back to you, causing phase cancellation and other acoustic issues.
The ideal height for studio monitors is at ear level, usually between 1.2 and 1.4 meters from the floor. This ensures that the high-frequency content is directed at your ear for more accurate sound.
The "sweet spot" is the area where you experience the best stereo imaging. To create this, angle or "toe-in" your studio monitors so that they form an equilateral triangle with your head.
A symmetrical room is ideal for studio monitor placement as any imbalances will be uniform for the left and right sides of the stereo field.
You can use specialised monitor mounts or DIY solutions such as drywall anchors or ceiling mounts. Ensure that the mount is secure and does not cause any audio interference. Consider using acoustic panels or other treatments to improve sound absorption and reduce reflections.


