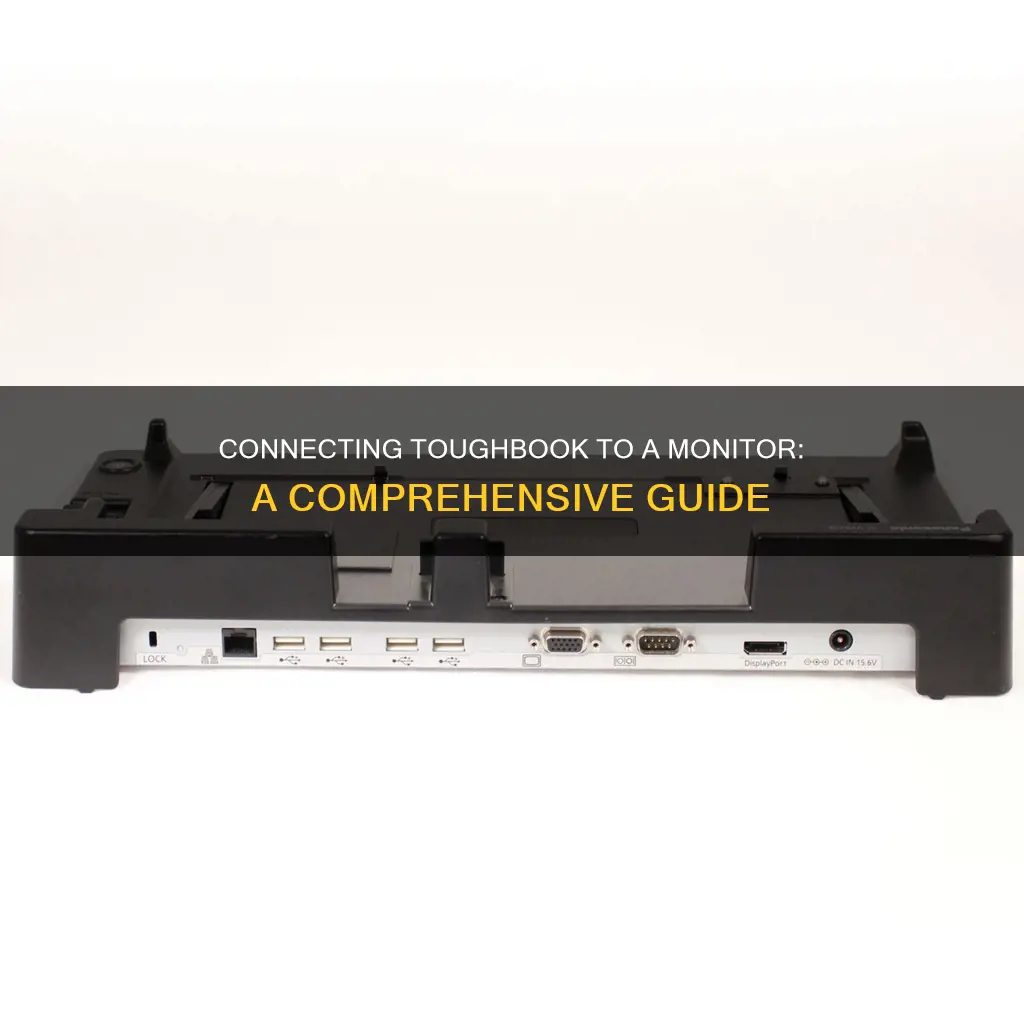
Hooking up a monitor to a laptop can elevate your viewing experience and productivity. The Panasonic Toughbook CF-53, for instance, can be easily connected to an external monitor. The Toughbook CF-18, which runs on Windows XP, also has this capability, but it has a smaller 10.4-inch screen. To connect an external monitor to the Toughbook CF-18, you need to shut down the device, locate the second input/output port cover from the right, and flip it down to expose the video output port. Then, connect the VGA cable from the monitor to the video output port. If your monitor uses a DVI cable, you'll need an adapter. After turning on both devices, push the Fn and F3 keys at the same time to switch between the Toughbook's display and the external monitor.
What You'll Learn

Understand different cables and ports
To connect your Toughbook to a monitor, you will need to use the correct cable and port. The Panasonic Toughbook CF-18, for example, has a VGA video port that can be used to connect the computer to a monitor, projector or television.
VGA
VGA (Video Graphics Array) is a standard for connecting displays to computers. It supports a maximum resolution of 640 x 480, which is significantly lower than newer standards such as 4K and 8K. VGA uses a D-Sub connector with 15 pins, which can be tightened with screws to keep them secure. While VGA is becoming outdated, it is still included on many computers, projectors, video cards and high-definition TVs.
HDMI
HDMI (High-Definition Multimedia Interface) is the current standard for connecting digital video devices, such as computers to TVs. HDMI can carry uncompressed video and compressed or uncompressed audio signals. The latest version, HDMI 2.1, supports a resolution of up to 4K at 120Hz or 8K at 60Hz. HDMI connectors have 19 pins.
USB
USB (Universal Serial Bus) is the standard for connecting most devices today. There are several types of USB connectors:
- USB-A: The standard connector found on one end of almost every USB cable. It is rectangular and only fits one way. It is found on desktop and laptop computers, as well as many other devices.
- USB-B: An older connector that is less common nowadays. It is almost square at one end and usually plugs into printers or similar devices.
- Mini USB: A smaller connection type used for mobile devices. It has been largely replaced by micro-USB and USB-C.
- Micro-USB: A tiny connector used for portable devices such as Android phones, external battery packs and Bluetooth headphones.
- USB-C: The newest USB standard, which is reversible and can connect two devices with USB-C ports. It can also be used to transfer data at high speeds and connect to high-resolution displays.
DisplayPort
DisplayPort is a digital display interface designed to replace VGA and DVI as the main connection between computers and monitors. It offers better resolution than DVI and uses a 20-pin connector. The latest version, DisplayPort 1.4a, supports a resolution of up to 4K at 120Hz or 8K at 60Hz.
DVI
DVI (Digital Visual Interface) is a high-speed digital interface for connecting a display controller, such as a computer, to a display device, such as a monitor. There are three types of DVI connectors: DVI-I, DVI-D and DVI-A, which carry integrated analogue and digital, only digital, and only analogue signals, respectively. DVI supports a maximum resolution of 1920 x 1080.
Monitoring Data Usage on Your iPhone: A Quick Guide
You may want to see also

Set up display preferences
Once you've connected your Toughbook to an external monitor, you'll need to set up your display preferences. The steps to do this will depend on the operating system you're using.
Setting up display preferences on Windows
If you're using a Windows operating system, you can set up your display preferences by following these general steps:
- Right-click on your desktop screen.
- Select "Display settings".
- In the "Multiple displays" section, choose how you want to use your displays:
- "Duplicate these displays" – It should show the same image on both displays.
- "Extend these displays" – Increases your desktop across both displays.
- "Show only on 1" or "Show only on 2" – Shows the image only on the selected display.
Click "Apply" and then "Keep changes" when you're happy with your selection.
Alternatively, you can try the following:
- Click on the Start menu.
- Go to Settings > System > Display.
- Use the drop-down menu under "Scale and layout" to change the size of your text and apps.
- Use the drop-down menu under "Display resolution" to change your screen resolution.
- To adjust your colour calibration, search for "calibrate display colour" in the Settings search box and follow the directions.
Setting up display preferences on a Panasonic Toughbook CF-18
If you're using a Panasonic Toughbook CF-18, you can toggle between the integrated display and the external monitor by pressing the "Fn" and "F3" keys simultaneously.
Setting up display preferences on a Panasonic Toughbook G2
If you're using a Panasonic Toughbook G2, you can connect up to 5 monitors via the USB-C port using Intel UHD Graphics. To use HDMI/VGA and other video connections, you'll need to use a dongle or specific cable as there are no dedicated ports.
Monitoring Bandwidth: A Guide for ASUS Routers
You may want to see also

Use adapters when needed
When connecting a Panasonic Toughbook to an external monitor, you may need to use adapters to establish a successful connection. The specific adapter you will require depends on the model of your Toughbook and the type of cable connection your monitor uses.
For example, if you are using a Panasonic Toughbook CF-18, you will need to shut down the device and locate the second input/output port cover from the right on the back of the device. Flip down the cover to expose the video output port. If you are connecting your Toughbook to a monitor with a DVI cable, you will need to attach a DVI female to VGA male adapter to the end of the cable before connecting it to the Toughbook.
On the other hand, if you are using a Panasonic Toughbook G2, you can easily connect to an external monitor using its built-in USB-C connector. However, if you wish to use HDMI, VGA, or other video connections, you will need to use a dongle or specific cable, as the Toughbook G2 does not have dedicated ports for these connections.
Additionally, there are various monitor adapter plate assemblies available for Panasonic Toughbooks, such as the Havis Monitor Adapter Plate Assemblies, which can help turn your device into a mobile workspace. These adapter plates work with specific monitor bases and keyboard bases for easy installation. Therefore, depending on your specific Toughbook model and your monitor's connection type, ensure you have the correct adapters or adapter plates to establish a proper connection.
Enabling 240Hz on the ASUS PG258Q Monitor: A Step-by-Step Guide
You may want to see also

Checking power and data connections
When hooking up a Toughbook to a monitor, it is important to check the power and data connections to ensure that the setup works as intended. Here are some detailed steps to verify these connections:
- Check Power Cords: Ensure that both the Toughbook and the monitor are properly powered on. Check that their power cords are securely plugged into a working power outlet or power strip. If the devices are not turning on, try plugging something else into the same outlet to confirm it is functional.
- Inspect Cable Connections: Verify that the cable connections between the Toughbook and the monitor are secure. Depending on the specific model of Toughbook, you may be using a VGA, HDMI, or DisplayPort cable. Ensure that the cable is firmly plugged into the corresponding port on each device.
- Select Correct Input Source: On the monitor, select the correct input source that matches the type of cable you are using. For example, if you are using an HDMI cable, select the HDMI input on the monitor. This step is crucial, as failing to select the right input source may result in no display being shown.
- Verify Display Settings: Adjust the display settings on your Toughbook to ensure the external monitor is recognized. Right-click on your desktop screen, select "Display Settings," and then choose the "Multiple Displays" section. Here, you can set your preferences, such as duplicating or extending your displays or choosing to show the image on only one display.
- Use Adapters if Needed: If your Toughbook and monitor have incompatible ports, you may need to use an adapter. For instance, if your Toughbook has an HDMI port but your monitor only supports VGA, you would need an HDMI-to-VGA adapter. Ensure that any necessary adapters are securely connected.
- Troubleshoot as Needed: If issues persist, there may be other factors at play. The cable could be faulty, or there could be problems with the display settings or drivers on the Toughbook. In such cases, it is recommended to troubleshoot these potential issues to resolve the problem.
By carefully checking and verifying these power and data connections, you can ensure that your Toughbook and external monitor are properly connected and functioning as expected.
Understanding FPS Mode on Your ASUS Monitor
You may want to see also

Leveraging keyboard shortcuts
Keyboard shortcuts are a great way to improve efficiency and productivity when using a Toughbook or any other device. They can help you quickly navigate, switch between applications, and perform various tasks without reaching for your mouse or touchpad. Here are some ways to leverage keyboard shortcuts when hooking a Toughbook to a monitor:
Using the Right Function Keys
When connecting a Toughbook to an external monitor, you can use specific function keys to toggle between the integrated display and the external monitor. For example, on the Panasonic Toughbook CF-18, pressing the "Fn" and "F3" keys simultaneously allows you to switch between displays. This shortcut makes it easy to choose which screen you want to use or extend your display across both screens.
Windows Key Shortcuts
If your Toughbook runs on a Windows operating system, you can utilize the Windows key, also known as the Start key, in combination with other keys to perform various tasks efficiently. Here are some examples:
- Windows Key + P: This shortcut opens the Project settings, allowing you to choose how you want to project your display. You can select options like "PC Screen Only," "Duplicate," "Extend," or "Second Screen Only." This is particularly useful when setting up your display configuration with an external monitor.
- Windows Key + D: This shortcut helps you quickly display or hide your desktop, allowing you to access your desktop icons or minimize all open windows.
- Windows Key + L: This shortcut locks your computer, ensuring privacy and security when stepping away from your device.
- Windows Key + I: This shortcut opens the Settings menu, providing quick access to various device settings and configurations.
- Windows Key + Tab: This shortcut opens the Task View, enabling you to switch between different virtual desktops or applications.
- Windows Key + E: This shortcut opens the File Explorer, giving you quick access to your files and folders.
General Keyboard Shortcuts
In addition to the Windows-specific shortcuts, there are standard keyboard shortcuts that you can use across different applications and operating systems. These include:
- Ctrl + C and Ctrl + V: These shortcuts are used for copying and pasting content, respectively. They are incredibly useful when transferring text, images, or other data between documents or applications.
- Ctrl + Z and Ctrl + Y: These shortcuts are for undoing and redoing actions, respectively. They are handy when you need to reverse a mistake or repeat a previous action.
- Ctrl + A: This shortcut selects all items in a document or window, saving you time when you need to select large amounts of text or multiple files.
- Alt + Tab: This shortcut allows you to switch between open applications, making it easy to navigate between different programs without using your mouse.
- Ctrl + Arrow Keys: This shortcut combination has various functions depending on the application. For example, in the Start menu, it resizes the menu, while in a text editor, it moves the cursor to the beginning of a word or paragraph.
By utilizing these keyboard shortcuts, you can streamline your workflow, improve efficiency, and reduce the time spent navigating with a mouse or touchpad. Whether you're connecting a Toughbook to a monitor or simply optimizing your daily tasks, keyboard shortcuts are a powerful tool to enhance your computing experience.
Hooking Up Sega Genesis Classic to a Signage Monitor
You may want to see also
Frequently asked questions
First, shut down your Toughbook and locate the VGA video port on the back of the device. Connect the VGA cable from the monitor to the video output port on the Toughbook. If your monitor has a DVI cable, you will need a DVI female to VGA male adapter. Once connected, turn on both devices and press the "Fn" and "F3" keys simultaneously to toggle between the Toughbook's display and the external monitor.
The Panasonic Toughbook CF-53 model includes an HDMI output. Simply connect the HDMI cable to the device and the monitor, and your operating system should automatically detect the monitor.
If your external monitor is not displayed, try waiting a few minutes with the device disconnected from the internet. If this doesn't work, right-click C:/util/drivers/dlink/pinstall and select "Run as administrator". After the command prompt window disappears, restart your device and the external monitor should be displayed.
Connecting your Toughbook to a monitor can provide a larger screen size, improved resolution, dual-screen functionality, better ergonomics, enhanced performance, and increased longevity of your Toughbook.


