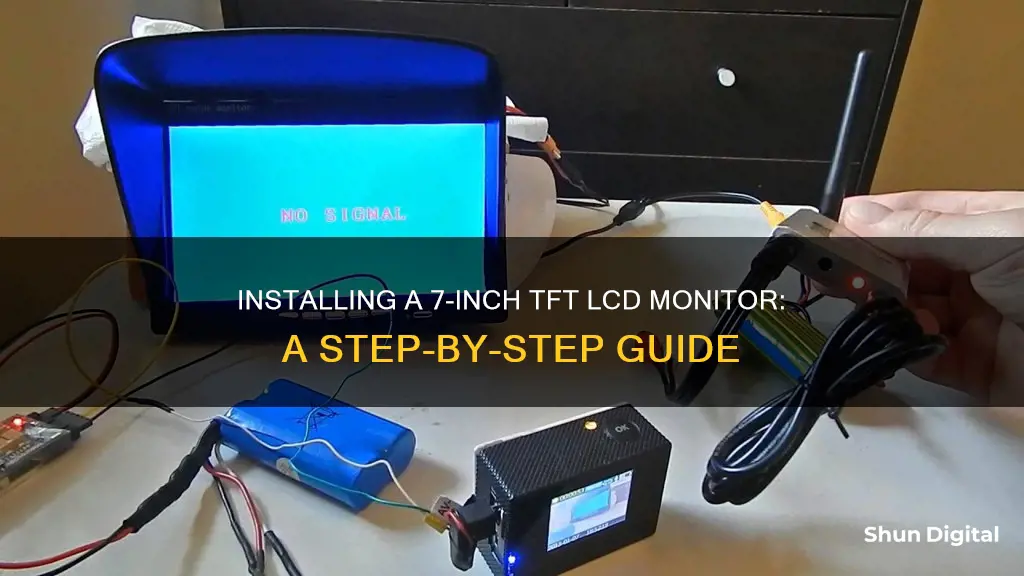
If you're looking to install a 7-inch TFT LCD monitor, you're likely considering improving your vehicle's safety features. TFT LCD monitors are often used as rear-view or backup cameras, providing a clear display of what's behind your vehicle. They typically come with features like night vision and waterproof capabilities, making them ideal for reversing or parking in low-light or wet conditions.
While some monitors may be easier to install than others, it's important to carefully follow the instructions provided with your specific model. You'll also need to consider how you want to power the monitor, whether from the cigarette lighter, backup light circuit, or another power source.
Overall, a 7-inch TFT LCD monitor can be a valuable addition to your vehicle, enhancing visibility and making manoeuvring in tight spaces much safer.
What You'll Learn

How to install a 7-inch TFT LCD monitor for a rearview camera
To install a 7-inch TFT LCD monitor for a rearview camera, you will need to follow these steps:
Firstly, decide on the type of rearview camera you want. There are generally three types of backup cameras available on the market: surface-mounted, flush-mounted, and license-mounted. Surface-mounted cameras are installed on any flat surface, usually high up for an improved rear view. Flush-mounted cameras are installed through a hole in the body of the vehicle and are level with the road, providing a clean look. License-mounted cameras are fixed to the license plate, making installation easy, but if your plate is off-center, your view will also be off-center.
Next, consider the field of view of the camera. The bigger the sensor of the camera, the better the picture quality, especially in low-light conditions. You should also look for a camera with a wide field of view; 90 degrees is the minimum you should accept.
Now, onto installing your 7-inch TFT LCD monitor. This type of monitor usually comes with a dashboard or surface mount. You can install the monitor by clipping it onto your existing rearview mirror, or you may need to drill holes and feed wires through, depending on the model. The monitor should come with a power cable that you will need to connect to your vehicle's power source. The blue wire should be connected to your reverse light power so that the monitor turns on automatically when you put the car in reverse. You will also need to connect the monitor to your camera using an RCA cable.
Finally, test that the monitor and camera are working correctly. When you put your car in reverse, the monitor should automatically display the feed from the rearview camera. You may also be able to turn on the monitor manually using a remote control or touch buttons.
Some monitors will also have additional features, such as brightness and contrast controls, and the ability to connect to other devices like DVD players.
Uncover Hidden Internet Monitors: A Comprehensive Guide
You may want to see also

Connecting the monitor to a power source
To connect your 7-inch TFT LCD monitor to a power source, you will need to identify the power input cable. This is usually a red wire, which is the standard colour for positive voltage. You will also need to identify the ground wire, which is typically black. These wires will need to be connected to a power source, such as the car's fuse box or cigarette lighter.
If you are connecting the monitor to a car's fuse box, you will need to locate the fuse box and identify a fuse that is connected to the car's electrical system. This is usually a fuse that is labelled as being for the radio, interior lights, or another accessory. Once you have identified the correct fuse, you will need to connect the power input cable from the monitor to that fuse. This can be done by splicing into the fuse with a fuse tap or by connecting directly to the fuse box with a fuse add-a-circuit.
If you are connecting the monitor to a cigarette lighter, you will need to purchase an adapter that plugs into the cigarette lighter and provides a power outlet. These adapters are available at most auto parts stores and online retailers. Once you have the adapter, simply plug it into the cigarette lighter and connect the power input cable from the monitor to the adapter.
It is important to note that connecting the monitor directly to the car's electrical system may drain the battery if the car is not driven regularly. To avoid this, you can connect the monitor to a power source that is only active when the car is on, such as the fuse for the accessory or ignition.
Additionally, some monitors may have a blue wire which is used to trigger the monitor to turn on when the car is in reverse. This wire can be connected to the reverse light circuit to automatically turn the monitor on when the car is in reverse.
When connecting the monitor to a power source, it is important to follow all safety precautions, such as disconnecting the car battery before making any connections and ensuring that all connections are secure and insulated to prevent short circuits.
Understanding Monitor Pixel Sizes: 1920x1080 Resolution Explained
You may want to see also

Setting up the monitor's display
Step 1: Positioning the Monitor
The first step is to decide on the placement of your 7-inch TFT LCD monitor. This can vary depending on your vehicle and personal preference. Some common locations include mounting it on the dashboard, attaching it to the windshield, or integrating it with the rearview mirror. Consider factors such as visibility, safety, and ease of installation when making your decision.
Step 2: Power Connection
Once you've determined the monitor's location, it's time to establish a power source. The monitor typically requires a 12V power supply, which can be obtained from the vehicle's electrical system. Identify a suitable power source, such as the fuse box or a cigarette lighter plug, and connect the monitor's power cable accordingly. Ensure that the power cable is securely attached and routed neatly to avoid any potential hazards.
Step 3: Video Input
The next step is to establish the video connection between the monitor and your chosen video source. This could be a rearview camera, a DVD player, or another device. Use the appropriate video cable, typically an RCA cable, to connect the video output of the source device to the video input on the monitor. Ensure that the connections are secure and colour-coded correctly (yellow for video).
Step 4: Display Settings
After establishing the power and video connections, it's time to adjust the display settings for optimal viewing. This may include adjusting the brightness, contrast, colour, and sharpness to your preference. Refer to the monitor's manual for specific instructions on how to access and adjust these settings. Additionally, if your monitor has multiple video inputs, you may need to select the correct input source to display the desired video feed.
Step 5: Test and Fine-Tune
Finally, it's essential to test the monitor's display to ensure everything is functioning correctly. Turn on the power source and the video source, then observe the monitor's display. Check for clarity, colour accuracy, and responsiveness. Make any necessary adjustments to the display settings or cable connections to fine-tune the viewing experience.
Remember to consult the installation manual or seek guidance from a professional if you encounter any challenges during the installation process.
Expanding Your View: Four Monitors with the Asus G74SX-DH72
You may want to see also

Mounting the camera
To mount the camera for your 7-inch TFT LCD monitor, you can follow these steps:
Firstly, decide on the location for your camera. A common location is on the license plate, as mentioned in several reviews. This location provides a clear view for the camera and is easily accessible for installation. However, you can also choose to mount the camera above the license plate or on the rear of your vehicle, depending on your preference and vehicle design.
Once you've decided on the location, gather the necessary tools and materials. You will need a drill, screws, and any additional mounting hardware that came with your camera. Some cameras may have adhesive strips, while others may require you to purchase mounting brackets separately.
Before drilling, clean the surface and ensure it is free of dirt and debris. This will ensure a strong and secure bond between the camera and the mounting surface. Carefully drill holes at the marked locations, being mindful of any wires or components behind the surface.
Next, attach the camera to the mounting bracket or adhesive strip, following the instructions provided by the manufacturer. Secure the camera in place by tightening the screws. Ensure that the camera is firmly attached and won't move or vibrate during driving.
Finally, connect the camera to the power source and test it to ensure it is functioning properly. You may need to connect it to the reverse light circuit or another power source, depending on your setup. Adjust the camera angle as needed to ensure it captures the desired field of view.
By following these steps, you can securely mount the camera for your 7-inch TFT LCD monitor, ensuring a clear view and easy installation.
Removable Stand on Asus VG245H Monitor: Is It Possible?
You may want to see also

Testing the monitor and camera
Monitor Testing:
- Check Power and Cable Connections: Ensure that the monitor is switched on. Some monitors have multiple power buttons or switches, so confirm that all are turned on. Check for any loose or unplugged power cables. Also, verify that all cable adapters are securely connected.
- Adjust Brightness and Contrast Settings: Increase the monitor's brightness and contrast settings to maximum. If the display is too dark, you may not be able to see any information being shown.
- Test with a Different Monitor: If your monitor is still not displaying anything, try connecting a different working monitor to your system. If the new monitor doesn't work either, there may be an issue with your computer, such as a disconnected or faulty video card.
- Test with a Known Working Cable: If the problem persists, test your original monitor with a data cable that is known to work. If this doesn't solve the issue, it's likely that the monitor itself needs to be replaced.
Camera Testing:
- Check Power and Connections: Ensure the camera is receiving power and all cables are securely connected.
- Test Camera Output: Check if the camera is outputting any video tracks. If not, there may be a technical issue or the camera could be defective.
- Lighting Conditions: Evaluate the lighting conditions. If the room is too dark, turn on additional lights or adjust the brightness of the webcam's LED lights. If the image appears too bright, adjust the lighting in the room accordingly.
- Image Quality: Assess the image quality by checking for issues such as invalid aspect ratio, low resolution, or poor colour reproduction.
- Frame Rate: Check the frame rate (FPS) of the camera. A low FPS can cause video lags, so ensure your system is not overloaded.
- Field Testing: Take the camera outside the lab and test its performance in real-world conditions. Evaluate its autofocus capabilities, ergonomics, battery life, build quality, and weather protection.
- Video Testing: Record videos at the highest quality and utilise different colour profiles. Look for issues such as rolling shutter distortion or autofocus problems.
- Waterproofing: If your camera is advertised as waterproof, conduct tests to ensure its waterproofing capabilities. For example, you can expose it to rain or use it in wet conditions to see if it remains functional and dry.
- Compare with Other Cameras: If you have multiple cameras, compare their performances to identify any outliers.
By following these comprehensive testing steps, you can be confident that your 7-inch TFT LCD monitor and camera are installed and functioning correctly.
Disabling Your HP LCD Monitor: A Step-by-Step Guide
You may want to see also
Frequently asked questions
TFT stands for thin-film-transistor, a type of LCD (liquid-crystal display) screen that uses a thin-film transistor to improve image quality.
The installation process will vary depending on the make and model of your monitor, as well as your vehicle. However, some general steps include: connecting the power supply, mounting the monitor and camera, and connecting the video cables.
Some common issues include: poor image quality due to low-quality video cables, difficulty with grounding the system, and a lack of clear instructions for installation.
The power supply can be connected in a few different ways. You can connect it to the reverse light circuit in your vehicle, so the monitor only turns on when you are in reverse. Alternatively, you can connect it to the "key-on" hot lead from your fuse panel, so the monitor turns on when you start your vehicle.
To improve the grounding of your system, you can solder a large lug to the end of a heavy-gauge black wire and attach it to the negative battery cable or the truck body.


