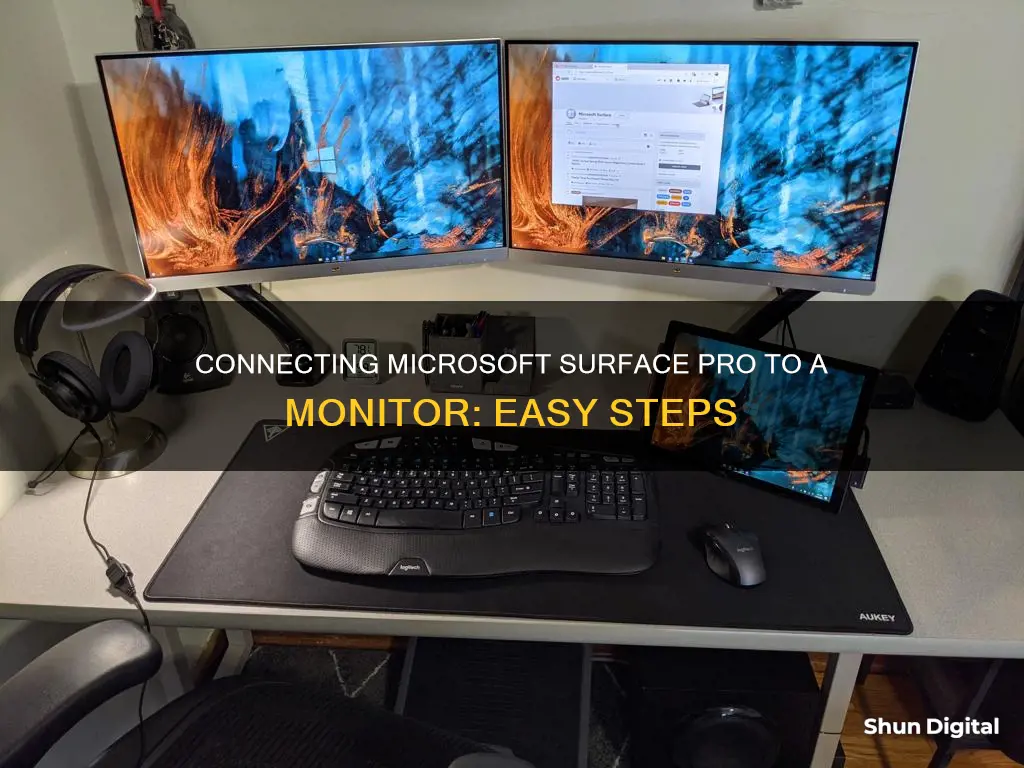
If you want to hook up your Microsoft Surface Pro to a monitor, you'll need a compatible cable and adapter. You can even connect to some displays wirelessly. The specific cable and adapter you need will depend on the type of video port on your monitor. For example, if your monitor has a DisplayPort, you will need a DisplayPort video cable and a Surface USB-C to DisplayPort adapter. If your monitor has an HDMI port, you will need an HDMI cable and a USB-C to HDMI adapter.
What You'll Learn

Connecting a Surface Pro 8 to a modern monitor
- Check the video ports on your monitor. Common ports include HDMI, DisplayPort, and VGA.
- Get the appropriate cable and adapter for your monitor. If your monitor has an HDMI port, you will need a USB-C to HDMI adapter and an HDMI cable.
- Plug one end of the video cable into the port on the monitor. Ensure that the monitor is turned on.
- Connect the other end of the cable to the video adapter.
- Connect the adapter to the USB-C port on your Surface Pro 8.
- Turn on your Surface Pro 8.
Your Surface Pro 8 should immediately detect the external monitor, and you can start using the second display.
Note: If you are connecting to a wireless display, you can use the Microsoft Wireless Display Adapter or connect wirelessly when Windows detects a nearby wireless display.
Choosing the Right Monitor Size for CAD Work
You may want to see also

Using a USB-C to HDMI dongle or adapter
To connect your Microsoft Surface Pro to a monitor using a USB-C to HDMI dongle or adapter, follow these steps:
Firstly, check that your Surface Pro has a USB-C port. The Surface Pro 7 and newer models have a USB-C port, while the Surface Pro 6 and older models use a Mini DisplayPort. You will also need to ensure that your monitor has an HDMI port, as modern monitors usually do.
Once you have confirmed that your Surface Pro has a USB-C port, you can purchase a USB-C to HDMI adapter or dongle. Microsoft offers its own Surface USB-C to HDMI adapter, which is HDMI 2.0 compatible and 4K-ready. However, there are also third-party options available that may be more cost-effective.
After acquiring the necessary adapter, follow these steps:
- Plug the USB-C end of the adapter into the USB-C port on your Surface Pro. The USB-C port is usually located on the right-hand side of the display.
- Take an HDMI cable and plug one end into the HDMI port on your monitor. The ports are usually labelled, so look for one labelled HDMI.
- Plug the other end of the HDMI cable into the larger end of the dongle or adapter.
- Turn on your monitor and Surface Pro. You should now get a signal, and your Surface display should be mirrored on the monitor.
- If needed, you can change the display settings by pressing the Windows Key + P on your keyboard. This will allow you to choose between "Duplicate", "Extend", or "Second Screen Only" options.
- If you want your display in a specific orientation, click its icon and drag it to the desired placement. You can also adjust additional settings such as resolution and scaling.
Using a USB-C to HDMI adapter or dongle is a straightforward way to connect your Microsoft Surface Pro to a monitor, allowing you to enjoy a bigger screen and improve your multitasking capabilities.
Triple Monitor Setups: Size and Configuration Guide
You may want to see also

Using a Surface Dock
The Surface Dock is a small hub that is compatible with every Microsoft Surface Pro since the Surface Pro 3. It gives your device a wider range of ports, including USB-A ports and a pair of Mini DisplayPort outputs (or USB-C display ports on the Surface Dock 2 and the Surface Thunderbolt 4 Dock).
- Put the Surface Dock on your desk and lay out any necessary cords or cables so that they are easily accessible.
- Plug the AC end of the dock power cord into a power source, then connect the other end into the power jack on the dock.
- If you want to use a wired network connection, connect a network cable to the Ethernet port.
- Connect your USB computer peripherals to the USB ports.
- Connect a video cable from your monitor to the Mini DisplayPort on your Surface Dock. If you are using the Surface Dock 2 or Surface Thunderbolt 4 Dock, connect the video cable to the USB-C port on the back. If your monitor cable doesn't have the correct connector, you will need to buy another cable or an adapter.
- Connect any audio accessories, such as wired speakers or headphones, to the dock's 3.5mm audio port.
- After setting up your workspace, connect the Surface Connect cable on the dock to your Surface.
- Your device will now charge and automatically connect to the accessories and peripherals connected to the Dock.
- After connecting your Surface and external monitor to the dock, you can choose what to display on each screen. Go to Start > Settings > System > Display, and then open Display settings.
- Choose one of the following options: Duplicate desktop on 1 and 2 (your screen appears on two screens); Extend desktop to this display (your screen is spread over two screens, and you can drag items between them); or Show only on __ (your screen appears on the selected screen, and the other screen is blank).
Note: If you are using a Surface Book or Surface Laptop Studio performance model, ensure that all accessories are removed, and the dock is connected to the original in-box power supply that came with the Surface Dock.
Monitoring Home Electricity Usage: Data Collection Methods
You may want to see also

Connecting to a single display
Connecting your Microsoft Surface Pro to a single display monitor is a straightforward process. The specific steps will depend on the model of your Surface Pro and the type of connection your monitor requires.
Surface Pro 7 or Newer
If you have a Surface Pro 7 or a newer model, you can connect your monitor using the USB-C port. You will need a USB-C cable and, if your monitor doesn't have a USB-C port, a USB-C adapter. The adapter you need will depend on the type of port your monitor has. For example, if your monitor has an HDMI port, you will need a USB-C to HDMI adapter, whereas a monitor with a VGA port will require a USB-C to VGA adapter.
Once you have the correct cable and/or adapter, connect one end to your Surface Pro and the other to your monitor. Ensure that your monitor is turned on, and your Surface Pro should immediately detect the second display.
Surface Pro 6 or Older
On a Surface Pro 6 or an older model, you will be connecting your monitor using the Mini DisplayPort. As with the newer models, you will need a cable and/or adapter that is compatible with your monitor. If your monitor has an HDMI port, for example, you will need a Mini DisplayPort to HDMI adapter and cable.
Again, once you have the correct cable and/or adapter, simply plug one end into your Surface Pro and the other into your monitor. Your Surface Pro should then immediately detect the second display.
Troubleshooting
If you are having problems with your setup, check that all cables are securely connected. You can also try disconnecting and reconnecting the adapter from your Surface Pro, and if that doesn't work, disconnect and reconnect the video cable from the adapter. If you are still having issues, try unplugging the USB-C connector from your Surface Pro, flipping it over, and plugging it back in. Finally, if none of these steps work, restart your Surface Pro.
Best Grand Caravan Models with Second-Row LCD Monitors
You may want to see also

Connecting to dual displays
For Surface Pro 7 and newer models, you can connect to dual displays using the USB-C port. You will need a compatible cable and adapter, such as a USB-C to HDMI or a USB-C to VGA adapter. Make sure to get a USB-C cable that supports data transmission and not just charging. You can also use third-party USB-C docks or hubs.
For Surface Pro 6 and older models, you can connect to dual displays using the Mini DisplayPort. You will need a Mini DisplayPort to HDMI or a Mini DisplayPort to VGA adapter. Make sure to get a Mini DisplayPort cable that has the correct connector, as the regular DisplayPort size will not fit in the Surface Pro 6 and older models.
Another option for connecting to dual displays is to use the Microsoft Surface Dock. The Surface Dock supports 3rd and 4th-generation Surface Pros, while the Surface Dock 2 supports 5th-generation and newer models, and the Surface Thunderbolt 4 Dock is designed for Pro 8/9. The Surface Dock provides a wider range of ports, including USB-A and Mini DisplayPort outputs.
To connect dual displays using the Microsoft Surface Dock:
- Power off your Surface Pro and connect it to the Dock.
- Plug in your monitors and connect the cables.
- On the Dock, you will see two ports next to the headphone jack. Connect one monitor to each port.
- Boot up your Surface Pro. It should automatically detect your monitors.
- Open the Windows menu and go to Settings > System > Display.
- Arrange the screen layout to match your physical setup by dragging and dropping the screens.
- Select each screen and adjust the resolution, orientation, and magnification as needed.
When connecting dual displays, it is recommended to use similar screen resolutions to prevent eye strain and enhance viewing quality. Additionally, make sure to manage the cords properly to avoid trip hazards.
Asus Monitor Warranty: Is It Transferable?
You may want to see also
Frequently asked questions
To connect your Microsoft Surface Pro to a monitor, you will need a compatible cable and adapter. The exact cable and adapter you need will depend on the type of video port on your monitor. Common video ports include HDMI, DisplayPort, and VGA.
To connect to a monitor with an HDMI port, you will need a USB-C to HDMI adapter and an HDMI cable.
To connect to a monitor with a DisplayPort, you will need a USB-C to DisplayPort adapter and a DisplayPort cable.
To connect to a monitor with a VGA port, you will need a USB-C to VGA adapter and a VGA cable.
The easiest way to connect your Microsoft Surface Pro to dual monitors is with a Microsoft Surface Dock. The Surface Dock has two Mini DisplayPort ports, allowing you to connect two monitors using DisplayPort to Mini DisplayPort cables.


