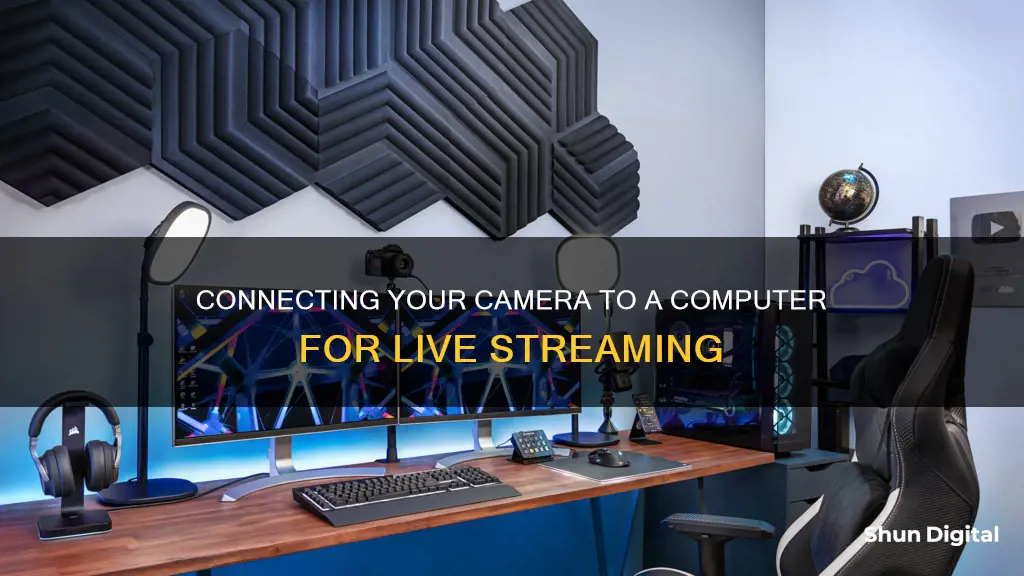
There are several ways to connect your camera to your computer for live streaming, including using a USB cable, an HDMI cable, a capture card, or a switcher. Each method has its own advantages and disadvantages, and the best option for you will depend on your specific camera model and your streaming setup.
Using a USB cable is often the simplest method, as many cameras offer USB webcam support built-in or through additional software. This allows for a direct connection between your camera and computer, and can provide a high-quality video feed.
Another option is to use an HDMI cable, which can transmit high-quality audio and video signals through a single cable. This method may require an adapter or capture device, especially if you're connecting to a computer with USB-C ports.
Capture cards are another way to connect your camera to your computer for live streaming. They take the video signal from your camera and convert it for digital streaming. There are various types of capture cards available, including external and internal options, and they can support different resolutions and frame rates.
Finally, a switcher can be used to connect your camera to your computer. Switchers offer additional features like sound mixing and special effects, which can enhance your live stream.
Each method has its pros and cons, and the best approach will depend on your specific camera, computer, and streaming requirements.
| Characteristics | Values |
|---|---|
| Camera Connection Type | USB, HDMI, SDI |
| Camera Types | DSLR, Mirrorless, Video, Webcam, Compact |
| Camera Brands | Canon, Nikon, Sony, Fujifilm, Panasonic, Logitech |
| Camera Accessories | Tripod, Microphone, Lighting |
| Software | Canon EOS Webcam Utility, Fujifilm X Webcam, Nikon Webcam Utility, LUMIX Tether for Streaming, Ecamm Live, OBS, Restream |
| Hardware | Elgato Cam Link 4K, Blackmagic Atem Mini, Magewell USB Capture HDMI, Blackmagic Design Intensity Shuttle |
What You'll Learn
![]()
Using a USB cable
To hook up your camera to your computer for live streaming using a USB cable, you will need to follow these steps:
Firstly, check if your camera has a USB port. Almost every digital camera has one, and you can connect it directly to your computer. Look for a USB-C port, as this is a good indicator of USB Video Class (UVC) support, which means you won't need extra software to connect your camera. If your camera does not have UVC support, you will need to download the relevant software for your camera.
Next, plug one end of a compatible USB data cable into your camera, and the other end into a USB port on your computer. Depending on your camera, you may need to select the appropriate USB mode (often called "Webcam" or "Tethering") either before or after this step. Consult your camera's manual for the specific instructions.
Now, launch your video meeting app or streaming platform of choice. In the preferences section, choose your connected camera as the video source. If you wish to use your camera's microphone as the audio source, you can select this option too. However, it is worth noting that most cameras have poor microphones, so you may want to consider using a USB microphone for better audio quality.
If you are using a camera without UVC support, you may need to download and install manufacturer software to make the connection. This software will allow you to make changes to your video settings and control your camera remotely. Examples of this include the Canon EOS Webcam Utility, Fujifilm's X Webcam app, and Sony's Imaging Edge Webcam software.
Eufy Camera Charging: Know When It's Fully Charged
You may want to see also
![]()
Using a capture card
A capture card is a device that allows you to record and stream video in real time without losing quality. It is placed between your camera and the software on your computer, acting as a "middle man" and translating the input so that you can grab the better video quality from your camera.
There are two main types of capture cards: external capture cards and internal capture cards. External capture cards connect to your computer via a USB cable, while internal capture cards attach to your computer's motherboard using a PCIe expansion card.
When choosing a capture card, consider your needs and your setup. If you require high-quality streaming and recording, an internal card that can send data over PCIe lanes may be the best option. However, if you want more mobility and the ability to move between different setups, an external card might be more suitable. Additionally, ensure that your capture card is compatible with your camera and computer.
- Plug the first HDMI cable into the HDMI IN port of the capture card.
- Plug the other end of the first HDMI cable into the HDMI OUT port of your camera.
- Plug the second HDMI cable into the HDMI OUT port on the capture card.
- Plug the other end of the second HDMI cable into the HDMI IN port of your display device (monitor or TV).
- Connect the capture card to your computer using a USB cable.
By following these steps, you will be able to connect your camera to your computer for live streaming, utilising the benefits of a capture card to achieve high-quality video output.
Mastering the Note 9 Camera: Focus Control Explained
You may want to see also
![]()
Using a switcher
When choosing a switcher, opt for one with an HDMI interface, as this will enable you to connect your camera and begin streaming instantly. Additionally, select a switcher that suits your budget and requirements, considering factors such as the number of inputs and outputs, ease of use, video quality, effects, and power source. For instance, if you require multiple camera angles, ensure your switcher has enough ports to accommodate all your cameras.
You can connect your camera to the switcher using an HDMI cable. If you are using a microphone, you can connect it to either the camera or the switcher, depending on your preference, as the switcher has a mixing function and HDMI input audio.
Once your camera is connected to the switcher, you can either push the stream directly through the switcher to your live room or use a USB cable to link the switcher to your computer. This will allow you to transmit the camera screen and the audio recorded by the microphone to your computer effortlessly.
- Roland Professional V-1HD: A compact, professional-quality switcher with a built-in audio mixer, PiP, and green-screen effects. It is easy to operate and ideal for beginners, but it is priced higher than entry-level options.
- FEELWORLD LivePro L1 Multi Camera: A budget-friendly and user-friendly switcher with four HDMI inputs and a USB 3.0 output. While it has limited features, it can be connected to a computer for access to more functions.
- BlackMagic Design ATEM Mini Pro: A small, lightweight, and user-friendly switcher with four inputs and a built-in encoder, perfect for independent streamers or small productions. It is recognised by most streaming software and hard drives, allowing for easy editing and saving of broadcasts.
The Power of Camera Focus in UE4: Why Isn't it Default?
You may want to see also
![]()
Using a capture device
There are two main types of video capture devices: USB devices and PCI Express (PCIe) devices. USB devices are external and require their own software to work, while PCIe devices are internal and support plug-and-play. PCIe devices are generally preferred as they are easier to use and don't require additional drivers. They usually connect through the PCIe adapter slot inside a desktop or rack system.
When choosing a capture device, it's important to consider the resolution and frame rate your camera supports, as well as the pass-through resolution. If you plan to record or stream in higher resolutions like 4K, you'll need a capture device that can handle those standards. Additionally, look for devices that support high dynamic range (HDR) to future-proof your setup.
To set up a capture device, you'll need the correct cables. For a USB external capture device, you'll need a USB cable and two HDMI cables. Plug one HDMI cable into the input port on the capture device and the other end into the output port of your camera. Then, take the second HDMI cable and plug it into the output port of the capture device, and the other end into the input port of your display device. Finally, use the USB cable to connect the capture device to your computer.
For an internal PCIe capture device, you'll need an open PCIe slot on your motherboard and two HDMI cables. Insert the capture device into the PCIe slot, then connect one HDMI cable from the input port of the capture device to the output port of your camera. Take the second HDMI cable and connect it from the output port of the capture device to the input port of your display device.
Once your capture device is set up, you'll need to install the necessary software and drivers. Many capture devices come with proprietary software, but you can also use third-party programs like OBS Studio to enhance your streaming and recording capabilities.
Japan-Made Cameras: A Comprehensive Brand Guide
You may want to see also
![]()
Using broadcasting software
Broadcasting software is an essential component of live streaming, enabling you to create professional-looking broadcasts with relative ease. This software allows you to mix multiple camera sources, add graphics and text overlays, and stream to various platforms. Some popular options include OBS Studio, vMix, and Wirecast.
When choosing broadcasting software, consider your specific needs and budget. Some software may offer more advanced features but require a subscription, while others are free and open-source. Additionally, ensure that the software is compatible with your operating system and desired streaming platforms.
- Select and install the broadcasting software of your choice. Popular options include OBS Studio, vMix, Wirecast, and XSplit Broadcaster.
- Connect your camera to your computer:
- You can use a USB cable to connect your camera to your computer. However, this method may result in lower image resolution and frame rate, and it does not support audio transfer.
- Alternatively, you can use a capture card, which offers higher quality and supports audio input. Capture cards can be external (USB) or built-in (PCIE) and typically support SDI or HDMI interfaces.
- If you have a switcher, you can connect your camera to its HDMI interface. Switchers offer additional features like sound mixing and special effects, and they usually have streaming capabilities.
Set up your audio:
- Ensure you have a good microphone to capture clear audio. You can connect the microphone directly to your camera or the switcher, depending on your setup.
- If using a capture card or USB connection, you may need to use a separate audio interface or microphone connected directly to your computer, as audio may not be transferred through these methods.
Configure your streaming platform:
- Choose a reliable online video platform (OVP) that supports live streaming and offers the features you need, such as browser-based streaming and privacy/security options.
- Set up your live channel on the platform, including a descriptive title and keywords to help viewers find your stream.
Test your setup:
Before going live, conduct a test run to ensure that your video and audio are working correctly. Pay close attention to lighting and audio quality and make any necessary adjustments.
Start streaming:
Once you are satisfied with your test run, it's time to go live! Launch your broadcasting software, ensure your camera and audio are connected and functioning, and click the "Start Streaming" button on your chosen platform.
By following these steps and choosing the right broadcasting software for your needs, you can easily set up your camera for live streaming and create engaging, professional-looking broadcasts.
Focusing Your 35mm Camera: A Beginner's Guide to Sharp Shots
You may want to see also
Frequently asked questions
You will need a camera with a USB or HDMI port, a compatible USB data cable, and a computer with a USB port. Additionally, you may require a video capture adapter or capture card if your camera uses HDMI.
First, download any necessary software or drivers for your camera and computer. Then, connect your camera to the computer using the USB cable. Ensure the correct USB mode is selected on your camera, such as "Webcam" or "Tethering". Launch your live streaming or video conferencing software and select your camera as the video source in the preferences section.
Using a camera, such as a DSLR or mirrorless camera, can significantly improve video quality. It offers better low-light performance, manual settings control, and the ability to capture a blurred background. Additionally, you can utilise camera accessories such as external microphones, teleprompters, and portable lights to enhance your live stream.