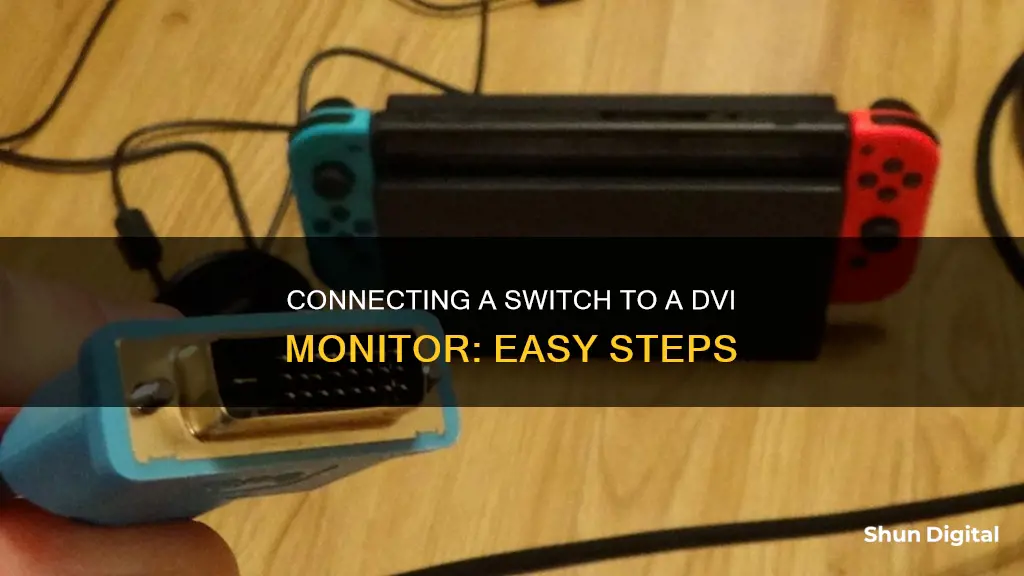
If you're looking to hook up a Nintendo Switch to a DVI monitor, you'll need a few things. First, you'll need a Nintendo Switch dock and an AC adapter (model No. HAC-002). You'll also need an HDMI cable and, if your monitor doesn't have an HDMI port, an HDMI-to-DVI adapter or cable. Once you have all the necessary components, simply connect the Switch to the dock, plug the AC adapter into the wall, and connect the HDMI cable to the dock and the monitor. If your monitor doesn't have an HDMI port, use the HDMI-to-DVI adapter or cable instead. Finally, turn on the monitor and select the correct HDMI input. And that's it! You should now be able to enjoy your Nintendo Switch on a larger screen.
| Characteristics | Values |
|---|---|
| Number of ways to connect Switch to an external monitor | 2 |
| First way | Using the HDMI port on the NS dock |
| Second way | Using only the NS console with a USB Type-C video cable |
| Major IO port of Switch console | USB Type-C port |
| Use of dock | Not required if using the second way to connect Switch to a large screen |
| Connection via HDMI | Turn on the NS console and place it into the dock, then plug the AC adapter of the dock. Connect the HDMI cable to the dock and the other end to the external monitor |
| Connection via USB Type-C | The USB-C port on Switch supports PD fast charging and DisplayPort (Alt mode) video output. When connecting Switch to an external monitor via USB Type-C, the monitor's USB-C port must support DP Alt mode and supply enough power to the Switch console |
What You'll Learn

Connect the Switch to the dock
To connect your Nintendo Switch to a DVI monitor, you will need to use the Dock device provided with the gaming console. This will allow you to connect your Nintendo Switch to any device with a DVI port, such as a PC monitor.
- Open the back cover of your Nintendo Switch dock.
- Connect the Switch's AC adapter to the dock. The AC adapter is model No. HAC-002 and has a USB Type-C plug. Insert this into the top terminal of the dock labelled "AC ADAPTER".
- Connect the other end of the AC adapter to a power outlet.
- Connect one end of an HDMI cable into the bottom terminal of the dock labelled "HDMI OUT".
- If your monitor does not have an HDMI port, you will need to use an HDMI to DVI adapter or an HDMI to DVI cable. Connect the HDMI cable to the adapter and then plug the adapter into the DVI port on your monitor, or connect the HDMI to DVI cable directly to the DVI port.
- Close the back cover of the Nintendo Switch dock.
- Remove the left and right Joy-Con controllers from the console.
- Position the console so that the console screen faces in the same direction as the front panel on the dock, then insert the console into the dock.
Once you have completed these steps, your Nintendo Switch should be successfully connected to the dock, and you can begin playing on your DVI monitor.
Monitoring Router Performance: A Step-by-Step Guide
You may want to see also

Connect the dock to the monitor
To connect your Nintendo Switch to a DVI monitor, you will need a dock, an HDMI connection cable, and an HDMI to DVI adapter or an HDMI to DVI cable if your monitor doesn't have an HDMI port.
Firstly, open the back cover of your Nintendo Switch dock. Then, connect the Switch's HDMI connection cord into the connection port labelled 'HDMI OUT'. If you are using an HDMI to DVI cable, plug it into the 'HDMI OUT' connection port and take the rear cover off. If you are using a modern monitor, connect the other end of the HDMI connection cable to the 'HDMI IN' connection port on the rear side of the monitor. If your monitor doesn't have an HDMI port, use the HDMI to DVI adapter. Plug the HDMI cable of the Nintendo Switch into the HDMI end of the adapter, and the other end of the cable into the DVI port at the rear of your monitor. If you are using an HDMI to DVI cable, plug the other end of the cable directly into the DVI port of your monitor.
Once your gaming console is docked, separate the joystick controllers from your Nintendo Switch by pressing the release button on the console at the rear of the joystick controllers, then switch on the console. Now, connect your monitor to the main power source and turn it on.
Your Nintendo Switch should now be connected to your DVI monitor. If you can't see anything on your monitor, check the cable connections and ensure the dock is placed properly.
Finding Faulty Silverado TPS Monitors: A Step-by-Step Guide
You may want to see also

Power the monitor
To power the monitor, you will need to connect the monitor's power cable to a power source. This is usually done by plugging the power cable into a wall outlet. Once the power cable is connected, you can turn on the monitor by pressing the power button, usually located on the front or side of the monitor.
If you are connecting a Nintendo Switch to a monitor, you will also need to connect the Nintendo Switch dock to a power source. This is done by connecting the USB Type-C plug from the Nintendo Switch AC adapter into the top terminal of the dock labelled "AC ADAPTER", and then plugging the other end of the AC adapter into a wall outlet.
It is important to ensure that all cables are securely connected and that the power sources are turned on before proceeding to the next steps of setting up your monitor.
In addition, when connecting a Nintendo Switch to a monitor, it is important to note that the Switch console must be charging for uninterrupted operation when using the TV mode. This can be done by connecting the AC adapter of the dock and ensuring that the console is charging before beginning gameplay.
Blind Spot Monitoring: How It Improves Your Driving Experience
You may want to see also

Connect the Switch to the monitor
To connect your Nintendo Switch to a DVI monitor, you will need a PC monitor with its power cable, an HDMI cable, and either an HDMI-to-DVI adapter or an HDMI-to-DVI cable if you have an older monitor without an HDMI port.
Firstly, power off your monitor and disconnect any other cables connected to it. Then, locate the DVI port on the back of the monitor and plug in one end of the DVI cable. If your monitor is older and does not have an HDMI port, you will need to use an HDMI-to-DVI adapter or cable.
Next, connect the other end of the HDMI cable to the HDMI port on the back of your Nintendo Switch dock. If you are using the adapter, plug the HDMI cable into the HDMI end of the adapter and connect the other end of the adapter to the DVI port on the monitor.
Once the cables are connected, power on the monitor and press the "Source" or "Reset/DV Mode" button until "DVI" appears on the screen. Now, power on your Nintendo Switch and place it into the dock. Ensure that the console screen faces the same direction as the front panel on the dock.
Finally, turn on your TV or monitor and select the correct HDMI input. Your Nintendo Switch should now be successfully connected to your DVI monitor.
If you are using a modern monitor with an HDMI port, you can also connect your Nintendo Switch directly to the monitor without the need for an adapter or extra cables. Simply connect one end of the HDMI cable to the HDMI port on the monitor and the other end to the HDMI port on your Nintendo Switch dock.
Hooking Up Multiple Monitors to Your GeForce GTX 1080
You may want to see also

Check the monitor's display
To check the monitor's display, you should first ensure that the monitor is powered on. If you are using a Nintendo Switch, the console must be charging for uninterrupted operation.
If you are using a modern monitor, connect the other part of the Switch's HDMI connection cable to the HDMI IN connection port, which is present on the rear side of the monitor. If your monitor does not have an HDMI port, you should use an HDMI-to-DVI adapter. Plug the HDMI cable of the Nintendo Switch into the HDMI END connection port of the adapter, and the other part of the cable into the DVI port at the rear of your monitor. If you are using an HDMI-to-DVI cable, plug the other part of the cable directly into the DVI port of your monitor.
If you are using a Nintendo Switch, separate the Joy-Con controllers from the console by pressing the release button on the rear side of the controllers. Then, switch on the console.
If you are connecting a PC to a monitor, you should ensure that the correct video source is selected. For example, if you are using the HDMI 1 video connector on the monitor, set the source to HDMI 1.
If you are using a Nintendo Switch, connect your monitor to the main power source using the monitor's power cord and turn on the monitor.
Once you have completed these steps, your Nintendo Switch should be successfully connected to your monitor. If you cannot see anything on your monitor, check the cable connection between the gaming console and the monitor, and cross-check that the dock is placed properly with the correct connection.
Blind Spot Monitoring: Where Are the Sensors Located?
You may want to see also
Frequently asked questions
You will need a Switch console, a Switch dock, a Switch AC adapter (model No. HAC-002), an HDMI cable, and a DVI monitor.
First, open the back cover of the Switch dock. Next, connect the USB Type-C plug from the Switch AC adapter into the top terminal of the dock labelled "AC ADAPTER", then connect the other end of the AC adapter to a wall outlet. Then, connect one end of the HDMI cable to the bottom terminal of the dock labelled "HDMI OUT", and connect the other end to the DVI monitor.
Yes, remove the left and right Joy-Con controllers from the console and insert the console into the dock, making sure the console screen faces in the same direction as the front panel on the dock.
Close the back cover of the dock. The console screen will shut off while docked. Turn on the DVI monitor and select the correct HDMI input.
Yes, you can connect the Switch console directly to the DVI monitor using a USB Type-C video cable. However, the monitor's USB-C port must support DP Alt mode and be able to supply enough power to the Switch console.


