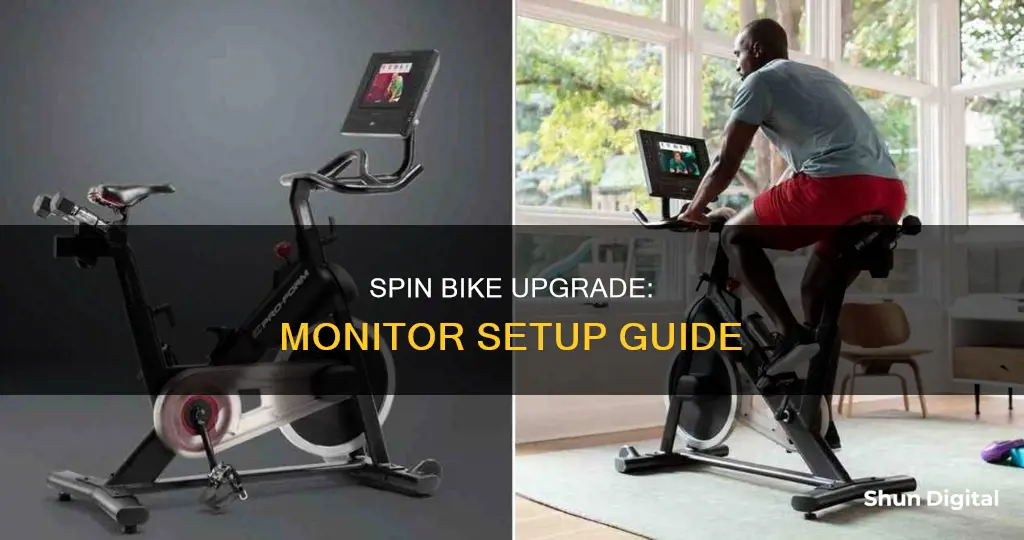
Adding a monitor to a spin bike can be a great way to enhance your indoor cycling experience. While some spin bikes come with built-in computers that display metrics like cadence, speed, and distance, others may not have these features. If you want to hook up a monitor to your spin bike, there are several options available. You can choose to use a simple speedometer or bike computer, which can be purchased online or at sporting goods stores. These devices typically track metrics such as speed, distance, and heart rate. Alternatively, you can explore more advanced options, such as power meters or virtual apps like Zwift, which require additional hardware such as sensors and a device to run the app. Keep in mind that adding a monitor to your spin bike may involve some DIY skills for mounting the hardware, and you may need to consider your budget when choosing the right solution for your needs.
| Characteristics | Values |
|---|---|
| Purpose | To track cycling data such as duration, distance, and watts |
| Hardware | Power meter pedals, Bluetooth speed/cadence sensors, bike computer apps, speed sensors, heart rate monitors |
| Software | Virtual apps like Zwift or MyWhoosh run from an iPad or laptop |
| Cost | Power meter pedals are expensive; Bluetooth speed/cadence sensors are cheaper ($30-$40 for generic models) |
| Mounting | Requires attaching hardware to the bike, such as mounting a screen or using a VESA mount |
| Data Transfer | Bluetooth, ANT+, USB |
What You'll Learn

Using a power meter and virtual app
To use a power meter and virtual app with your spin bike, you will need to purchase some additional hardware and choose a suitable app.
Hardware
Firstly, you will need to purchase a power meter. Unfortunately, power meters can be quite expensive, with one source stating that they are unlikely to be within a $50 budget. You could instead opt for a cheaper pair of Bluetooth speed and cadence sensors, which can be purchased for $30-40. These sensors can be attached to your bike wheel or frame and will send data to a computer.
Apps
There are a variety of virtual apps available for spin bikes, with options to suit different needs and budgets. Here are some of the most popular apps:
- Zwift: Zwift is the market leader for indoor cycling apps and offers a highly social experience with tons of racing, group workouts, and free riding through a vast virtual world. It also has a companion app that allows you to chat with other riders. However, it may not be the best choice for those who prefer training alone, as the training plans require a high level of understanding.
- TrainerRoad: TrainerRoad is the opposite of Zwift, focusing on solo training with no visual distractions. It uses machine learning and data analysis to guide you through tailored workout plans to meet your goals. It is more expensive than Zwift, with a monthly price of $19.95.
- Wahoo SYSTM: This app covers high-intensity cycling-specific content as well as a variety of other workouts, including running, strength, mobility, swimming, and yoga. It offers immersive video footage and includes off-bike training such as yoga and strength training.
- FulGaz: FulGaz focuses on providing a realistic riding experience, using real-world ride footage and advanced physics modelling to tailor resistance based on your effort. It has a broad catalogue of real-world footage from locations such as Alpe D'Huez to Sunshine Canyon.
- Rouvy: Rouvy is similar to FulGaz, offering real-world footage of outdoor routes. It also includes augmented reality superimposed avatars, so you can see other people riding in the virtual world with you.
- BKool: BKool allows users to upload their own ride footage, providing a unique and personalised experience. However, the video quality can be inconsistent, with some low-quality and blurry videos.
- MyWhoosh: MyWhoosh is a free app that offers indoor cycling with a focus on racing, including prize pots for winners. It is based in the UAE and sponsored by the UAE Team Emirates pro team.
- Peloton: Peloton requires the purchase of a Peloton bike, but it offers a vast catalogue of engaging workouts, both pre-recorded and live, as well as running, strength, and yoga classes.
Setup
Once you have chosen and purchased your hardware and app, you will need to set up your equipment. This may involve attaching sensors to your bike and connecting them to your chosen device (e.g. iPad, laptop, or TV). You may also need to calibrate your power meter with your app before starting your indoor training.
By combining a power meter or speed and cadence sensors with a virtual app, you can enhance your indoor cycling experience and track important metrics such as duration, distance, and watts.
FirePro W9100: Monitor Connection and Compatibility
You may want to see also

Mounting a large monitor
Planning and Preparation:
Before you begin, it's important to check if your monitor has four evenly spaced mounting holes at the back that match the VESA (Video Electronics Standards Association) standard. The VESA standard for computer monitors is typically 75 x 75 mm or 100 x 100 mm. Ensure that your monitor is VESA-compliant before purchasing a mount.
Choosing a Mount:
There are two main types of mounts to choose from:
- Desk Mounts: These mounts clamp onto your desk and are usually cheaper and easier to install. They don't require drilling into walls, making them a good option for renters. However, they do take up desk space and require a sturdy desk to support the weight of the monitor.
- Wall Mounts: Wall mounts provide more flexibility in monitor placement and save desk space. However, they are more involved to install and require additional tools, including a drill. You'll also need to ensure your desk is positioned against a wall.
Installation Process:
The exact installation steps will depend on the type of mount and model you choose, but here's a general overview:
- Assemble the mount: Follow the instructions provided with your mount to assemble the different components.
- Attach the mount to the desk or wall: For a desk mount, securely attach the clamp to the desk. For a wall mount, locate a wall stud, mark the drilling holes, drill the holes, and then screw the mount into place.
- Remove the monitor stand: Detach the monitor stand by following the specific instructions for your monitor.
- Attach the VESA mount to the monitor: Use screws or bolts to secure the VESA mount to the back of your monitor.
- Connect the monitor to the mount: Slide or attach the monitor to the plate or arm of the mount, and secure it with screws or bolts.
- Manage cables: Use cable clips to neatly route power and display cables along the mount and down to your power source.
Example Mounts:
- Huanuo Single Monitor Mount ($28) is a good option for a single desk mount.
- WALI Wall Mount ($14.99) is a basic yet affordable option for a single wall mount.
- Huanuo Dual Monitor Wall Mount ($56.99) is a suitable choice if you plan to use two monitors.
By following these steps and choosing the right mount for your setup, you'll be well on your way to enjoying a large monitor mounted on your spin bike!
LCD Monitors and Cancer: Is There a Link?
You may want to see also

Connecting to Zwift
To connect your spin bike to Zwift, you will need a smartphone and a Zwift account. You will also need fitness equipment with ANT+ Link and a Viiiiva heart rate strap from 4iiii.
If your spin bike doesn't capture and transmit cadence, you will need to fit the Wahoo Speed and Cadence sensors to your spin bike. You could also install power pedals like Garmin's Vector 3, which will give you the ability to transmit power.
Zwift Insider recommends using a power meter to ensure accuracy. This is because a stationary bike has a set resistance, and your speed increases with your wattage via gear changes and cadence. On a spin bike, speed is dependent only on cadence (no gears). Therefore, if you maintain the same cadence, you will maintain the same speed and thus the same Zwift estimated power, regardless of the resistance.
Zwift Insider suggests that the only way to have accurate zPower is to have a spindown test within Zwift. Set the stationary bike resistance to where you want to ride, do a spindown to determine resistance, then keep the resistance at that setting for the entire ride, using only cadence to make changes in power.
If you are looking for a more budget-friendly option, you can get a set of speed/cadence sensors for $30-40 on Amazon.
LCD Monitors and Radiation: Is There a Risk?
You may want to see also

Using a cadence sensor
Choose the Right Cadence Sensor
First, you need to select an appropriate cadence sensor for your spin bike. There are many options available on Amazon, such as the Wahoo RPM Cycling Cadence Sensor, Garmin Cadence Sensor 2, or the Magene Speed/Cadence Sensor. These sensors typically connect to your bike and track metrics like RPM and speed.
Install the Cadence Sensor
Once you've purchased your sensor, it's time to install it on your spin bike. The exact process may vary depending on the sensor model, but typically, you'll need to attach a magnet to a moving part of the bike, such as the wheel for speed and distance or the crank for cadence. The sensor itself is mounted on a fixed part of the bike, close to the magnet, so it can detect and track each revolution.
Connect the Sensor to a Monitor
After installing the sensor, you'll need to connect it to a monitor or device that can display the data. Some sensors may have dedicated apps or software that you can install on your smartphone, tablet, or computer. For example, the Wahoo RPM sensor can connect to apps like Zwift or Strava. Alternatively, you can use a bike computer, which is a dedicated device that displays cycling data.
Calibrate and Test
Before you start your indoor cycling session, ensure that the sensor is correctly calibrated. This may involve inputting the circumference of your bike wheel or tire, so the sensor can accurately calculate distance and speed. Test the setup by spinning the wheel and checking if the sensor is accurately tracking your RPMs and other metrics.
Analyze and Track Your Progress
Now that your setup is complete, you can use the data from the cadence sensor to analyze and track your indoor cycling performance. This data can help you understand your cycling style, identify areas for improvement, and set goals for future workouts. Additionally, some apps or software may provide training plans or virtual cycling environments to enhance your indoor cycling experience.
Remember, when installing and using a cadence sensor, it's important to refer to the specific instructions provided by the manufacturer, as each model may have unique features or requirements.
Host Resource Monitor: Tracking Guest Memory Usage?
You may want to see also

Adding a speedometer
Step 1: Choose a Suitable Speedometer
First, you need to select an appropriate speedometer for your spin bike. There are many options available on the market, such as the Wahoo RPM Cycling Cadence Sensor, the Cateye Velo 7 Wired Bike Computer, or the CYCPLUS GPS Bike Computer. Consider your budget, preferences for wired or wireless connections, and the specific features you want, such as heart rate monitoring or GPS functionality.
Step 2: Gather the Required Tools
Before you begin the installation process, ensure you have all the necessary tools and materials. This may include the speedometer, a computer sensor, cable ties, a copper tube or tubing for the wire, electrical tape, a zip tie, silicone caulk, and a magnet. Some speedometers may require additional components, so refer to the product instructions.
Step 3: Mount the Computer Display
Attach the computer display mount to the handlebars of your spin bike. Ensure that it is secured according to the specific design of your computer and is positioned in a location that is easily visible to you while cycling.
Step 4: Attach the Computer Sensor
The computer sensor should be attached to the fork opposite the brakes on the front wheel mount. You can usually secure it at any point along the fork, but choose a location that is easily accessible. If your sensor doesn't come with specific attachments, you can use cable ties to secure it in place.
Step 5: Run the Sensor Wire
Carefully run the wire from the sensor up the back and outer part of the shock absorber. This positioning will help protect the wire from any undergrowth or branches you might encounter during your rides, as well as keeping it away from the moving wheel. Consider encasing the wire in small-diameter plastic tubing and using cable ties to affix it neatly.
Step 6: Connect the Sensor and Computer Mount
Secure the wire that connects the sensor and the computer mount to your bike frame using cable ties. Ensure there is enough slack in the wire to allow the front wheel and handlebars to turn freely.
Step 7: Attach the Magnet to the Spokes
Clip the included magnet to the spokes of your front wheel. It should be positioned so that it passes close to the sensor with each turn of the wheel, ideally no further than 1/4 inch away. This allows the sensor to detect the magnet and calculate the wheel revolutions accurately.
Step 8: Enter Wheel Diameter and Test
Enter the diameter of your front bicycle tire into the computer. This information is typically printed on the tire or available in the user manual. Turn the wheel to ensure the sensor detects the magnet, resulting in a non-zero speed value on the display. You can test the accuracy by cycling next to someone with a similar device and comparing the readings.
Step 9: Fine-tune and Adjust
Make any necessary adjustments to ensure the accuracy of your speedometer. This may include mounting the magnet close to the hub and positioning the sensor on the fork accordingly. You can also use transparent plastic tape to secure the components more discreetly.
By following these steps, you should be able to successfully add a speedometer to your spin bike, allowing you to track your speed, distance, and other relevant cycling metrics.
Cleaning Your LCD Monitor: Removing Internal Dust
You may want to see also
Frequently asked questions
You can hook up a virtual app like Zwift or MyWhoosh to a laptop or iPad.
You will need some sort of hardware to attach to the bike. This could be a power meter, Bluetooth speed/cadence sensors, or a bike computer app for your phone.
You can use a VESA mount to attach a monitor to your spin bike. You can also use an Android-based media player device hooked up to a large-screen TV.
Some specific product recommendations for monitors to hook up to a spin bike include the Wahoo RPM Cycling Cadence Sensor, the COOSPO Bike Computer Wireless GPS, and the YOSUDA Indoor Cycling Bike.


