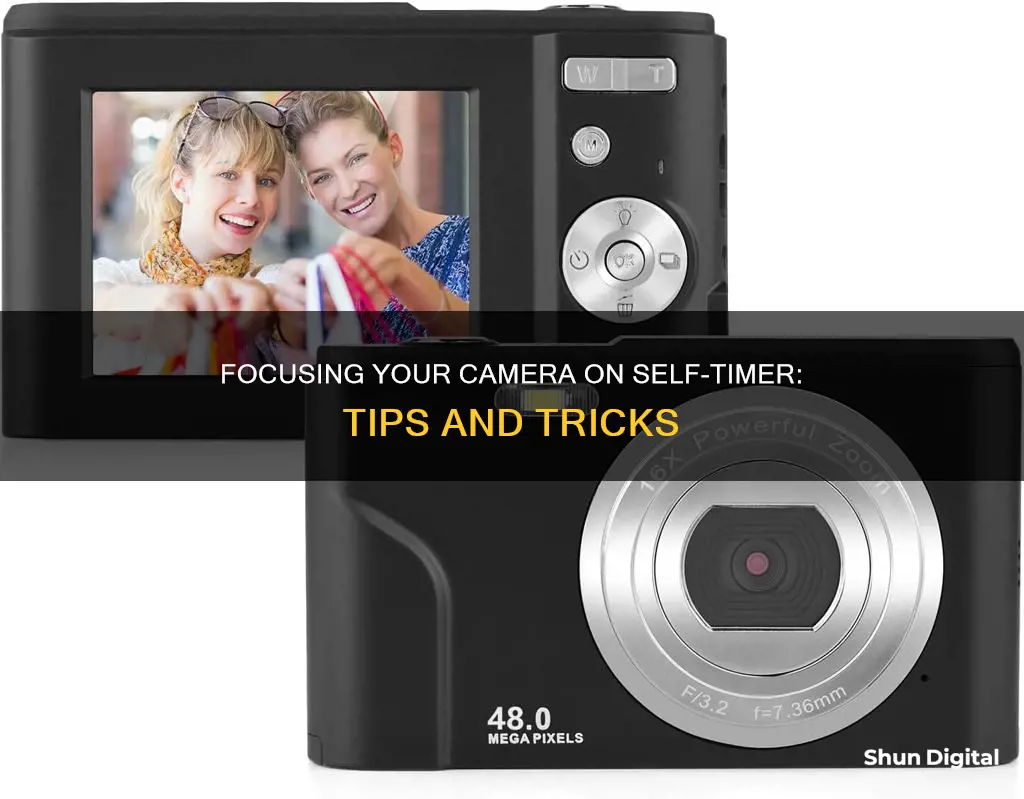
Focusing a camera on a self-timer can be tricky, especially when taking a self-portrait. The camera will focus on whatever it is pointing at when the timer is triggered, which may not be you. One way to get around this is to use manual focus and lock the focus on yourself before triggering the timer. Another method is to use a stand-in object at the same distance you will be, focus on it, and then replace it with yourself before the timer goes off. Alternatively, you can use a remote control to trigger the shutter, allowing you to focus on yourself right before taking the shot.
What You'll Learn
- Use a stand-in object to focus on, then replace it with yourself before the timer runs out
- Set your camera to manual focus to lock the focus
- Increase your f-stop to increase the depth of field and have more of the scene in focus
- Use a remote control to trigger the shutter and avoid camera shake
- Use a tripod to stabilise the camera and prevent camera shake
![]()
Use a stand-in object to focus on, then replace it with yourself before the timer runs out
When taking a self-portrait, it can be challenging to get the correct focus when using a self-timer. One solution is to use a stand-in object to focus on and then replace it with yourself before the timer runs out. Here's a step-by-step guide to help you achieve sharp and focused self-portraits using this technique:
Step 1: Set Up Your Camera
Place your camera on a stable surface or a tripod to ensure it remains steady during the shot. If you're using a tripod, make sure it's securely tightened so that the camera doesn't move or shift during the process.
Step 2: Find a Stand-In Object
Look for an object that you can use as a stand-in for focusing. It could be anything that's roughly the same distance from the camera as you will be when you take the photo. Common household items like a chair, a broom, or even a stack of books can work well. Place the stand-in object directly in front of the camera at the spot where you plan to stand for your self-portrait.
Step 3: Focus on the Stand-In Object
Compose your shot and focus on the stand-in object. If your camera has autofocus, it will lock focus on the object. If you're using manual focus, adjust the focus ring on your lens until the object appears sharp and clear in the viewfinder or live view screen.
Step 4: Set the Self-Timer
Now that your camera is focused on the stand-in object, it's time to set the self-timer. Depending on your camera model, you can usually find the self-timer option in the camera's settings or shooting menu. Set the timer to give yourself enough time to move into position, typically around 10 seconds or more.
Step 5: Replace the Stand-In with Yourself
Once the self-timer is set, quickly move the stand-in object out of the frame and take your position. Strike a pose, maintain your composure, and let the camera capture the shot. Remember to stay still during the exposure to avoid blurring the image.
Step 6: Review and Adjust
After the shot is taken, review the image on your camera's display. Check if the focus is sharp and you are properly framed in the photo. If needed, make any necessary adjustments to your composition or focus and repeat the process until you're happy with the result.
Tips for Success:
- Practice makes perfect: Don't be discouraged if your first attempts don't turn out perfectly. Taking self-portraits with this technique may take some practice, but you'll improve with each try.
- Lighting is key: Pay attention to the lighting conditions and try to use natural light whenever possible. Avoid harsh lighting or backlighting that may affect the camera's ability to focus accurately.
- Consider your aperture: Using a narrower aperture (higher f-stop value) will increase the depth of field, making it easier to achieve a sharp focus. However, this will also reduce the amount of background blur, so choose an aperture that suits the desired effect.
- Focus on your eyes: When composing your shot, ensure that the camera focuses on your eyes. This will create a stronger connection with the viewer and make your portraits more engaging.
Uploading Raw Camera Files: A Step-by-Step Guide
You may want to see also
![]()
Set your camera to manual focus to lock the focus
Setting your camera to manual focus is a great way to ensure your self-timer photos are sharp and focused. Here's a step-by-step guide to help you lock the focus on yourself:
- Understand the Basics: Manual focus gives you control over the lens's focus. Instead of relying on autofocus, you adjust the lens's focus ring to change the point of focus. This is especially useful when autofocus struggles, such as in low-light or close-up shots.
- Locate the Focusing Mode Switch: On your camera or lens, find the switch labelled "AF/MF." This switch allows you to activate autofocus ("AF") or manual focus ("MF").
- Switch to Manual Focus (MF): Turn the switch to "MF" to activate manual focus. If you don't see this switch, check your lens manual, as some lenses might not have this feature.
- Find the Focus Ring: The focus ring is usually near the middle of the lens barrel for prime lenses or near the end for zoom lenses.
- Adjust the Focus Ring: Look through your camera's viewfinder and twist the focus ring. You should see the focus shift, with different areas going in and out of focus.
- Use Live View for Accuracy: It can be challenging to perceive focus through the viewfinder. Switch to your camera's Live View function, which displays a live feed on the LCD screen. Magnify the image and adjust the focus until you achieve perfect sharpness.
- Check and Adjust Aperture: Narrowing the aperture gives you a larger margin of error. For example, shooting at f/8 allows you to move slightly behind or in front of your subject without worrying about blur.
- Check the Result: After taking the photo, review it on the LCD screen. Zoom in to ensure you've captured the desired point of sharpness.
- Consider Using a Stand-In: If you're taking a self-portrait, you can point the camera at an object at the same distance you'll be standing. Press the shutter release, recompose, and then move into the frame before the timer ends. This ensures the camera locks focus on the correct spot.
- Focus on a Specific Spot: If you're taking a group photo, you can ensure everyone is in focus by focusing on a specific spot. Place an object or mark a spot on the ground where one of the group members will stand. Adjust the focus on this spot, then recompose and take the photo.
Unlocking Galaxy S9+ Camera Modes: A Step-by-Step Guide
You may want to see also
![]()
Increase your f-stop to increase the depth of field and have more of the scene in focus
The f-stop, or aperture, is a crucial setting to understand if you want full control of your photography. It controls the amount of light that passes through the lens, and also the depth of field, or how much of the scene is in focus.
Depth of field is the front-to-back zone of a photograph that is in sharp focus. It is one of the main elements of a photograph that you as the photographer have complete command over. By adjusting the depth of field, you can isolate a subject and draw the viewer's eye to a specific point in the image.
The depth of field is determined by three factors: aperture size, distance from the lens, and the focal length of the lens. The aperture is the opening at the rear of the lens that lets light through to the image sensor. The size of the aperture is measured in f-stops, which work as inverse values. A small f-number corresponds to a larger or wider aperture size, which results in a shallow depth of field. Conversely, a large f-number results in a smaller aperture size and a deeper depth of field, with more of the scene in focus. For example, a setting of f/11 or higher will give you a deep and rich depth of field.
The f-stop also controls how much light enters the lens. A small f-stop lets in more light, and a large f-stop lets in less light. So, when you increase the f-stop to get more of the scene in focus, you will also need to adjust the shutter speed or add more light to properly expose the image.
The focal length of the lens also affects the depth of field. Wide-angle lenses have a great depth of field, while telephoto lenses have a shallow depth of field. The focal length controls your field of view, or what you see in your viewfinder. A longer focal length gives you a smaller field of view, which is useful for isolating a particular subject. A shorter focal length gives you a wider field of view, which is good for capturing wider scenes like landscapes.
By increasing the f-stop to a larger number, you can increase the depth of field and have more of the scene in focus. However, you will also need to adjust the shutter speed or add more light to ensure the image is properly exposed.
Galaxy S7 Camera Mode: How to Access and Use It
You may want to see also
![]()
Use a remote control to trigger the shutter and avoid camera shake
Using a remote control to trigger the shutter is a great way to avoid camera shake and get crystal clear, shake-free shots. This is especially important if you are shooting at long shutter speeds or doing macro photography, as even the slightest shake can ruin your shot.
There are a few different types of remote camera triggers to choose from. Infrared remote controls are low-cost and great for time-lapse photography, but they require a clear line of sight to the camera. Wireless remote controls, on the other hand, offer more flexibility and a larger operating range. They typically consist of a separate transmitter and receiver unit, with the receiver connecting to your camera via a cable. This allows you to shoot hands-free and is a popular choice among professional photographers. Another option is a remote corded control, also known as a cable release. This is a fantastic tool for time-lapse and macro photography, but you need to be careful to keep the cord out of the photo if you're taking self-portraits.
When choosing a remote control, it's important to consider your camera model and the type of photography you plan to do. Some remote controls offer advanced features such as interval timers and the ability to control flash settings, while others are simpler and more affordable.
Using a remote control can give you more flexibility and control over your shots, allowing you to capture professional-looking self-portraits and sharp images without any risk of camera shake. So, if you're looking to improve your photography skills and get clearer, sharper shots, investing in a remote control trigger may be a great option.
Mastering Auto-Focus: A Guide to Camera Auto-Focusing
You may want to see also
![]()
Use a tripod to stabilise the camera and prevent camera shake
Using a tripod is a great way to stabilise your camera and prevent camera shake when taking photos with a self-timer. Here are some tips to get the most out of your tripod and improve the sharpness of your images:
Choose a Sturdy Tripod
It is important to invest in a high-quality tripod that can support the weight of your camera and lens setup. Look for a tripod with a solid base, adjustable legs, and a secure head. Avoid cheap or flimsy tripods that may wobble or collapse, affecting the stability of your camera. Additionally, try to avoid extending the centre column or the thinnest sections of the legs, as this can reduce the overall stability of the tripod.
Use a Remote Shutter Release or Self-Timer
Even with a sturdy tripod, pressing the shutter button can cause some movement and blur in your photos. To avoid this, consider using a remote shutter release or the self-timer feature on your camera. A remote shutter release can be wired or wireless, allowing you to trigger the shutter from a distance without touching the camera. Alternatively, the self-timer can be set to delay the shutter by a few seconds, giving you time to step away from the camera and eliminate any potential camera shake caused by pressing the shutter button.
Enable Mirror Lock-Up or Use Live View
If you're using a DSLR camera, the movement of the mirror when you press the shutter button can create a slight vibration that affects the sharpness of your images. To address this issue, enable the mirror lock-up feature, which locks the mirror in the up position before taking the photo. This way, you only have one movement instead of two, reducing the potential for camera shake. Another option is to use live view, which also keeps the mirror up and allows you to compose your shot using the LCD screen.
Turn Off Image Stabilisation
While image stabilisation is beneficial when shooting handheld, it can cause issues when using a tripod. Image stabilisation can detect and correct movements that aren't there, leading to unwanted blur and noise in your photos. Therefore, it is recommended to turn off image stabilisation when using a tripod, either on your camera body or lens, depending on your setup.
Avoid Windy or Unstable Conditions
Even with a sturdy tripod, shooting in windy or unstable conditions can introduce camera shake. Look for sheltered or solid locations, or wait for calmer times of the day to minimise the impact of wind or other vibrations. You can also use weights or sandbags to anchor your tripod and make it more stable in challenging conditions.
Check Your Settings and Focus
Finally, before taking your photo, double-check your camera settings and focus to ensure sharp images. Make sure you have the correct exposure, aperture, ISO, and white balance for the scene you're shooting. Additionally, pay attention to your focus point and mode, using manual focus or autofocus with a single point or zone. Utilise the magnify or zoom function on your LCD screen to check the sharpness and details of your image before capturing the shot.
Garden Grove Camera Tickets: Your Options and Defenses
You may want to see also
Frequently asked questions
The self-timer will focus on whatever the camera is pointing at when the timer is triggered. To get around this, you can set the camera to manual focus, or place an object at the same distance you will be standing, trigger the timer, and then replace the object with yourself.
If you are taking a self-portrait, you can use manual focus to lock the focus on yourself. However, if you are using a tripod, you can also use autofocus by pointing the camera at something that is the same distance away as you will be when the photo is taken.
To ensure your self-portrait is in focus, you can increase the f-stop to increase the depth of field, making more of the scene appear in focus. You can also try using manual focus, or a remote control to trigger the shutter.
On a Sony camera, the self-timer will focus on whatever it is pointing at. To lock the focus, you can use manual focus or autofocus by pointing the camera at an object that is the same distance away as you will be.
Yes, you can use autofocus with a self-timer, but the focus will be locked in when the timer is triggered. To track a moving subject, you can use a remote control or a smartphone app to trigger the shutter and adjust the focus and exposure dynamically.