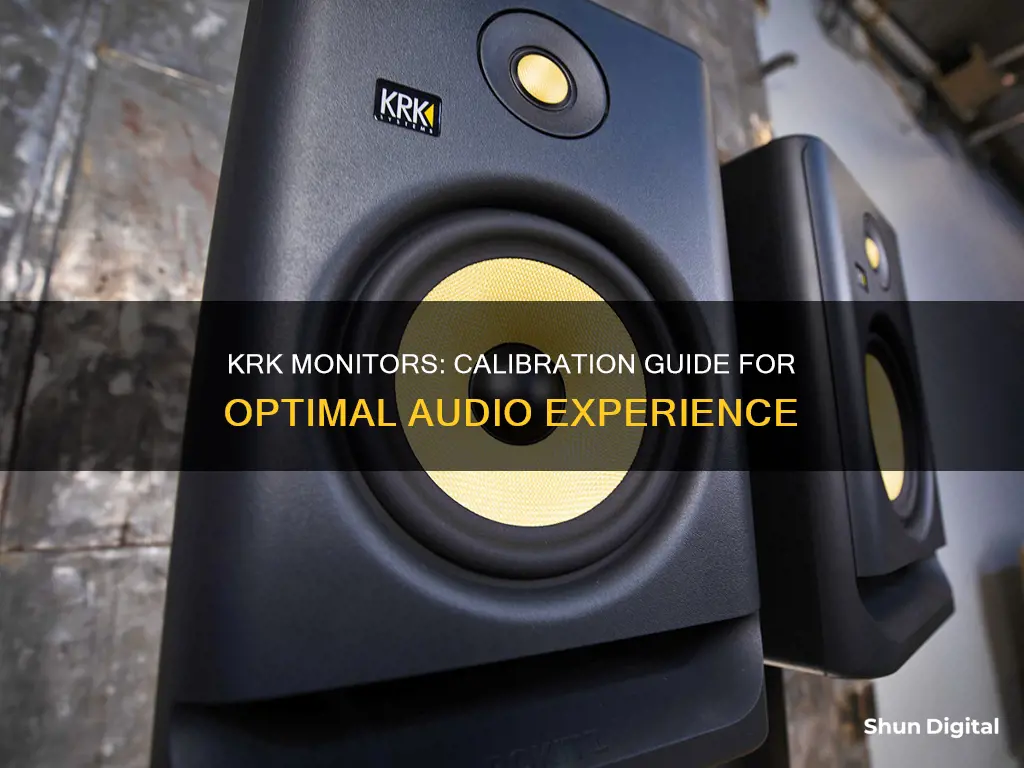
Calibration is essential for music producers to get the best sound from their KRK monitors. The process involves setting the level of sound coming out of your DAW relative to the SPL leaving the speaker. This not only helps with accurate mixing but also reduces noise and minimises the risk of damage to the monitors and your ears. KRK offers its own app, KRK Audio Tools, which includes a Level Meter tool for monitor level calibration. The app also features a Spectrum RTA tool, which measures the frequency spectrum of the input audio signal in real-time, and an EQ Recommendation tool, which takes a frequency analysis of your room and suggests EQ presets for your monitors. The app also includes a Monitor Align tool, a Delay tool, and a Polarity tool.
| Characteristics | Values |
|---|---|
| Speaker Placement | 3-5 feet apart, pointed towards listener to form an equilateral triangle |
| Power Source | Wall outlet |
| Audio Interface | Focusrite Clarett 8 Pre |
| EQ Changes | Use KRK Audio Tools app |
| EQ Presets | Use EQ Recommendation tool in KRK Audio Tools app |
| Speaker Angle | Use Monitor Align tool in KRK Audio Tools app |
| Time Delay | Use Delay tool in KRK Audio Tools app |
| Wiring | Use Polarity tool in KRK Audio Tools app |
What You'll Learn

Speaker placement
When setting up your KRK monitors, there are a few factors to consider to ensure optimal sound quality and listening experience.
Firstly, it is important to place the monitors at ear level, with the tweeters at or slightly above ear height when seated. This will ensure that the sound is directed towards your ears, providing a clear and accurate listening experience. The distance between the monitors should also be considered, with the ideal setup forming an equilateral triangle between the two monitors and your head. This means that the distance between the monitors should be equal to the distance from each monitor to your head. This setup will provide the best stereo imaging and spatial perception. If your setup does not allow for a perfect triangle, you can experiment with different distances and angles to find the best sound stage for your space.
Another factor to consider is the distance between the monitors and the wall behind them. Placing the monitors close to the wall can minimise the cancellation notch generated by the out-of-phase bass that bounces off the wall. However, this may also increase bass frequencies, so it is important to find a balance that works for your room. If possible, it is recommended to leave some space between the monitors and the wall to improve the sound quality. Additionally, consider using acoustic treatment, such as bass traps and acoustic foam, to improve the acoustics of the room and reduce unwanted reflections and reverberations.
When positioning your monitors on the desk or surface, it is important to use foam or isolation pads to reduce sound transfer to the desk and minimise vibrations. This will help improve the accuracy of the sound and reduce any unwanted resonance or colouration.
Finally, consider the placement of other items in your setup, such as your desktop tower or dual monitors. If possible, move your desktop tower to another surface to make more room for your monitors and speakers. If you have dual monitors, you can also consider placing them above or below each other instead of side by side to create more space for your speakers.
Understanding Monitor Specifications: A Guide to Finding Your Monitor's Definition
You may want to see also

Powering KRK monitors
The KRK Rokit 7 Gen 5 Monitors are a mid-size monitor speaker for DJs or DJ/producers. They are quite heavy at 7 kg each and are powered by Class D amplification, a modern way of powering speakers that runs cool. If you prefer, KRK also manufactures the Classics, which are an A/B amplified series. These get hotter and use more power but have a slightly different sound.
The Rokit 7s are quite big and are better used in medium-sized rooms. The power cord is plugged into the IEC socket on the rear panel of the active speaker and into the AC mains. The power switch on the active speaker should be in the 'on' position. The AC mains voltage should be matched to the correct operating voltage requirements. If the AC mains voltage is higher than the selected voltage, the fuse will break to protect the active speaker electronics and will need to be replaced.
The power light can often be found on the front panel of the monitors and the rear panel of the subwoofers. It is part of the triangle contained in the 'KRK' logo. If the power light is not illuminated, turn the power switch off and check the AC mains fuse(s). The fuse is located directly below the power receptacle. NEVER USE A LARGER AMPERAGE FUSE THAN IS SPECIFIED!
If a fuse change is needed and upon powering the monitor back up the fuse(s) blow again, the monitor needs to be returned to the dealer where you purchased it, or to KRK for servicing.
IEC Power Cables
Pretty much any IEC power cord will work with the KRK R8 monitor speakers. These speakers might draw up to 5 amps each, but probably more like 3 or 4. IEC power cords are rated up to 13 amps, so there is a pretty big safety margin.
Understanding Processor Time: Performance Monitor's Vital Sign
You may want to see also

Connecting to an audio interface
To connect your KRK Rokit 5 Studio Monitors to your audio interface, you will need a pair of TRS 1/4-inch male-to-male patch cables.
Take one of the cables and plug one end into your first KRK monitor. Then, take the other end and plug it into the correct monitor output on your audio interface. Repeat this step for the second monitor.
Remember that every audio interface is different and has different outputs/output configurations. For example, the Focusrite Clarett 8 Pre audio interface has the monitor speaker outputs clearly labelled.
Once you have connected your monitors to your audio interface, you can power them up by flipping the power switch located on the back of each monitor.
You can then fine-tune your monitors using the KRK Audio Tools app, which is available for both iOS and Android devices. The app includes a Level Meter tool to help with monitor level calibration, ensuring that all monitors are at the same dB level.
Best Retailers to Buy Sceptre Monitors From
You may want to see also

Fine-tuning with the KRK Audio Tools app
The KRK Audio Tools app is a comprehensive suite of software applications designed to enhance the audio experience for both professionals and enthusiasts. It is available for both iOS and Android devices and is compatible with a range of KRK Systems products. The app includes several tools that can help with fine-tuning your KRK monitors to match the acoustics of your room. Here is an overview of the tools and how they can help with fine-tuning:
Spectrum RTA Tool: This tool is used to measure and display the frequency spectrum of the input audio signal in real time. It helps you identify potential factors that can negatively impact your listening experience, such as background noise and ambiance. The Spectrum RTA tool uses the Fast Fourier Transform algorithm to generate its frequency analysis view of amplitude vs frequency. This tool is great for finding nuances in any environment.
Level Meter Tool: The Level Meter tool is used for monitor level calibration, ensuring that all your monitors are at the same dB level and volume. To calibrate your monitors, generate pink noise from each monitor one at a time and adjust their volumes accordingly.
EQ Recommendation Tool: The EQ Recommendation tool takes a frequency analysis of your room by generating a pink noise signal. It then suggests optimal EQ presets to use on your KRK monitors based on the characteristics of your speakers and room acoustics. This tool helps you achieve a balanced and accurate sound output.
Monitor Align Tool: This tool helps you align your studio monitors at a precise angle. Place your phone on top of one of the monitors, tap the corresponding monitor icon in the app, and rotate the monitor until you achieve the desired angle. Repeat this process for the other monitor.
Delay Tool: The Delay tool helps you eliminate any time delay between your monitors. Use this tool by holding your phone microphone close to the subwoofer of one monitor to set a reference point, then repeat this process with your phone in your listening position. The time delay for each monitor should be as close as possible.
Polarity Tool: The Polarity Tool verifies that your monitors are wired correctly. It displays an oscilloscope showing a green '+' for correct polarity or a red '-' for incorrect polarity. If your polarity is incorrect, check your monitor's wiring for any issues.
The Evolution of Ankle Monitors: A Historical Perspective
You may want to see also

Testing the monitors
Testing out your monitors is the final step in setting up your KRK Rokit 5 Studio Monitors. At this stage, you should listen to some music through the monitors to test them out. If you have followed the previous steps correctly, your monitors should sound well-balanced and in sync with whatever you listen to through them.
However, if you still have any issues, go through the steps again and see if you might have missed something. For instance, you could try recalibrating your monitors to your room environment. Finding the room's modal response time allows you to find the perfect spot for placing the monitors so that each note will resonate equally and determine how to soundproof the room accordingly.
You can also try using the KRK Audio Tools app to fine-tune your monitors. The app includes a "Spectrum RTA" tool to measure and display the frequency spectrum of the input audio signal in real-time, a "Level Meter" tool for monitor level calibration, an "EQ Recommendation" tool to determine the best EQ presets for your room, a "Monitor Align" tool to align the angle of your studio monitors, a "Delay" tool to time-align your monitors in a multi-monitor system, and a "Polarity" tool to verify that your monitors are wired correctly.
Additionally, you can use a calibration mic, RTA, and then EQ until your RTA is flat. If it still doesn't sound right, you can make a 2-3 point slope to either increase or decrease the treble or bass until it sounds neutral.
Gamer's Guide to Buying the Perfect Monitor
You may want to see also
Frequently asked questions
KRK has its own audio tools app, which includes a level meter tool that can be used to calibrate your studio monitors' levels. You can do this by generating pink noise from your monitors one at a time and adjusting each one's volume accordingly.
The KRK Audio Tools app also includes a monitor align tool, which helps you align your studio monitors at a precise angle. You can use this tool by having your monitors facing forward with no angle and placing your phone on top of one monitor at a time. Tap the corresponding monitor icon in the app and rotate the monitor until you have achieved the desired angle.
First, place the monitors about three to five feet apart from each other, pointed towards you, to form an equilateral triangle. Next, plug the monitors into a power source and your audio interface using the included power cables and TRS 1/4 inch patch cables. Then, power up the monitors and fine-tune them using the KRK Audio Tools app.


