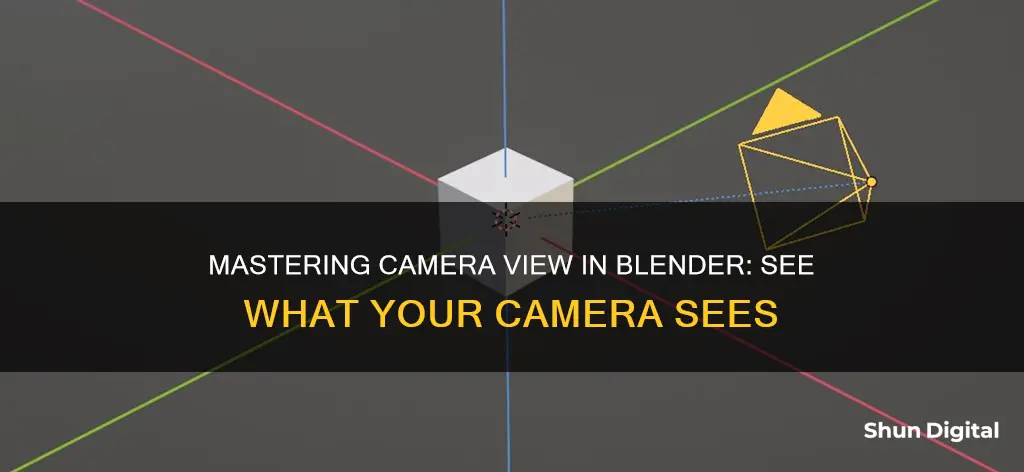
To see what your camera sees in Blender, you need to set the active camera. This can be done by going to View > Cameras > Active Camera or by pressing Ctrl + Numpad 0. Once the active camera is set, you can view the scene through its lens by pressing Numpad 0 or by going to View > Viewpoint > Camera. You can also lock the camera to the current view by pressing N to open the sidebar and checking the Camera to View box under the View tab.
| Characteristics | Values |
|---|---|
| How to see what the camera sees | Press Numpad 0 or go to View > Viewpoint > Camera |
| How to align the camera to the current view | Press Ctrl + Alt + Numpad 0 |
| How to lock the camera to the current view | Press N to open the sidebar, then check the box labelled "Camera to View" |
| How to point the camera to the 3D cursor location | Navigate to a good position, select the camera, and press Ctrl + Alt + Numpad 0 |
| How to point the camera towards an object | Select the camera, add a Track To constraint, and choose the object in the Target field |
What You'll Learn

Viewing the Active Camera
To view the active camera in Blender, you can use the following methods:
Using the View Menu
In the 3D Viewport menu, go to View > Viewpoint > Camera or View > Cameras > Active Camera. This will switch your view to that of the active camera.
Using Keyboard Shortcuts
- Press Numpad 0 or Ctrl + Alt + Numpad 0 to view from the active camera.
- Press Ctrl + Numpad 0 to set an object as the active camera.
- Press Ctrl + Alt + Numpad 0 to set the active camera to the current view in the 3D Viewport.
Using the Sidebar
Open the sidebar by pressing "N", then check the box labelled "Camera to View" under the "View" tab. This will lock the camera to the current viewport view.
Using the Properties Panel
Open the Properties panel by pressing "N", then check the "Lock active camera to view" option. This will allow you to navigate the scene while moving the camera accordingly.
Activating Your Apple Watch Camera: A Simple Guide
You may want to see also

Setting the Active Camera
To set the active camera in Blender, follow these steps:
- Using Key Bindings: Select the desired camera and press Ctrl + Numpad 0 on your keyboard. This sets the selected camera as the active one and also switches your view to the camera's perspective.
- From the Menu: Go to the 3D Viewport Header, then click View > Cameras > Set Active Object as Camera. This will make the chosen object the active camera and switch to the camera view.
- Using the Scene Property: Navigate to the Scene tab in the Properties Editor. Here, you can pick a camera object from the list to set it as the active camera.
- Using the Outliner: In the Outliner, look for the camera icon next to the camera's name. Click on this icon to toggle the camera as the active one for the scene.
- Using Markers (for animation): If you want to change the active camera during an animation, you can use markers. Add a marker at the desired point in your timeline (by pressing 'M') and then select the object you want to set as the new active camera. Press Ctrl + B in the timeline to bind the camera change to the marker. Remember that you need at least two markers with different cameras bound to them to achieve camera switching.
- Using the Lock Icon (for a single view): In the 3D View Header, you'll find a lock icon on the right side of the layers buttons. If this icon is pushed in, it means Scene-lock is enabled, and your active camera will be the same across all viewports. To make a camera active for only one viewport, ensure that Scene-lock is disabled.
By following these methods, you can effectively set the active camera in Blender and view your scene from the chosen camera's perspective.
Lane Watch Camera: When Did Honda Introduce This Feature?
You may want to see also

Animated Camera Switching
Blender allows you to have multiple cameras in a scene, which is useful if you want to cut to another camera during the course of an animation. To switch between cameras, follow these steps:
- Select the camera you want to switch to.
- Position the playhead in the timeline to the desired point.
- Press CTRL + B at the bottom of the timeline. This creates camera markers, indicating the points at which the cameras will switch.
- To delete a camera marker, select it and press X.
You can also create regular markers by hovering over the timeline and pressing M. These can be used for notes and to mark specific points in your animation.
Additionally, you can set an active camera, which is the camera that will be used for rendering and the one you'll look through when choosing the camera view. To set the active camera:
- Go to View > Cameras > Set Active Object as Camera.
- Alternatively, you can set the active camera through the Scene tab of the Properties.
With the active camera set, you can then use the following shortcuts to manipulate the camera view:
- View > Cameras > Active Camera, or View > Viewpoint > Camera: Switch to the view of the active camera.
- View > Cameras > Frame Camera Bounds: Centre the camera view inside the 3D viewport's screen area and resize it to fit within the bounds.
- View > Navigation > Zoom Camera 1:1: Zoom in so that the camera frame matches the output resolution, allowing you to preview how objects will appear in the rendered image or animation.
- View > Align View > Align Active Camera to View: Rotate and move the camera to match your current viewport view.
To perform more specific camera moves like rolls, pans, dollies, and tracks, select the camera and use the same tools you would use to transform any object. For example, to perform a camera roll, press R to enter object rotation mode, and the camera will rotate along its local Z-axis. For a vertical pan or pitch, press R, then X twice to select the local X-axis for rotation.
Watching King Doway Camera Feeds on PC
You may want to see also

Frame Camera Bounds
To centre the camera view inside the 3D Viewport's screen area and resize the view to fit within the area's bounds, you can use the "Frame Camera Bounds" function. This can be accessed by selecting "View" > "Cameras" > "Frame Camera Bounds".
This function is useful for positioning the camera in your scene. The active "camera" can be any kind of object, so these actions can also be used to position and aim a light, for example.
- Align Active Camera to View: This moves and rotates the camera to match your current viewport view. You can access this by selecting "View" > "Align View" > "Align Active Camera to View".
- Lock Camera to View: By enabling this feature in the Sidebar > View and switching to camera view, or by toggling the lock navigation gizmo button when in camera view, the camera will follow your view as you navigate.
- Roll, Pan, Dolly, and Track: To perform these moves, you must first select the camera so that transform operations apply to it. Then, you can manipulate the camera using the same tools used to transform any object. For example, to enter object rotation mode, press "R", which will rotate the camera along its local Z-axis by default.
Apple Watch Series 1: Camera Expectations Explained
You may want to see also

Align Active Camera to View
To align the active camera to your current viewport view in Blender, you can use the following method:
- Go to the "View" menu.
- Navigate to "Align View".
- Select "Align Active Camera to View". This option is also accessible through the shortcut Ctrl + Alt + NumPad 0 on your keyboard.
This action will move and rotate the camera to match your current viewport view.
If you want to view the scene through the camera, you can do so by pressing Numpad 0 or by going to the "3D Viewport" menu, choosing "View", and then selecting "Viewpoint" and "Camera". Alternatively, you can go to "View" > "Cameras" > "Active Camera".
LG TV Camera: What You Need to Know
You may want to see also
Frequently asked questions
To view the scene through a specific camera, you must first make it the active camera. You can do this by selecting the camera in the Scene panel or by pressing Ctrl + Numpad 0. Once the camera is active, you can view the scene through it by pressing Numpad 0 or by selecting View > Viewpoint > Camera or View > Cameras > Active Camera.
To point the camera towards an object, first select the camera, then add a Track To constraint to it. In the constraint settings, choose the object you want the camera to target in the Target field, -Z in the To field, and Y in the Up field. The camera will now always point at the object, regardless of where it or the object are moved.
To lock the camera to your current view, press "N" to open the sidebar in the 3D viewport. Under the "View" tab, check the box labelled "Camera to View." Now, when you navigate the scene, the camera's view will follow.


