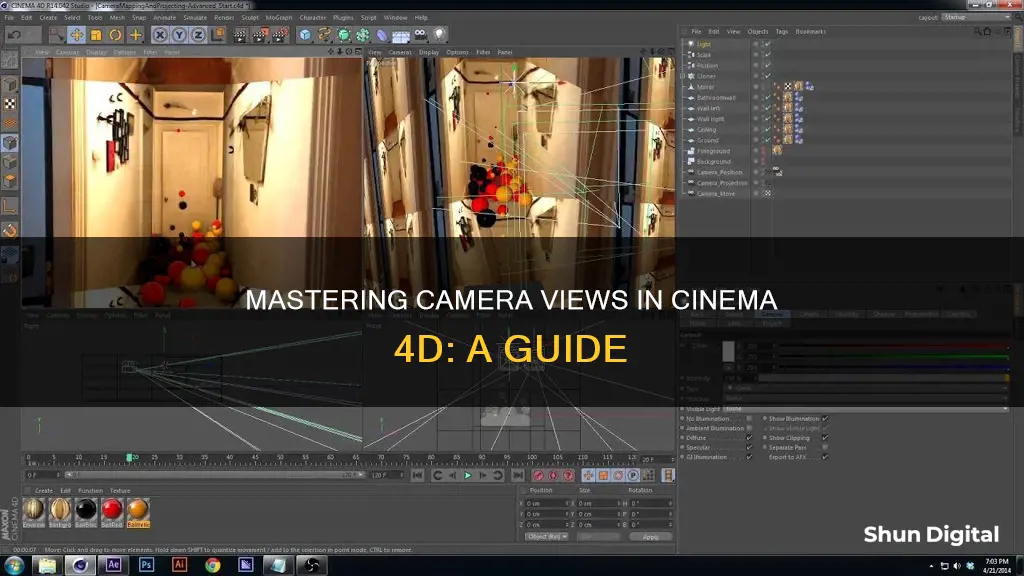
To see through the camera in Cinema 4D, you need to adjust the view clipping settings. This can be done by pressing Control or Command+D to bring up the project settings, where you can find the View Clipping option in the Attribute Manager. You can manually change the clipping settings or use presets from the dropdown menu. This will allow you to zoom in and out and see objects being cut away, giving you the ability to see through walls and other objects. Additionally, to move the camera while viewing through it, ensure that the camera is selected by enabling the active camera button in the object manager or selecting it via the viewport menu. Once selected, you can use the navigation tools to move, rotate, or zoom within the viewport.
| Characteristics | Values |
|---|---|
| Focal length | Defines how wide or narrow the view is |
| Dolly zoom effect | Animating along a short focal length while simultaneously moving the camera closer to the subject |
| F-Stop | Controls how large the opening of a lens is, and how much light gets in |
| Depth of Field (DOF) | The range of what's focused and blurry in the image |
| Shutter speed | Controls how much motion blur appears in renders |
| View clipping | Using virtual planes that run perpendicular to the camera or perspective view line of sight |
| Camera clipping | Adjusting the near (foreground) and far (background) planes |
What You'll Learn

Adjust the focal length
Adjusting the focal length of your camera in Cinema 4D can have a significant impact on the composition and overall look and feel of your scene. The focal length of a camera lens refers to the distance between the lens and the image sensor when the subject is in focus, and it determines how wide or narrow your field of view is.
Cinema 4D's default perspective viewport focal length is 36mm, which is relatively wide. While this can be useful for navigation, it can cause distortion when viewing products or subjects at various distances. To adjust the focal length, go to the viewport menu in the upper left corner of the viewport and select "Options" from the dropdown menu. Then, navigate to the “Configure” option at the bottom of the list. In the Attribute Manager, you'll find the settings for the viewport, including the focal length parameters.
Another way to access these settings is by pressing the hotkey combination SHIFT+V. This will take you directly to the configure settings for the viewport. From here, you can adjust the focal length by using the interactive hotkey combination of 2 + Right Click and dragging. Dragging to the right will increase the focal length, while dragging to the left will decrease it. You can see the adjustments in real-time in the Attribute Manager. This method also works when you have a camera in the scene, allowing you to explore different focal lengths interactively.
When choosing a focal length, consider the effect you want to achieve. Wide-angle lenses (15-35mm) can make objects appear larger when looking up at them, while telephoto lenses (85-300mm) can make objects look smaller and farther away when looking down on them. Additionally, longer lenses typically require more distance between the camera and the subject to fit everything in the frame, while shorter lenses allow you to get closer.
Understanding how to adjust and choose the right focal length will give you more creative control over your renders and help you achieve the desired composition and atmosphere for your scene.
Pursuing a Career as a TV Cameraman: Degree Options
You may want to see also

Understand F-Stop and Depth of Field
In photography, the F-stop controls how large the opening of a lens is, which in turn affects how much light gets in and the depth of field of the image. The depth of field refers to the range of what is in focus and what is blurry in an image.
In Cinema 4D, the F-stop value can be adjusted in the camera's Physical tab under Render Settings. Lower F-stop values will result in a shallower depth of field, with a more blurry background and foreground. Higher F-stop values will produce a deeper depth of field, with less blur in the background and foreground.
To create depth of field in Cinema 4D, you need to enable the Physical Renderer. Go to the Render menu, select 'Edit Render Settings', and choose 'Physical' from the drop-down menu. Then, under Physical Options, enable Depth of Field in the Basic tab.
You can also adjust the focus distance numerically under the Object tag of the camera object or by selecting the object you want in focus in the viewport. If you want to lock the focus on a specific object, you can drag it into the Focus Object field. This is useful when you have a moving object that you want to keep in focus.
Additionally, you can increase the quality of the blurred areas by setting the sampling quality to 'High' in the Render Settings/Physical menu. However, this will also increase the render time significantly.
When working with F-stop and depth of field in Cinema 4D, it's important to consider the scale of your scene. If your scene is larger or smaller than real-world proportions, you may need to adjust the F-stop values accordingly to achieve the desired depth of field effect.
Master Splinter Cell Blacklist: Sticky Camera Viewing Techniques
You may want to see also

View clipping
To adjust the view clipping settings in Cinema 4D, you can press Control or Command+D to bring up the project settings. In the Attribute Manager, you will find the "View Clipping" option in the bottom quarter of the menu. From here, you can manually adjust the clipping settings or select from preset options such as "Small" or "Tiny". Changing the view clipping settings will allow you to zoom in closer to your model without parts of it being cut off.
Camera clipping works similarly to view clipping, allowing you to adjust the near (foreground) and far (background) planes independently. This gives you more flexibility when composing your shot, as you are not limited by the size or layout of your shooting environment. To enable camera clipping, select the Cinema 4D camera object and go into the details tab. Here, you will find the "Enable Near Clipping" button and a box to adjust the clipping distance. Increasing the near clipping distance will move the plane further out, cutting through objects in the foreground and allowing you to see past them. The far clipping plane works in the same way but from the opposite end of the camera's view.
By utilising view and camera clipping, you can gain greater control over your 3D scenes and camera compositions. These features are available in most 3D software and render engines, making them valuable tools for any 3D artist or designer.
Cameras: Are We Being Watched?
You may want to see also

Camera clipping
To enable and adjust camera clipping in Cinema 4D, follow these steps:
- Select the Cinema 4D camera object you want to edit.
- Go into the details tab of the selected object.
- In the details tab, you will find the "Enable Near Clipping" button and a box for specifying the clipping distance.
- Increasing the number in the near clipping box will move a plane outwards at the same angle as the camera's line of sight. When this plane comes into contact with geometry, it will cut through it, allowing you to see past it as if it isn't there.
- The far clipping plane works in the opposite way, starting from the far end of the camera's view. Adjusting the far clipping plane can be useful to remove expansive environments in the background that are not needed in your shot, simplifying the compositing process.
By utilising camera clipping, you can save time and effort in scene adjustments and composition, especially when working within constraints or dealing with complex environments.
It is worth noting that camera clipping is usually only possible with certain rendering plugins, such as Corona or Vray, and specific tools like Scatter, which is used to distribute large amounts of items like vegetation. These plugins often have features that automatically hide objects that are not in the camera frame.
The Masters: TV Cameras Everywhere on the Course
You may want to see also

Camera movement
The focal length impacts the distance you need to place the camera from the subject to fit them in the frame. Longer lenses require a farther distance from the subject, while shorter lenses allow you to get closer.
Dolly Zoom Effect
By animating a short focal length and simultaneously moving the camera closer to the subject, you can achieve the dolly zoom effect, popularized by filmmakers like Hitchcock and Spielberg.
F-Stop & Depth of Field (DOF)
F-stop controls the size of the lens opening, influencing the amount of light entering the camera and the depth of field (DOF). Lower F-stops result in a shallower depth of field, with more blur in the background and foreground, while higher F-stops provide a deeper depth of field with less blur.
To achieve photorealism in Cinema 4D, you can use the Physical Renderer by going to the Render menu, selecting Edit Render Settings, and choosing 'Physical' from the drop-down menu. Additionally, under Physical Options, enable Depth of Field in the Basic tab.
When working with depth of field, it's important to create your scenes using real-world scale to obtain predictable results. If your scene deviates from real-world proportions, you may need to adjust the F-stop values accordingly.
Focus Object
To maintain focus on a specific object while animating the camera, you can use a 'Focus Object'. Simply drag the desired object into the field, and the camera will remain focused on it regardless of its movement. Using a Null object as the focus object provides even more flexibility, allowing you to animate it and easily visualize the focus point in the viewport.
Exposure and Shutter Speed
By enabling the 'exposure' option in the camera's Physical tab, you can recreate photorealistic over and underexposures by adjusting the F-stop values. Higher F-stop values lead to underexposure and a decrease in depth of field, while smaller F-stops result in overexposure and increased depth of field.
Shutter speed controls the amount of motion blur in your renders. By adjusting the shutter speed, you can dial up or down the amount of motion blur to simulate realistic camera movement.
Camera Rigs
Animating the camera can be as simple as dragging it around the scene and setting keyframes. However, for more complex movements, you can use camera rigs. Here are two simple camera rig setups:
Simple Camera Rig (2 Node)
This rig uses two null objects to separate what the camera is pointed at and what it orbits around. Add two new null objects, naming one 'Target' and the other 'Parent'. Select your camera, right-click, and choose Cinema 4D Tags > Target. Assign the 'Target' null object, and the camera will point towards it. Then, make the camera a child of the 'Parent' null object. Moving the 'Parent' null will cause the camera to follow while staying aimed at the 'Target'.
Simple Camera Rig (Splines)
This rig uses splines to draw the path for the camera to follow. Draw the desired path using the Pen Tool (Create menu > Spline > Pen). Then, right-click on your camera and select Cinema 4D Tags > Align to Spline. Drop your spline object into the spline path tag, and animate the 'Position' property to make the camera move along the path.
Using B-Splines will create smooth arcs between two points, simplifying your path adjustments. If you don't use a target tag on your camera, you can make the camera look down the path by enabling the 'Tangential' button on the Align to Spline Tag.
To enhance your camera movement options, you can use plugins like Gorillacam, which offers a range of cinematic camera moves, including:
- Natural handheld camera shake for realistic animations
- Camera smoothing and overshoot for a stabilizer look or simulating a large camera rig
- Shake system and jolt for natural camera shake or timed shakes
- Target and zoom functionality to follow objects in your scene
- Imperfect focal distance adjustments for a human operator feel
- Random movement generator to preview various camera moves
Stream Tybee Island: Accessing the Tybee Cameras
You may want to see also
Frequently asked questions
Go to the Create menu, then Camera, and select Camera.
The focal length of a camera lens defines how wide or narrow your field of view is. You can find the focal length under the object properties in the Attribute Manager. A small focal length like 10mm-15m is considered super wide, while a long focal length like 100-200mm is considered telephoto.
To move the camera, make sure it is selected by enabling the active camera button in the object manager or by selecting the camera via the viewport menu. Once you're viewing through the camera, you can use the navigation tools to move, rotate, or zoom in the viewport.


