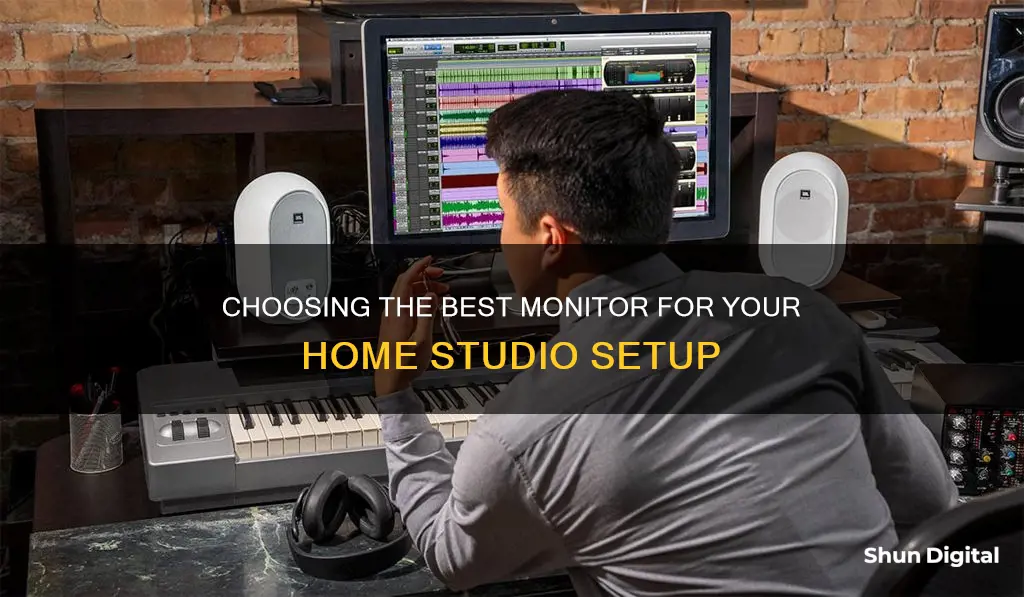
Studio monitors are an essential component of any home studio setup, providing accurate sound reproduction to help you make informed mixing decisions. When choosing studio monitors, it is important to consider your specific needs and requirements. Factors such as room size, budget, connectivity, and desired features will influence your decision. Here is an introduction to guide you in selecting the right studio monitors for your home studio.
Active vs Passive Monitors
Studio monitors can be either active or passive. Active monitors have built-in amplifiers, making them simpler to use and are often preferred for their convenience and accuracy. On the other hand, passive monitors require external amplifiers, offering more flexibility in amplifier choice but demanding additional setup.
Monitor Size and Wattage
The size of your studio monitors should align with your room size and music style. For home studios, 5-inch woofers are commonly recommended as they provide a good balance between size and performance. Larger woofers, such as 8-inch models, are better suited for bigger rooms and bass-heavy music genres like EDM. When it comes to wattage, aim for 50-75 watts per channel for a typical home studio setup, and consider higher wattage for larger commercial studios.
Budget Considerations
Your budget will play a significant role in choosing your studio monitors. For beginners, a decent pair of monitors can be found in the $200-$400 range. Intermediate users should expect to spend around $400-$1,000, while professionals may invest upwards of $1,000 per monitor for high-end options.
Recommended Options
- Under $200: PreSonus Eris E5 XT offers a compact design, multiple inputs, and room correction features.
- Under $500: Yamaha HS5 provides accurate and uncolored sound, making it a popular choice for mixing and mastering.
- Under $1,500: Adam Audio A7V delivers exceptional transient response and high-end clarity, with front bass ports and front panel controls.
| Characteristics | Values |
|---|---|
| Speaker size | 5", 6.5", 7", 8" |
| Price | $99 - $1500 |
| Compatibility with audio interface | 1/4″ monitor outputs |
| Acoustic treatment | Treated environments |
| Wattage | 50-75 watts per channel |
| Frequency response | 35Hz-35kHz |
| Amplifier | Single-amp, Bi-amp, Tri-amp |
What You'll Learn

Studio Monitor vs Hi-Fi Speakers
Studio monitors and Hi-Fi speakers may look similar, but they are designed for different purposes and behave differently. Studio monitors are used in recording studios, mixing and mastering processes, and radio stations, while Hi-Fi speakers are used in home and car audio systems, as well as entertainment venues like clubs and bars. Studio monitors are designed to have a flat frequency response, meaning all frequencies are played at the same volume level, resulting in an accurate and unbiased listening experience. On the other hand, Hi-Fi speakers are "biased" to emphasise certain frequencies, such as adding more bass or boosting treble frequencies, to create an enhanced and enjoyable listening experience.
Studio monitors usually have a two-way design, with a woofer for low frequencies and a tweeter for high frequencies. Some high-end models have a three-way design, with a supplementary loudspeaker dedicated to medium frequencies. Studio monitors can be active, with built-in amplifiers, or passive, requiring external amplifiers. Active monitors are simpler to use, while passive monitors offer more flexibility.
When it comes to amplifier configurations, single-amp is common for passive monitors, while bi-amp provides better frequency control in active monitors. Tri-amp configurations, found in high-end professional studios, offer the most flexibility and precise sound reproduction.
For home studios, 5-inch studio monitors are generally recommended. The size of the studio monitor should also consider the music style; for example, EDM producers may require larger drivers for better low-frequency response. Wattage is another important factor, affecting the monitor's ability to deliver adequate sound levels without distortion. For small to medium-sized rooms, 50-75 watts per channel is a good starting point.
In terms of budget, beginners can find decent studio monitors for around $200-$400, while professionals may spend upwards of $1,000 per monitor. It's important to consider factors such as driver quality, amplifier power, and speaker placement when choosing studio monitors, as these can impact sound quality.
Easy Ways to Attach Accessories to Your Monitor
You may want to see also

Placement and listening position
Studio monitors are usually placed on stands or a mixing console, with the listener seated a few feet away, at ear level. This allows the engineer to hear the audio in a relatively neutral listening environment.
The standard mixing position involves the listener's head forming an equilateral triangle with the monitors, as shown in the diagram below:
! [Standard Mixing Position](https://i.imgur.com/yZJ1q2k.png)
The logic behind this setup is that without an industry-standard mixing position, stereo image widths may vary drastically from one studio to another. The equilateral triangle method was likely devised as an easy-to-remember rule that offers a good compromise between too wide and too narrow.
Another rule of thumb is to point the monitors directly towards the listener's head. This is because high frequencies are more directional than low frequencies, so they are noticeably louder when the tweeters are pointed at the listener. This setup was likely developed to maintain a consistent listening perspective from one studio to another.
To minimize the effects of standing waves, it is better to spread those waves across multiple frequencies rather than having many waves at the same frequency. This can be achieved by varying the distances between the monitors and each wall. Here are some tips to achieve this:
- Position the monitors against the longest wall to minimize problems from side reflections.
- Ensure that the height of the monitors is either slightly above or below the midpoint between the floor and ceiling. Measure the distance between the monitors and the sidewalls, ensuring they are neither the same nor an exact multiple of the previous two distances. If they are, adjust and re-measure until everything looks good.
- Create space between the monitors and the rear wall. Bass frequencies project outward in all directions, and much of that sound travels backward and reflects off the rear wall. To solve this problem, pro studios often build their monitors directly into the wall, eliminating all rear reflections. However, since this solution is too expensive for home studios, a more affordable option is to maximise the separation between the wall and the monitors. For most rooms, this is between 1-2 feet.
- Find a good head position by centring the chair between the sidewalls to maintain a symmetrical stereo image. Set the chair height so that the listener's head is not halfway between the ceiling and floor.
In addition to the above tips, acoustic treatment can also help to minimize standing waves. Here are some recommendations:
- Add bass traps behind the monitors. This is the most effective way to minimize problems caused by reflected bass frequencies from the rear wall.
- Add absorption at initial reflection points. Cover the four key locations that cause the majority of problems with reflected sound from the monitors: two above the listener's head, one on the left wall, and one on the right wall.
- Add diffusion to the rear wall. This scatters the energy before it has a chance to cause problems.
Monitor stands are also worth the investment. Placing monitors directly on a desk can limit their ability to produce clear, balanced audio because the sound waves bounce off the hard, reflective surface of the desk before reaching the listener's ears. Studio monitors also transmit their vibrations to any surface they are resting on, which can lead to unwanted noises that can muddy up the mix. Monitor stands can raise the speakers closer to ear level and help prevent early reflections from interfering with the listening environment.
Isolation pads, such as the PreSonus ISPD-4, are a more affordable alternative to monitor stands, especially when working in a tight space or on a tight budget. Isolation pads are foam or rubber stands that help to decouple the speakers from the desk, preventing vibrations and sympathetic resonance.
LCD Monitors: Up-Close Viewing with First-Row Technology
You may want to see also

Active or Passive Studio Monitors?
When it comes to studio monitors, you have two options: active or passive. The difference between the two lies in their amplification. Active monitors have built-in amplifiers, while passive monitors require external amplification. So, which one is right for your home studio? Let's take a closer look at the advantages and disadvantages of each.
Active Studio Monitors
Active studio monitors are a popular choice, especially for home studios and small project studios. Here are some of the benefits:
- Simplicity and Ease of Use: Active monitors are often favoured by beginners or those seeking a straightforward setup. With built-in amplification, they are typically plug-and-play, reducing setup complexity.
- Optimised Performance: Manufacturers design the amplifiers specifically for the drivers in active monitors, ensuring optimal performance and sound accuracy.
- Compactness: Active monitors save space and reduce cable clutter since they do not require separate amplifiers. This makes them ideal for smaller studios or spaces where simplicity is valued.
- Precision: Each driver in an active monitor often has its own dedicated amplifier, allowing for more precise control over the sound.
However, there are also some drawbacks to active monitors:
- Cost: They tend to be more expensive upfront because of the built-in amplification.
- Repair Complexity: Repairs can be more complicated and costly if an internal component, such as the amplifier, fails.
- Weight: The built-in amplifiers can make active monitors heavier.
Passive Studio Monitors
Passive studio monitors, on the other hand, offer certain advantages that may appeal to specific users:
- Flexibility: With passive monitors, you have the freedom to choose and upgrade amplifiers independently of the speakers. This allows for more customization and the potential for improvements in sound quality over time.
- Cost-Effectiveness: Passive monitors can be more affordable upfront since they do not include a built-in amplifier.
- Ease of Repair and Upgrade: If a component fails, such as the amplifier or a speaker, it can be replaced independently, making repairs simpler and potentially less costly.
However, there are also some challenges to consider with passive monitors:
- Complex Setup: They require an external amplifier, and properly matching the amplifier and speaker specifications can be challenging, especially for beginners.
- Space and Clutter: The need for an external amplifier takes up additional space and increases cable management complexity.
- Potential Mismatching: Care must be taken to ensure the amplifier and speaker are correctly matched, or performance issues or damage may occur.
So, which type of monitor is right for your home studio? It depends on your specific needs, budget, and production environment. If you value simplicity, optimised performance, and precision, active monitors are likely the better choice. On the other hand, if customisation, flexibility, and cost-effectiveness are more important to you, then passive monitors might be the way to go. Ultimately, both options can deliver excellent sound quality, and the decision should be based on your personal preferences and the specific requirements of your studio setup.
Carbon Monoxide Monitor: Where to Buy Safely
You may want to see also

Amplifier Configurations
The single-amp configuration is the simplest setup, where the left and right speakers are powered by a single amplifier integrated into one of them. This setup is rarely used for studio monitors but is common for computer speakers.
The bi-amp configuration, featuring two amplifier modules in each speaker, offers greater control over the frequency response and more precise sound reproduction. In a 2-way design, each driver has its own dedicated amplifier. Bi-amp setups are often used in professional studios where accuracy and detail are essential. Some 3-way speakers also integrate two amplifier channels, with one powering the woofer and the other powering the midrange speaker and tweeter through a passive filter. However, this is not the best way to amplify 3-way systems.
The tri-amp configuration is the most advanced and complex option, providing the ultimate control over the frequency response. In this setup, each driver in a 3-way speaker (woofer, midrange, and tweeter) has its own dedicated amplifier for low, mid, and high frequencies. Tri-amp configurations are typically used in high-end professional studios where the highest level of accuracy is required.
Monitoring Home WiFi Usage: An Xfinity User's Guide
You may want to see also

Studio Monitor Size
Studio monitors are a key tool for achieving the best sound from your mix. Studio monitors differ from regular speakers in that they aim to reproduce audio signals that are flat across the frequency spectrum. This means that your bass, mids, and highs are consistent, and the result is the same no matter the volume level.
When choosing the right studio monitor size for your home studio, there are several factors to consider:
Room Size
The size of your room will play a crucial role in determining the appropriate studio monitor size. The bigger the room, the larger the monitor can be. If your room size is approximately 4x4x2.5 m, 5" monitors are suitable. For a room that is 5x5x3 m or larger, 8" monitors are a better option. If your room is smaller than 4x4x2.5 m, you may encounter reverb issues with larger monitors.
Low-End Frequency Reproduction
The size of the studio monitor woofer will determine its ability to reproduce low-end frequencies. Larger woofers can produce better and deeper bass. For example, the Yamaha HS5 studio monitors have a 5-inch woofer and can reproduce bass frequencies around 54Hz, while the Yamaha HS8, with an 8-inch woofer, can reproduce bass frequencies around 38Hz. If your music has more low-end frequency information, consider opting for a bigger studio monitor.
Placement and Listening Distance
The placement of your studio monitors is crucial for optimal sound quality. They should be positioned to form an equilateral triangle with your head when seated in the listening position. Additionally, consider the listening distance, as bigger studio monitors can be placed farther away from the listener. Larger monitors also tend to have a wider sweet spot range.
Acoustic Treatment
The acoustics of your room will significantly impact the performance of your studio monitors. If your room is not acoustically treated or properly treated, larger monitors can easily activate room modes, resulting in issues like phase cancellation, reflections, and sound build-up. If your room is untreated or very small (less than 20 feet in length), it is recommended to stick to studio monitors below 5 inches.
Budget
Your budget will also be a factor in determining the appropriate studio monitor size. Studio monitors can range from $200 for a pair of entry-level monitors to $5000 or more for high-end options.
In summary, when choosing the right studio monitor size for your home studio, consider the size of your room, your low-end frequency reproduction needs, placement and listening distance, acoustic treatment, and your budget. It is important to strike a balance between the size of the monitors and the space you have available to ensure optimal sound quality and performance.
Monitoring Employee Internet Usage: Security or Surveillance?
You may want to see also
Frequently asked questions
Studio monitors are designed to reproduce sound exactly as intended, translating to a flat, neutral frequency response with no coloration. This is because production professionals want to hear exactly what they created so they can make informed mix decisions and root out sonic imperfections without being influenced by the “sound” of their speakers. Consumer bookshelf speakers, or “hi-fi speakers,” are designed to provide a purely enjoyable listening experience and generally boost lows and highs (aka the “smiley” EQ curve) to make things sound bright and powerful.
On average, an affordable pair of monitors is going to run right around $300. That’s obviously more than a decent pair of headphones which you can grab for $100 or less. Of course, the price goes up the higher quality you go, or the bigger speaker size you choose.
The most common sizes for studio monitors are 5″, 6.5-7″, and 8″. It’s important to pick the right size for your room and budget. For the majority of us, smaller monitors will do just fine in normal-sized rooms. But, if you mix a lot of low-end heavy music and need that extra bass extension without a sub, you may want to go bigger.
Active studio monitors have built-in amplifiers and are simpler to use, while passive monitors require external amplifiers and offer more flexibility.
Wattage, an important factor, determines the monitor's ability to deliver adequate sound levels without distortion. In short: if you're just starting out or working in a small-to-medium-sized room, a studio monitor with 50-75 watts per channel should do the trick.


