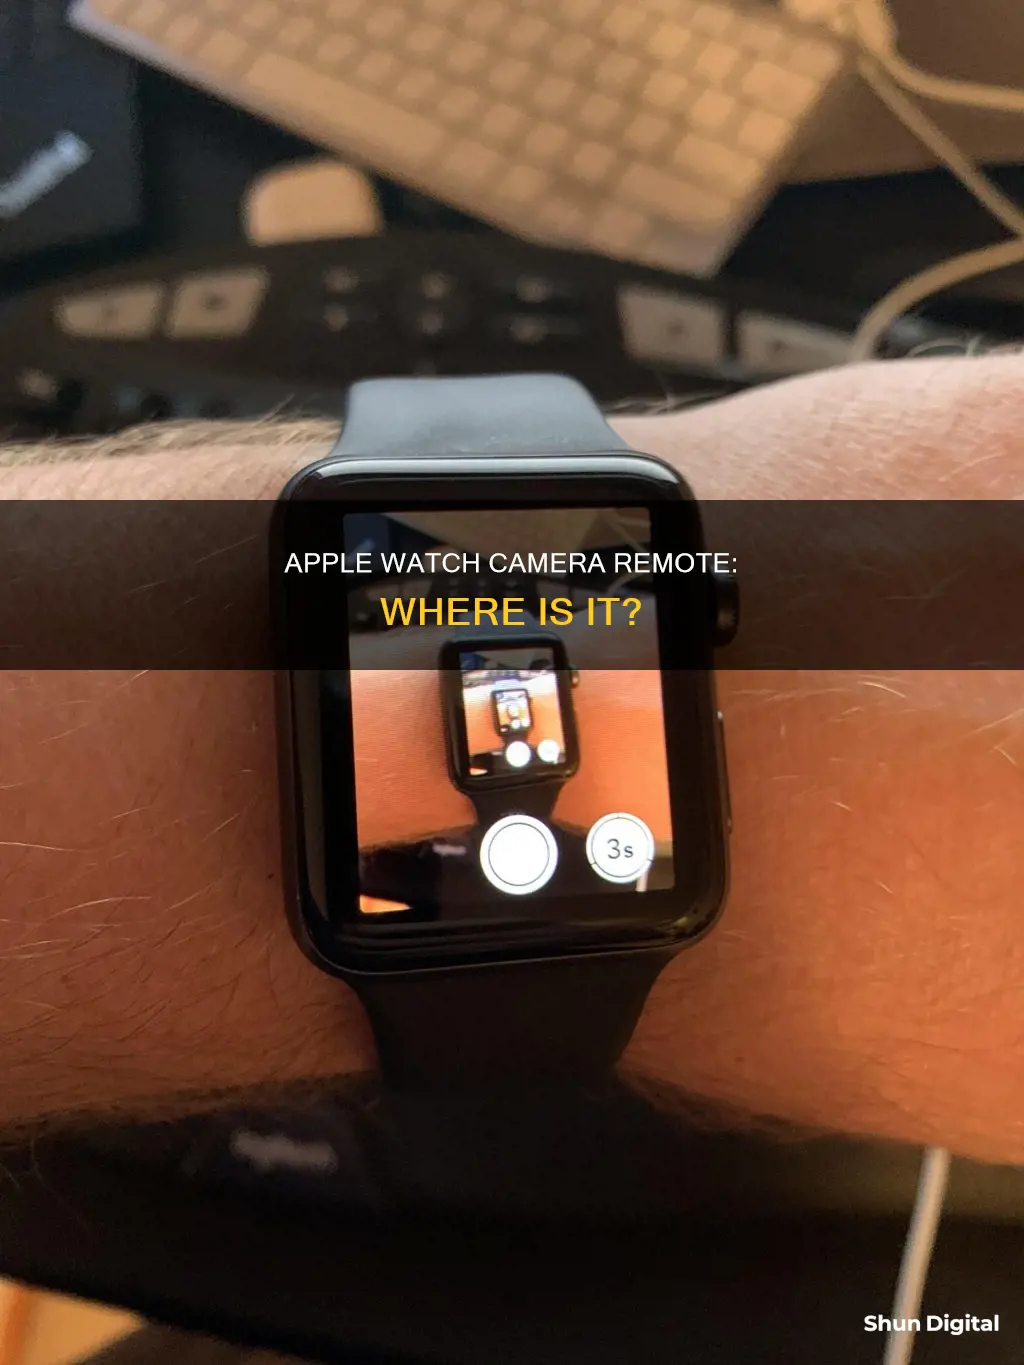
The Apple Watch has a feature that allows it to function as a viewfinder and remote for your iPhone camera. The Camera Remote app has been available on the Apple Watch since 2015, but it has gained more attention recently. The app lets you take pictures and videos from a distance by using your Apple Watch as a viewfinder for your iPhone camera. You can also control the flash, set a shutter timer, and review your shots on your Apple Watch. To use the Camera Remote app, you need to ensure that your Apple Watch is within the normal Bluetooth range of your iPhone (about 33 feet or 10 meters).
| Characteristics | Values |
|---|---|
| Function | The Camera Remote app allows the Apple Watch to be used as a viewfinder for the iPhone camera. |
| Use | Users can take photos and videos from a distance, control the flash, set a shutter timer, and review shots on the Apple Watch. |
| Range | The Apple Watch needs to be within normal Bluetooth range of the iPhone (about 33 feet or 10 meters) to function as a camera remote. |
| Shutter Timer | The default timer is set to 3 seconds but can be turned off or changed. |
| Camera Switching | Users can switch between the front and rear iPhone cameras. |
| Photo Review | Photos can be reviewed on the Apple Watch, but they are saved in the Photos app on the iPhone. |
| Photo Storage | Photos taken with the Camera Remote app are stored in the Photos app on the iPhone. |
What You'll Learn

How to use the Camera Remote app
The Camera Remote app on the Apple Watch allows you to use your watch as a viewfinder for your iPhone camera and take photos and videos from a distance. You can also control the flash, set a shutter timer, and review your shots directly on your Apple Watch.
To use the Camera Remote app, first make sure that your Apple Watch is within the normal Bluetooth range of your iPhone (about 33 feet or 10 meters). Then, open the Camera Remote app on your Apple Watch by pressing the side button and locating it among your other applications. Ensure that the Camera app also opens on your iPhone.
Now, you can use your Apple Watch to frame the shot. To zoom, turn the Digital Crown, and to adjust the exposure, tap the key area of the shot in the preview image. When you're ready, tap the Shutter button to take the shot. By default, there is a 3-second timer, but you can turn this off or adjust other settings if needed.
Your photo will be saved in the Photos app on your iPhone, but you can review it directly on your Apple Watch. To do this, tap the thumbnail in the bottom left to view a photo, and swipe left or right to see more photos. To zoom, turn the Digital Crown, and to pan, drag a zoomed photo. To fill the screen, double-tap the photo, and to show or hide the Close button and shot count, tap the screen. When you're done, tap Close.
You can also use the Camera Remote app to record videos. Position your iPhone and frame the shot using your Apple Watch as a viewfinder. To zoom, turn the Digital Crown, and to start recording, touch and hold the Shutter button. Release the Shutter button to stop recording.
Additionally, you can switch between the front and rear cameras, and adjust settings such as the timer, flash, and Live Photo by tapping the corresponding options in the Camera Remote app.
The Evolution of Smartwatch Cameras: Where Are They Now?
You may want to see also

How to view photos taken with the Camera Remote app
The Camera Remote app on the Apple Watch acts as a viewfinder to help frame your shot. It also lets you set a timer, adjust the flash, enable HDR, toggle Live Photos, and switch between the front and rear cameras.
To view photos taken with the Camera Remote app, follow these steps:
- Open the Camera Remote app on your Apple Watch by pressing the side button and finding it among your other applications. Ensure the Camera app also opens on your iPhone.
- After taking a photo, you can view it by tapping the thumbnail at the bottom left of the Camera Remote app.
- To see other photos, swipe left or right.
- To zoom in on a photo, turn the Digital Crown on your Apple Watch.
- To pan, drag your finger across the zoomed-in photo.
- To fill the screen with the photo, double-tap the image.
- To show or hide the close button and the shot count, tap the screen.
- When you're finished viewing, tap Close.
Note that to use the Camera Remote app, your Apple Watch needs to be within the normal Bluetooth range of your iPhone (about 33 feet or 10 meters). The photos you take will be saved in the Photos app on your iPhone, but you can review them directly on your Apple Watch using the steps outlined above.
Streaming Roku Camera Footage to Your TV
You may want to see also

How to disable the camera timer
The Apple Watch Camera Remote app allows you to use your watch as a viewfinder for your iPhone camera and take photos and videos from a distance. By default, there is a three-second timer before the shot is taken, giving you time to lower your wrist and raise your eyes if you're in the shot. Here is how you can disable the camera timer:
First, open the Camera Remote app on your Apple Watch. Ensure that the Camera app also opens on your iPhone. Position your iPhone to frame the shot using your Apple Watch as a viewfinder. You can turn the Digital Crown to zoom and tap the key area of the shot in the preview image to adjust the exposure.
To disable the timer, simply tap on the timer icon on the Camera Remote app to turn it off. You can also change other settings, such as the camera (front or rear), flash (auto, on, or off), and Live Photo (auto, on, or off).
Once you have disabled the timer and adjusted any other settings, you can take the shot by tapping the Shutter button on your Apple Watch. The photo will be saved in the Photos app on your iPhone, but you can review it on your Apple Watch.
In addition to the Camera Remote app, you can also use the Timers app on your Apple Watch to set, pause, resume, or end timers.
Watching DV Camera Footage on Windows 10
You may want to see also

How to switch between the front and back camera
The Apple Watch Camera Remote app allows you to use your Apple Watch as a viewfinder and remote for your iPhone's camera. To switch between the front and back camera on your iPhone, follow these steps:
- Open the Camera Remote app on your Apple Watch. Ensure that the Camera app on your iPhone is also open.
- Use your Apple Watch to frame the picture or video. You can also use the Apple Watch to set a timer and manage camera flash settings.
- To switch between the front and rear cameras, tap the camera flip icon in the lower-right corner of the screen. The icon looks like the outline of a camera with two curved arrows forming a circular shape inside it.
- Tapping the camera flip icon will animate the on-screen photo preview, switching between the front and back cameras.
- To switch back to the previous camera, simply tap the camera flip icon again.
It's important to note that for the Apple Watch to function as a camera remote, it needs to be within the normal Bluetooth range of your iPhone, which is about 33 feet or 10 meters.
Smartwatch Compatibility with Dexcom: Bluetooth Camera Edition
You may want to see also

How to change other camera settings
The Camera Remote app on your Apple Watch allows you to change a few camera settings remotely. Here's a step-by-step guide on how to change these settings:
- Open the Camera Remote App: Press the Digital Crown on your Apple Watch to access the Home Screen, and then tap on the Camera Remote app icon.
- Wait for the Connection: Ensure your Apple Watch is connected to your iPhone via Bluetooth. The Camera Remote app will automatically connect with your iPhone and open the Camera app.
- Adjust Exposure and Focus: Before taking a picture, you can tap anywhere on your Apple Watch's display to adjust the exposure and focus. This will help you capture better images based on the available light.
- Change Camera Settings: To modify other camera settings, tap the options button in the bottom-right corner of the Camera Remote app. From here, you can change the flash, Live Photo, and HDR settings.
- Confirm Your Changes: Once you've made your desired changes, tap "Done" in the top-right corner of the screen to save your new settings.
It's important to note that the Camera Remote app has limited settings adjustments. If you want to change other camera settings, you'll need to use your iPhone directly. Additionally, remember that your Apple Watch needs to be within the normal Bluetooth range of your iPhone (about 33 feet or 10 meters) for the Camera Remote feature to function properly.
Is It Safe to View an Eclipse Through a Camera?
You may want to see also
Frequently asked questions
The Camera Remote app can be found on the home screen of your Apple Watch.
Once you've found and opened the Camera Remote app on your Apple Watch, your iPhone will automatically open its Camera app. You can then use your Apple Watch as a viewfinder to frame your shot. To adjust the exposure, tap the key area of the shot in the preview image. To take the photo, tap the shutter button on your Apple Watch.
Open the Camera Remote app and tap the preview in the bottom-left corner of your Apple Watch. You can then swipe left or right to see other photos, turn the Digital Crown to zoom, drag on a zoomed photo to pan, or double-tap the photo to fill the screen.
Open the Camera Remote app, tap the options button in the bottom-right corner, then select Front or Rear to switch between cameras.


