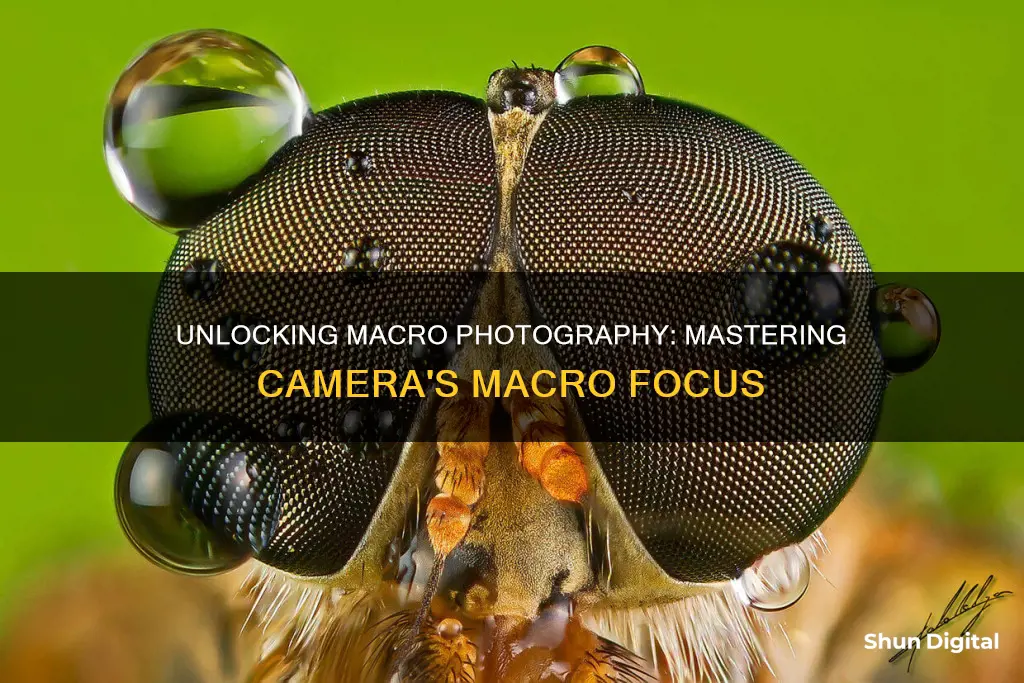
Macro photography is a genre of photography that involves capturing small subjects up close, often insects and flowers, but also still life such as jewellery and small household objects. It requires a camera with a macro mode or a macro lens, the latter being a tool that allows photographers to capture tiny details, magnifying their beauty and complexity. Macro lenses have a very short focal length and are designed for extreme close-up photography. They have a minimum focusing distance, which indicates how close the photographer can get to their subject and still achieve a sharp image.
| Characteristics | Values |
|---|---|
| Purpose | Capturing small items, often insects and flowers, but also still life like jewelry and small household objects |
| Definition | A 1:1 macro image means that the lens will capture a life-sized image of an object. A 1:2 ratio captures a small object at half of its original size |
| Camera Type | Many point-and-shoot cameras have macro modes. A macro lens with a DSLR offers more quality and flexibility |
| Camera Movement | Even the tiniest camera movements are amplified, so a sturdy tripod is recommended |
| Focusing Distance | The minimum focusing distance indicates how close you can get in macro photography. Modern compact cameras can focus as close as an inch from the object |
| Focusing Problems | The depth of field is extremely thin when working with macro photography, leading to blurry images or only small areas being in focus |
| Focus Stacking | A technique where multiple images with different focus points are stitched together in editing software to create a final image with a greater depth of field |
| Autofocus | Not the preferred mode for macro images due to issues with focus hunting and locking onto the wrong part of the image |
| Manual Focus | Requires precision and practice, but can help avoid the pitfalls of autofocus |
| Focusing Aids | Using the camera's LCD screen instead of the viewfinder, zoom tools, picture-in-picture view, focus scale, and focus peaking |
| Lighting | External light sources and reflectors are important to achieve the desired lighting and eliminate unwanted shadows |
| Aperture | Closing the aperture to f11 or higher will increase the depth of field but requires adjustments to shutter speed and ISO settings |
| Shutter Speed | A fast shutter speed is needed when holding the camera by hand to avoid blurry images due to camera shake |
| ISO | Increasing the ISO settings can help balance shutter speed and depth of field while maintaining image brightness |
What You'll Learn

Macro lenses and their magnification capabilities
Macro lenses are capable of producing images that are greater than life-size, with a magnification ratio of 1:1 or higher. This means that the ratio of the subject's projection on the imaging sensor is equal to or larger than its size in reality. For example, a 10-centimetre-long lizard with a projection on the sensor of 2 centimetres would have a magnification ratio of 1:5, meaning it appears five times larger in the image than in real life.
The magnification ability of a lens is stated in its specifications, but it is often challenging to achieve a true 1:1 magnification in practice. The minimum focusing distance of a lens determines how close you can get to your subject while still achieving sharp images. Longer focal length lenses, such as those in the 150-200mm range, require a greater distance from the subject, providing more working space for the photographer.
Macro lenses with a focal length between 90mm and 105mm are the most popular as they strike a balance between size, weight, affordability, and minimum focus distance of around 30cm. These lenses typically have internal focusing mechanisms, allowing the front element to remain a comfortable distance of about 14cm from the subject.
It is important to note that the term "macro" is sometimes used liberally by lens manufacturers, with some zoom and prime lenses marketed as "macro" despite only offering 1:4 or 1:3 magnification ratios. When shopping for a true macro lens, look for specifications stating "macro 1:1" or higher on the lens barrel.
Additionally, the effective magnification of a macro lens can be increased by using extension tubes or bellows, which increase the distance between the lens and the sensor, resulting in greater magnification. Close-up lenses or filters attached to the front of the camera lens can also increase magnification but may result in reduced image quality.
In summary, macro lenses with a focal length of 90-105mm, a minimum focusing distance of around 30cm, and a magnification ratio of 1:1 or higher are ideal for achieving sharp, highly magnified images of small subjects.
Troubleshooting Eufy Camera Charging Issues
You may want to see also

Focusing issues with macro lenses
Focusing is one of the most challenging aspects of macro photography. There are two main issues that can cause problems when focusing on a macro subject: depth of field and magnification.
Depth of Field
The depth of field in macro photography is very shallow because you are so close to the subject. This can lead to issues with focus, especially when photographing complex subjects such as flowers. Even the slightest movement of the camera or the subject can quickly result in a loss of focus. To achieve accurate focusing, it is crucial to have a steady setup, such as a sturdy tripod, and ensure that the subject remains stationary.
Magnification
The high magnification in macro photography further exacerbates focusing challenges. Any slight movement closer to or farther from the subject can instantly cause it to fall out of focus. Additionally, camera shake can introduce blur into the image, making it crucial to minimise vibrations, for example, by using a remote release or a tripod.
Autofocus Challenges
Autofocus systems in cameras can struggle in macro photography due to the extreme focusing range and high magnification. Insufficient light or lack of contrast in the scene can lead to autofocus hunting endlessly or giving up altogether. This is a common issue with macro lenses, and it is important to understand the limitations of your camera's autofocus capabilities.
Manual Focus Advantages
Manual focus is often preferred in macro photography to overcome the limitations of autofocus. By using the focus ring, you can fine-tune the focus more precisely. Additionally, by setting the lens to its closest focusing distance, you can slowly move forward and backward until the subject appears sharp in the viewfinder. This technique requires practice and a steady hand or a tripod to achieve consistent results.
Focus Stacking
Focus stacking is a powerful technique in macro photography. It involves capturing multiple images at slightly different focus distances and then combining them during post-processing to create a single image with an extended depth of field. This method is particularly useful for static subjects and can help overcome the limitations of shallow depth of field inherent in macro photography.
Capturing Close-Up Objects: Focus Tips for Photographers
You may want to see also

The role of lighting in macro photography
There are three main types of light used in macro photography: continuous, flash, and natural. Each has its advantages and photographers will often use a combination of these to achieve the desired effect.
Continuous Light
Continuous light is a steady, constant light source. This type of light is useful for macro photographers as it allows them to see exactly how the light is affecting their subject and make adjustments as needed. It gives the photographer full control over the direction and intensity of the light, which is essential for macro photography due to the very narrow aperture used to obtain depth of field. Continuous light is also useful for videography as it can be used for both photos and videos without needing to change any settings. LED lights are a popular choice for continuous light as they are lightweight, easy to carry around, and provide complete control over the direction, intensity, and colour of the light.
Flash
Flash is a brief, powerful burst of light that can be used to create dramatic effects in macro photography. Its main advantage is its ability to freeze moving subjects due to its short duration. Flash is more complex to use than continuous light, with various settings to learn, but the results can be amazing. One challenge with using flash is that the lens can block the light, creating shadows, so external flash units are often used to overcome this issue.
Natural Light
Natural light from the sun is a popular choice for macro photographers, especially daylight with a bright, overcast sky as it diffuses sunlight and creates even, gentle lighting. Windows can also be used as a natural light source for indoor macro photography, providing soft side lighting. However, natural light has its challenges, including the unpredictability of the weather and the time of day, which can result in harsh shadows or overexposed spots.
Lighting Techniques
Regardless of the type of light used, there are several techniques that can be employed to improve macro photography lighting:
- Diffusers can be used to soften the light and create a more natural look, especially when shooting subjects with shiny surfaces.
- Reflectors can be used to bounce light into dark areas and fill in unwanted shadows.
- Coloured gels or filters can be added to lighting equipment to create unique, artistic images.
- The direction of the light can be altered to backlight, side light, or front light the subject, each creating a different effect.
In conclusion, lighting plays a crucial role in macro photography, and by understanding the different types of light and lighting techniques, photographers can create stunning, creative images.
Mastering Lumix G7: Camera Modes Explained
You may want to see also

Manual vs autofocus
Macro photography can be one of the most satisfying genres of photography, but it comes with its own set of challenges. One of the biggest challenges is focusing. The shallow depth of field and high magnification in macro photography can make it difficult to achieve sharp focus. This is where the debate between manual focus and autofocus comes into play.
Autofocus allows the camera to set the focal point, taking on most of the work to ensure a clear shot. It is generally quick, although its speed varies depending on the camera and lens type. Autofocus has seen advancements such as tracking, which enable it to lock focus on a subject and follow it through the frame. This feature is particularly useful for capturing moving subjects, such as wildlife or sports. Autofocus is also helpful when you're working on your own or shooting very fast-moving subjects.
However, autofocus has its limitations. It relies on contrast to identify subjects, so it struggles in low-contrast scenes, such as when shooting in heavy backlight. Autofocus also performs poorly in low-light conditions because it needs light to determine where to focus. In scenes with many objects, autofocus can get confused, focusing on foreground objects instead of the desired subject. Additionally, autofocus is not very precise, making it challenging to nail focus at a specific spot, which is crucial in genres like landscape and portrait photography.
This is where manual focus comes in. Manual focus enables the photographer to set the focal point, providing more creative control over the image. It offers greater precision and is ideal for situations where autofocus may struggle, such as low-light conditions, shooting through glass or fences, or dealing with foreground distractions. Manual focus is also better suited for certain types of photography, such as macro photography, deep landscape photography, and complex focus bracketing. It is also useful when you need to nail a precise point of focus, like focusing on the eye in a portrait.
While manual focus gives you more control, it is generally slower than autofocus. This makes it less suitable for capturing moving objects or action scenarios, such as sports or birds in flight. Manual focus also requires more work from the photographer, as they have to choose the point of focus and make constant adjustments in dynamic scenes.
In conclusion, neither autofocus nor manual focus is universally superior. The choice depends on the photographer's needs and shooting conditions. Autofocus is generally recommended as the default option, with manual focus being used in specific scenarios where autofocus struggles. For macro photography, manual focus is often preferred due to the high magnification and the need for precise control over the point of focus. However, some photographers may choose to use autofocus in macro photography when dealing with fast-moving subjects or when they want to focus on other aspects of their craft.
The Evolution of Cameras: A Historical Perspective
You may want to see also

Macro photography equipment
Macro photography is a challenging but rewarding pursuit, requiring some specialist equipment to get the best results. Here is a guide to the essential gear for macro photography.
Tripod
A tripod is a must-have for macro photography. It helps to stabilise your camera, preventing camera shake and allowing for sharper images. When choosing a tripod, look for one with variable angle legs or an adjustable centre post, which will give you more flexibility with your shooting angles. It is also beneficial to have a tripod that can get low to the ground, as you will often be shooting at very low heights.
Macro Lens
A macro lens is another essential piece of equipment. It allows you to get extremely close to your subject and achieve a magnification ratio of 1:1 or greater. There are two types of macro lenses: 'short' and 'tele'. Short macro lenses have a focal length between 40-90mm and are compact and lightweight, making them perfect for handheld use. However, they don't provide a large working distance, so you'll need to get quite close to your subject. Tele-macro lenses have a focal length upwards of 90mm, providing a more generous working distance, which is useful for wildlife photography. They are also heavier and more expensive.
Focusing Rail
A focusing rail is a device that attaches to the top of your tripod. It allows for incremental compositional adjustments, moving your camera forward, back, and side to side with precision. This is especially useful for macro photography, where a high degree of finesse is required.
Lighting
Lighting is a critical component of macro photography. You can use natural light, but it can be challenging to get the right exposure. Electronic flash is a popular choice, providing bright, even illumination. Ring flashes are often used in scientific and medical photography and provide shadowless lighting. O-ring flashes provide a little bit of shadowing, giving a more directional light. You can also use reflectors and diffusers to soften harsh shadows and create more natural-looking light.
Close-Up Filters
Close-up filters, or diopters, are circular screw-in filters that attach to the front of your lens and act like a magnifying glass. They are a cheap and easy way to get started with macro photography, but they can degrade image quality and don't provide a generous camera-to-subject distance.
Extension Tubes
Extension tubes are hollow tubes that fit between your lens and your camera, increasing the distance between the two and allowing for closer focusing. They are an affordable way to get into macro photography, but be aware that cheap tubes may damage your camera's electrical contacts and may not maintain autofocus and auto-exposure functionality.
Reversing Rings
Reversing rings allow you to mount your lens backward on your camera. This is a cheap and effective way to get into macro photography, but it does require manual focusing and manual aperture control.
Bellows
Bellows are similar to extension tubes but offer a continuous range of magnification possibilities without changing lenses or tubes. They provide extreme magnification but are bulky and not very agile, making them less suitable for photographing tiny objects in the field.
Camera
While not essential, having a camera with a cropped sensor will affect how your macro lens behaves. You may also want to consider a camera with focusing aids, such as the ability to zoom in on the LCD screen, focus peaking, or a focus bracketing feature.
With the right equipment and plenty of practice, you'll be taking stunning macro photographs in no time!
Charging Vintage 8mm Cameras: A Step-by-Step Guide
You may want to see also
Frequently asked questions
Macro focus is a technique used in photography to capture small subjects up close, often with a magnification ratio of 1:1, revealing intricate details that would otherwise be invisible to the naked eye.
Essential equipment includes a macro lens or a camera with a macro mode, a tripod for stability, and sometimes additional lighting equipment like a ring flash or LED light.
Set your camera to 'aperture priority mode' with the aperture set to f/8. Use a fast shutter speed, especially if you're holding the camera manually. Ensure your shutter speed is 1/250s or faster to capture crisp images.
A macro lens has a much shorter minimum focusing distance, allowing you to get extremely close to your subject. They also have a very short focal length and are designed specifically for extreme close-up photography.
One of the biggest challenges is achieving and maintaining focus. The depth of field in macro photography is extremely shallow, so even slight movements can cause the image to go out of focus. Camera shake and autofocus issues are also common problems.


