An AC adapter is a device that allows a camera to be connected to a computer. It is used to transfer photos from a camera to a computer, as well as to charge the camera's battery. The AC adapter is connected to the camera's digital terminal and to a USB port on the computer. Some cameras have built-in USB cables, while others require the use of a separate USB cable. It is important to use the correct type of USB cable for the specific camera model. The AC adapter can also be plugged into a wall socket to charge the camera's battery.
| Characteristics | Values |
|---|---|
| Power Source | Standard wall outlet AC power |
| Internal Battery | No |
| Recording Modes | Motion-activated or continuous |
| Memory Card | Micro SD card (up to 128GB) |
| Compatibility | PC and Mac |
| Viewing Angle | 80-degree wide angle lens, 15-degree upward viewing angle |
| Warranty | 2-year parts and labor warranty |
What You'll Learn
![]()
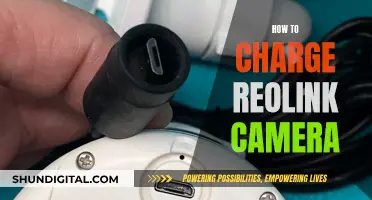
Using an AC adapter to charge a camera
An AC adapter is a great way to charge your camera without the need for batteries.
There are many AC adapters available on the market, and some cameras even come with their own. If your camera didn't come with an AC adapter, you can purchase one separately. When choosing an AC adapter, it is important to select one that is compatible with your camera. Using an incompatible AC adapter can damage your camera.
To use an AC adapter to charge your camera, simply plug the adapter into a power outlet and connect it to your camera. Some AC adapters will have a dedicated port for your camera, while others may require you to use the same port as your battery. If you are using an AC adapter that plugs into the same port as your battery, be sure to remove the battery before plugging in the adapter.
Once your camera is connected to the AC adapter, it should begin charging automatically. You may see a charging indicator on your camera's screen or a light on the AC adapter itself.
It is important to note that not all cameras can be charged via AC adapter. Some cameras may only support charging via USB or a dedicated charging dock. Always refer to your camera's user manual to determine the best way to charge your device.
In addition to using an AC adapter, you can also charge your camera by connecting it to a computer via USB. This method may be slower than using an AC adapter, but it can be a convenient option if you are near a computer.
- Always use the correct AC adapter for your camera model. Using an incorrect AC adapter can damage your camera.
- Ensure that your camera is turned off before connecting or disconnecting the AC adapter.
- If your camera has a removable battery, consider removing it while charging via AC adapter to prolong the battery's lifespan.
- Some AC adapters may become warm during use. This is normal, but if the adapter becomes hot, disconnect it and allow it to cool down before using it again.
- Be careful not to bend or damage the connector on the AC adapter, as this can cause electrical shorts or damage to your camera.
By following these tips and guidelines, you can safely and effectively use an AC adapter to charge your camera, ensuring that your device is always ready to capture the moments that matter.
Understanding Panasonic's RAW File Extension for Lumix Cameras
You may want to see also
![]()
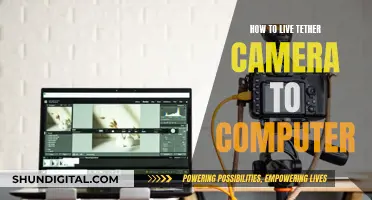
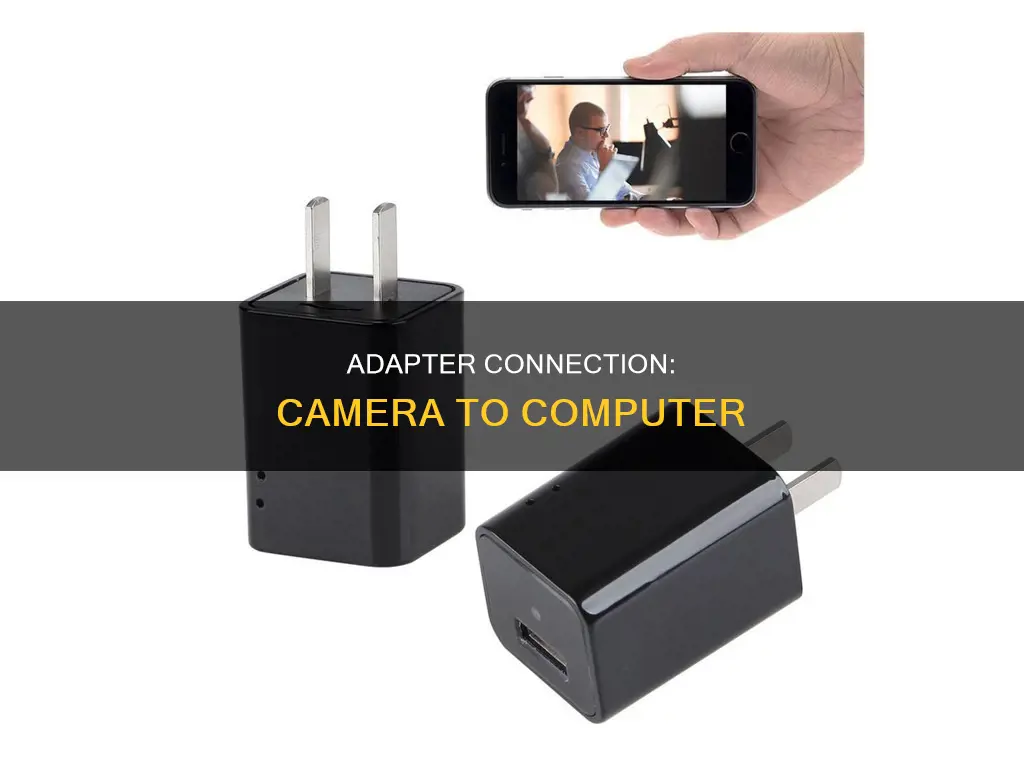
Connecting a camera to a computer
Firstly, ensure that your computer is turned on. Then, turn on your camera. The method for doing so will vary depending on the model, but most cameras have a dial near the top that you can use to power on the device.
Next, locate the USB cable that came with your camera. This cable is usually also used for charging. Plug the smaller end of the cable into your camera. The port for this cable may be hidden under a plastic flap, often labelled "Video Out". Then, plug the larger, rectangular end of the USB cable into an available USB port on your computer.
At this point, your computer should detect the camera and begin installing the necessary drivers. If this is the first time connecting the camera, this may take a few minutes. Once the drivers are installed, a pop-up window will usually appear, asking how you would like to proceed with the connected device.
To access the photos on your camera, open the "My Computer" application on your PC. Double-click on your camera's name, which should appear under the "Devices and Drives" section. From here, you can navigate to the camera's storage folder, typically named "DCIM". Inside this folder, you may find another folder named after the camera brand, such as "100CANON".
Within these folders, you will find your photos and videos. You can now choose to delete, copy, or view these files as needed.
If you are having trouble connecting your camera to the computer, there are a few alternative methods to consider. One option is to remove the SD card from your camera and insert it into an SD card reader connected to your computer. Many modern laptops have built-in SD card readers, but if your computer does not have one, you can purchase an external SD card reader that plugs into a USB port.
Another option for transferring photos is to use a wireless connection through a dedicated app or by syncing your phone to your computer. This method may vary depending on your camera model and the apps you choose to use.
By following these steps, you should be able to successfully connect your camera to your computer and transfer your photos with ease.
Choosing the Right Ethernet Cable for Surveillance Cameras
You may want to see also
![]()
Using a USB cable to connect a camera to a computer
To connect a camera to a computer using a USB cable, you will need a USB cable, a computer with an open USB slot, and your camera. The first step is to turn on your computer. Then, turn on your camera. You may need to press the photo playback button, which is usually marked with a play icon.
Next, locate the USB slot on your camera. This can sometimes be hidden behind a panel or door, so check your camera's user guide if you're unsure. Connect the USB cable to the camera, taking care to align the USB connector with the USB slot. Then, connect the other end of the USB cable to the computer.
Once the cable is connected to both devices, your camera may display a connecting message on the LCD screen. A pop-up window should appear on your computer screen, giving you options for downloading photos. Select an option and follow the on-screen instructions.
If your computer cannot recognize your camera, you may need to install the camera's software using the CD that came with the device or by downloading it from the manufacturer's website.
Fight Camera Tickets: A Guide for Los Angeles Drivers
You may want to see also
![]()
Using an AC adapter to power a hidden camera
Choosing the Right AC Adapter Hidden Camera:
- Video Quality: Look for a camera that records in high definition, preferably 1080p or higher. This will ensure clear and detailed footage.
- Recording Mode: Choose between motion-activated recording, which only records when activity is detected, or continuous recording, which records 24/7. Motion-activated recording saves memory space.
- Memory: Consider the memory capacity of the camera. Some cameras offer internal memory up to 32GB, while others use removable SD cards up to 128GB.
- Audio: If you require audio recording, ensure the AC adapter camera has a built-in microphone.
- Viewing Angle: Check the viewing angle of the camera to ensure it covers the desired area. Some cameras offer a wider viewing angle, making them ideal for larger rooms.
Setting Up Your AC Adapter Hidden Camera:
- Power Source: Plug the AC adapter camera into a standard wall outlet for power. You can also use an extension cord if your outlet isn't facing the desired direction.
- Recording: Insert a memory card into the camera if required. Then, use the included remote control or buttons on the device to turn on the camera and select the desired recording mode.
- Playback: To view your recorded videos, simply connect the camera to your computer using a USB cable or remove the memory card and insert it into your computer's card slot.
Additional Features:
- Covert Design: AC adapter hidden cameras are designed to be discreet, with no lights, beeps, or other indications when recording.
- Time/Date Stamp: Some cameras offer an embedded time and date stamp on the video, which is useful for evidence and documentation.
- Loop Recording: Some cameras feature loop recording, overwriting old footage when the memory is full, so you don't have to worry about manually deleting files.
- Charging: Certain AC adapter cameras can also function as regular USB chargers, allowing you to charge your phone or other devices while recording.
Common Use Cases:
- Home Security: Keep an eye on your home while you're away and protect against break-ins or vandalism.
- Nanny Camera: Monitor your babysitter or nanny to ensure your children are safe and well cared for.
- Infidelity: Investigate suspicions of a cheating spouse or partner.
- Business Surveillance: Monitor your office, investigate internal theft, or ensure employee productivity.
Charging Your 808 Camera: How Long is Too Long?
You may want to see also
![]()
Using an AC adapter to charge a camera battery
Using an AC adapter is a great way to charge your camera battery, and it's relatively simple to do. Here's a step-by-step guide on how to use an AC adapter to charge your camera battery:
Step 1: Understand the Basics
Firstly, it's important to know that not all cameras come with an AC adapter, so check your camera model's specifications. Also, ensure that you have the correct USB cable for your camera, as some require specific connectors.
Step 2: Connect the Camera to the AC Adapter
Locate the USB slot on your camera, which is usually hidden behind a panel or door. Connect the USB cable to the camera, ensuring that the connector is aligned correctly with the USB slot.
Step 3: Plug the AC Adapter into a Power Outlet
Connect the other end of the USB cable to the AC adapter. Then, plug the AC adapter into a power outlet.
Step 4: Turn Off the Camera
For the charging to begin, you need to turn off your camera. The battery will not charge if the camera is turned on.
Step 5: Wait for Charging to Complete
Once the camera is connected and turned off, charging will begin. The charging time varies depending on the ambient temperature and the battery's remaining capacity.
Step 6: Unplug When Charged
When the charging is finished, the access lamp on the camera will turn off, indicating that it's safe to unplug the camera from the AC adapter.
Additional Tips:
- If you're using a Canon camera, you can purchase the USB Power Adapter PD-E1 separately to charge certain battery packs without removing them from the camera.
- To protect your battery's health, avoid charging it continuously for more than 24 hours.
- If you encounter any issues during charging, such as the charging lamp not lighting up, unplug the power cord, reinsert the battery, and try again after a few minutes.
By following these steps, you can efficiently and effectively charge your camera battery using an AC adapter, ensuring your camera is ready for your next photo adventure!
Charging the Go Fish Camera: A Quick Guide
You may want to see also
Frequently asked questions
You can connect your camera to your computer using a USB cable. Simply connect one end of the USB cable to your camera and the other end to your computer. Ensure your computer is powered on and turn on your camera.
Yes, you can use an AC adapter to connect your camera to your computer. The AC adapter is usually plugged into a power outlet, and the camera connects to the computer via a USB cable. However, some cameras may have specific requirements, so refer to your camera's user manual for detailed instructions.
An AC adapter is a power supply that converts AC (alternating current) power from a wall outlet to DC (direct current) power required by your camera. It ensures a constant power supply to your camera, so you don't rely on batteries.
It depends on the camera model. Some cameras can charge their batteries via the AC adapter when connected to a power outlet, while others may require a separate battery charger. Check your camera's manual for specific instructions.