Reolink offers a range of battery-powered cameras that can be charged in multiple ways. The charging method depends on the model of the camera and whether the battery is embedded or removable. For instance, the Argus 2, Argus Pro, Argus Eco, and Reolink Go have removable batteries that can be charged separately or with the battery inserted in the camera. These models can also be charged using a Reolink Solar Panel. On the other hand, the Reolink Argus Eco has an embedded battery that can be charged using a DC adapter or a Reolink Solar Panel. It is important to note that the company does not recommend constantly operating the camera while plugged in as it may shorten the battery life.
| Characteristics | Values |
|---|---|
| Charging Methods | Power adapter, solar panel, USB power bank, or PC USB port |
| Power Adapter Type | DC 9V/5A USB adapter |
| Charging Cable | 5V/2A Micro USB Cable or USB-C cable |
| Battery Indicator Lights | Green: fully charged, Orange: charging |
| Charging Temperature Range | 0°C to 60°C |
What You'll Learn
![]()
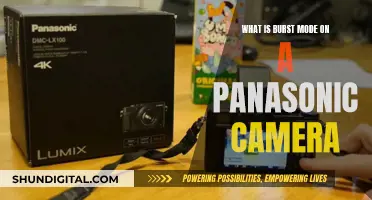
Charging via power adapter
Reolink cameras can be charged via a power adapter or a solar panel. The following instructions will detail how to charge your Reolink camera via a power adapter.
First, you need to determine what type of charging cable your Reolink camera requires. If your camera is the Argus 2, Argus Pro, Argus Eco, Argus 2E, Argus PT, Argus 3, Argus 3 Pro, Reolink Go, Reolink Go PT, Go Plus, Go PT Plus, or KEEN Ranger PT, it will come with a 5V/2A Micro USB Cable. If your camera is the Reolink TrackMix, Reolink TrackMix LTE, Duo 2, or Duo 2 LTE, it will come with a USB-C cable.
Once you have determined the correct charging cable for your camera, you can proceed to charge your camera. If your Reolink camera has a removable battery, you can choose to charge the battery separately or charge the camera with the battery inserted. To charge the battery separately, open the back cover of the camera by twisting it a little, then pull out the battery. Connect the battery to the USB adapter via the USB cable and plug the adapter into an electrical outlet.
If you would like to charge the camera with the battery inserted, you can do so by plugging the camera directly into the USB adapter and then into an electrical outlet.
Note that the LED status light on the camera will indicate the battery charging status: an orange LED means the battery is charging, while a green LED means the battery is fully charged. It is not recommended to operate the camera while it is constantly plugged in, as this will shorten the battery life.
Charging a Fuji X-30: A Quick Guide to Powering Up
You may want to see also
![]()
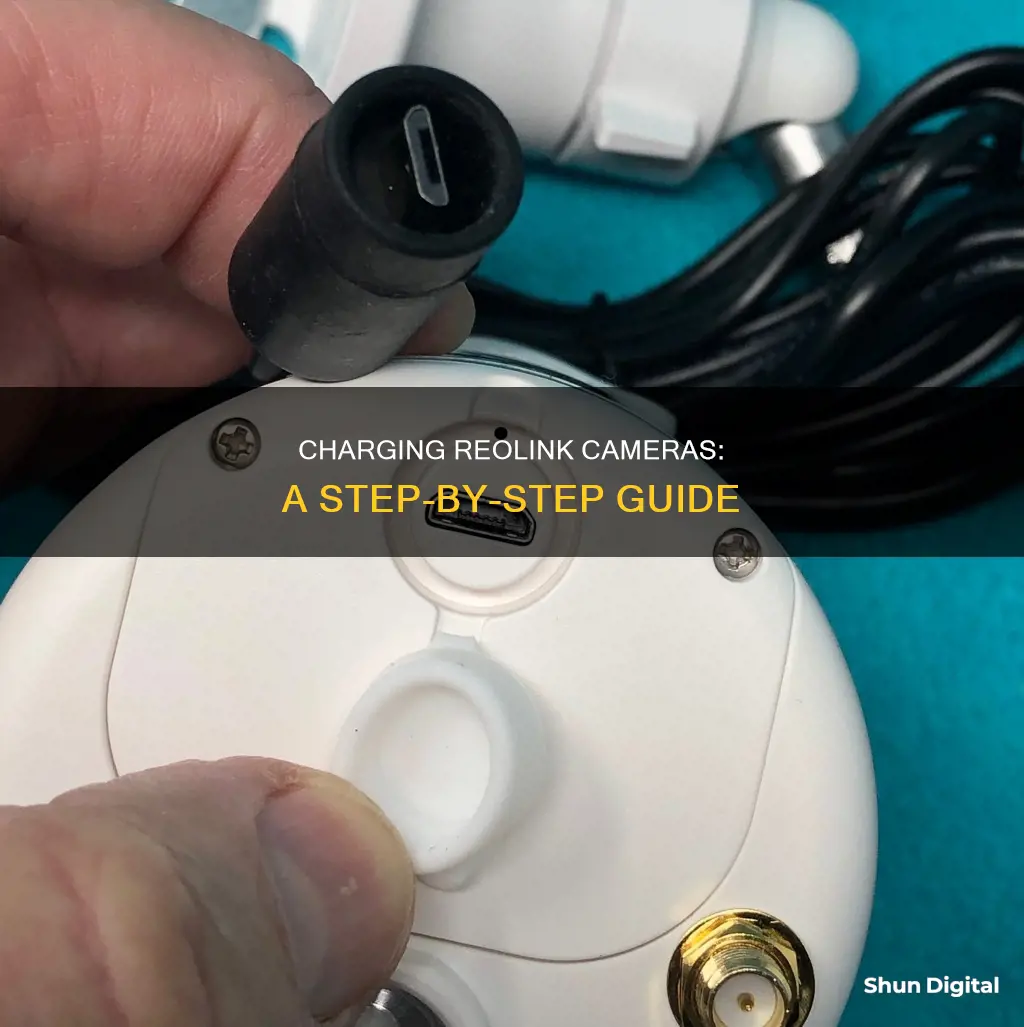
Charging via solar panel
Reolink offers a few different ways to charge your camera, including via a solar panel. This method is compatible with all Reolink battery-powered cameras.
To charge your Reolink camera using a solar panel, you will need to purchase a Reolink solar panel separately. Once you have the solar panel, follow these steps:
- Ensure that your solar panel is installed in a location with ample sunlight, and that the panel is facing the sun directly. Remove any obstructions, such as trees or buildings, that may be blocking the sunlight.
- Connect the solar panel to your camera. Check that the connection is stable and secure.
- Check the battery light on the camera, located around the micro USB port. If the connection is successful, the light will be orange, indicating that the battery is charging. A green light means the battery is fully charged.
- You can also launch your Reolink App to check the charging status. When connected to a solar panel, an icon of the sun will appear on the camera page. A lightning bolt icon indicates that the camera is charging.
- If your camera is not charging, try adjusting the angle of the solar panel to maximize sunlight exposure.
- Regularly clean the solar panel with a wet tissue or cloth to remove dust and debris, which can hinder its efficiency.
- Ensure that the camera's operating and charging temperatures are within the recommended range. Reolink devices function properly within a temperature range of -10°C to +55°C (14°F to 131°F). The optimal charging temperature is 0°C to 45°C (32°F to 113°F).
- If your camera has extensive use, consider reducing or stopping its usage for a day to allow the solar panel to recharge the battery.
- If you encounter any issues or the camera still does not charge, refer to Reolink's troubleshooting guide or contact their support team for further assistance.
By following these steps, you can effectively charge your Reolink camera using a solar panel, harnessing the power of the sun to keep your camera running smoothly.
Charging the Eufy Solar Camera: A Quick Guide
You may want to see also
![]()
Charging with the battery inserted
There are two ways to charge your Reolink camera with the battery inserted. The first method is to use a power adapter, and the second is to use a Reolink Solar Panel.
Charging with the Power Adapter
The power adapter used to charge your Reolink camera is a USB adapter (DC 9/5V), which is commonly used for smartphones. This adapter will not be included in the box, but a micro-USB cable will be. You can also use a USB-C cable, depending on your model. To charge your camera, connect the USB cable to the adapter and plug it into an electrical outlet. The LED under the micro-USB port will flash to indicate that your camera is charging. If the LED is flashing red or orange, this may be due to the battery self-protection mechanism, and you can try to take the battery out and reinstall it.
Charging with the Reolink Solar Panel
The Reolink Solar Panel is sold separately. If you are charging your camera with the solar panel and encounter issues, refer to the Reolink support page for further help.
Tips for Charging
- It is suggested to use a USB DC power plug (5V/2A) and plug it into the electrical outlet to charge the battery.
- You can also charge the battery by plugging the micro-USB cable into a USB power bank or PC USB port.
- Do not operate the camera constantly plugged in, as this will shorten the battery life.
Charging Camera Batteries: First-Time User Guide
You may want to see also
![]()
Charging a removable battery
To charge a Reolink camera with a removable battery, you have a few options. The first is to charge the battery separately. To do this, open the back cover of the camera by twisting it a little, then pull out the battery. Connect the battery to the USB adapter via a USB cable and plug it into an electrical outlet. The USB adapter should be a DC 9/5V adapter, which is commonly used for smartphones (this is not included in the box, but a micro-USB cable is).
The second option is to charge the camera with the battery inserted. To do this, connect the camera directly to the USB adapter and plug it into an electrical outlet. The orange battery indicator light means the battery is charging, and the green light means it is fully charged. It is not recommended to operate the camera while it is constantly plugged in, as this will shorten the battery life.
The third option is to charge the camera with a Reolink Solar Panel, which needs to be purchased separately.
If you are having trouble charging your camera, there are several possible causes. Firstly, check that the charging temperature is within the correct range (0°C to 60°C). Secondly, check that the USB cable is not too long (it should be less than 1.5m) and that the pins on the camera are not damaged. For the Argus Pro/2, make sure to take off the plastic film on the pins before installation. Finally, if your camera has a removable battery, try taking the battery out and charging it separately for a few hours, then put it back in and see if the battery level has increased.
Charging the Wyze Outdoor Camera: A Step-by-Step Guide
You may want to see also
![]()
Troubleshooting charging issues
If you're having issues charging your Reolink camera, there are several possible causes and troubleshooting steps you can try.
Power Switch is Off
If the power switch is off, simply switch it on.
Battery Has Run Down or Hasn't Been Charged
Check the LED indicator under the micro USB port on the battery. A green light means the battery is fully charged, while an orange light indicates it's charging. If there's no light, try the following:
- Ensure the micro USB cable is plugged in properly.
- Change to a 5V/2A power supply that is verified to be working.
- Make sure the temperature is between -10°C and 45°C (14°F to 113°F).
Solar Panel Stops Charging or Has Low Efficiency
If your camera uses a solar panel, ensure it's pointed directly at the sun and isn't obstructed by any obstacles. Regularly clean the panel with a wet tissue or cloth to remove dust and debris. If the issue persists, refer to the article "Why Reolink Solar Panel Stop Charging Reolink Battery Powered Cameras."
Defective Battery or Camera
If your battery is defective, try the following:
- Remove the battery from the camera and charge it for a few hours. Then put it back and check if the camera turns on.
- If you have multiple Reolink cameras, swap the batteries to determine if it's a battery issue.
If your camera is defective, remove the battery and charge the camera itself. If the status LED doesn't light up, contact Reolink support for further assistance.
Other Tips
- Avoid operating the camera while plugged in, as this can shorten battery life.
- If using a solar panel, ensure the camera is installed in a well-lit area with a stable WiFi connection.
- Rechargeable batteries in Reolink cameras can be charged within a temperature range of 0°C to 45°C (32°F to 113°F).
Charging Lorex Cameras: Quick and Easy Guide
You may want to see also
Frequently asked questions
It depends on the model of the camera. If your camera is Argus 2, Argus Pro, Argus Eco, Argus 2E, Argus PT, Argus 3, Argus 3 Pro, Reolink Go, Reolink Go PT, Go Plus, Go PT Plus, or KEEN Ranger PT, it will come with a 5V/2A Micro USB Cable. If your camera is Reolink TrackMix, Reolink TrackMix LTE, Duo 2, or Duo 2 LTE, it will come with a USB-C cable.
You can charge the battery with the charging cable by plugging it into a USB power bank, PC USB port, or a USB DC power plug (5V/2A) and plugging that into an electrical outlet.
Plug the USB-C cable into the camera and a USB DC power plug (5V/2A) and plug that into an electrical outlet.
Yes. Reolink cameras can be charged with a Reolink Solar Panel.
A green LED light means the battery is fully charged, and an orange LED light means the battery is charging.