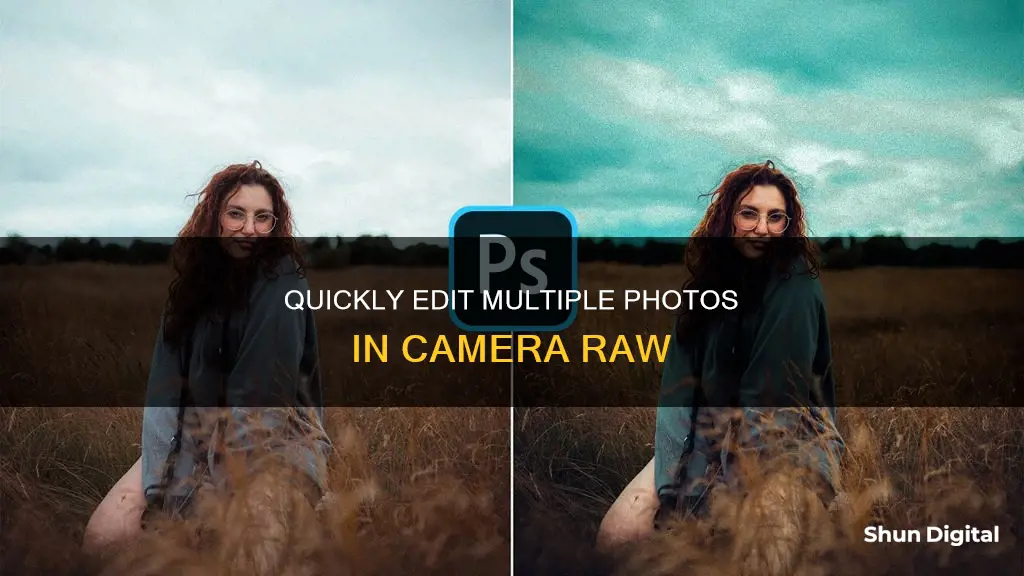
Editing multiple pictures in Camera Raw is a convenient way to apply the same adjustments to several images at once. This process, also known as batch editing or batch processing, is especially useful when dealing with a large number of images taken in similar environments or lighting conditions. To begin, users can select the desired files in Adobe Bridge or Photoshop, before opening them in Camera Raw and making the desired adjustments. Once the first image is edited, the same settings can be applied to the remaining photos in the batch, saving time and effort.
| Characteristics | Values |
|---|---|
| Software | Adobe Photoshop |
| File Types | Raw, JPEG, TIFF |
| Number of Images | Multiple |
| Image Selection | Shift + Click on all images |
| Opening Files | File > Open in Camera Raw |
| Selecting All Images | Ctrl + A (Mac: Command + A) |
| Editing | Adjustments will be applied to all selected images |
| Synchronising Settings | Right-click on image > Synchronise Settings |
| Saving | Save as JPEG, TIFF, PSD, DNG, or PDF |
What You'll Learn
![]()
How to open multiple photos in Camera Raw
Opening multiple photos in Camera Raw is a convenient way to edit several images at once. Here is a step-by-step guide on how to do it:
Using Adobe Bridge:
- Open Adobe Bridge and navigate to the folder holding the photos you want to edit.
- Select all the images you want to open by Shift + Clicking on them.
- Go to "File" and select "Open in Camera Raw" from the menu.
- All the selected images will now open in Camera Raw. You can choose any photo to edit by clicking on its thumbnail.
Using Photoshop:
If you prefer to work within Photoshop, there are a few ways to open multiple photos in Camera Raw:
- Open Photoshop and go to "File > Open" or simply click the "Open" button.
- Locate the folder with your images and select the first photo you want to open.
- Hold down Ctrl (PC) or Cmd (Mac) and select the other images you want to open.
- Click "Open" and the selected images will open in Adobe Camera Raw.
Alternatively, you can open a single RAW image in Photoshop, and Camera Raw will automatically open. You can also select a layer in an existing Photoshop project and go to "Filter > Camera Raw Filter" to open it in Camera Raw.
Tips and Troubleshooting:
- If you are having trouble opening multiple images directly in Photoshop, try dragging the images into the Photoshop application icon instead.
- To open multiple images as layers in a single Photoshop document, use the "Stack" button in Raya Pro, then click "Align".
- To open multiple images in Camera Raw from Adobe Bridge, make sure you have the latest version of Photoshop.
- When opening multiple images in Camera Raw, the Filmstrip view will be enabled by default. This allows you to easily navigate and select images for editing.
- You can also use the "Synchronize" button in the Filmstrip pane to apply the settings from one image to all the selected images.
Now that you know how to open multiple photos in Camera Raw, you can efficiently edit your RAW, JPEG, or TIFF files with the same adjustments.
Correcting GoPro Photos: Camera Raw Techniques
You may want to see also
![]()
Editing multiple photos in Camera Raw
Step 1: Select Your Images
First, you need to select the images you want to edit. Open the folder containing your photos in Adobe Bridge, which is a digital asset management app that allows you to manage and edit multiple creative assets. Then, select all the images you want to edit by Shift + Clicking on each image.
Step 2: Open Images in Camera Raw
Once you have selected your images, choose "File > Open In Camera Raw" from the menu. This will open all the selected images in Camera Raw. You can also right-click on any selected image and choose "Open in Camera Raw" from the drop-down menu.
Step 3: Edit the First Photo
In the left column of Camera Raw, click on the top photo, hold down the Shift key, and then click on the bottom photo. This will select all the images in the column. Now, edit the first photo in the sequence as you desire. It's important to get the first photo right, as the same adjustments will be applied to the rest of the photos.
Step 4: Apply Changes to Remaining Photos
After you're satisfied with the edits on the first photo, select all the photos by clicking the first thumbnail, holding the Shift key, and then clicking the last thumbnail. Click on the small icon in the top right corner of the Filmstrip column and choose "Sync Settings." This will open a dialog box where you can choose which adjustments to apply to the remaining photos.
Step 5: Save or Export Images
After applying the adjustments, click "Done" if you want to keep the files in RAW format with the changes. If you want to export the images in a different format, such as JPEG, select the images, right-click, and choose "Save Images." Specify your desired settings and output location.
Additional Tips:
- You can also create and apply presets in Camera Raw, which can streamline your workflow.
- If you have a large number of images, consider batch processing in smaller groups to avoid slowing down your computer.
- You can always go back and edit individual photos after applying batch adjustments.
Charging Your Fuji X-S1: A Quick Guide
You may want to see also
![]()
Applying changes to multiple photos
Once you have opened your images in Camera Raw, you can apply changes to multiple photos simultaneously. This is a great way to save time, especially if your images were taken in similar environments and require similar adjustments.
To apply changes to multiple photos, first, make sure all the images you want to edit are selected. You can do this by shift-clicking on the images in the left-hand filmstrip column or by pressing Ctrl + A (Command + A on a Mac). Once your images are selected, any adjustments you make will be applied to all selected images.
If you are applying changes to a batch of images, it is more efficient to edit only the first photo and then apply those edits to the remaining photos. This will decrease processing time as Camera Raw has to apply every tweak you make to each photo.
To apply the changes to the remaining photos, select all the photos by clicking the first thumbnail, holding the Shift key, and then clicking the last thumbnail. Then, click the small icon in the top right of the Filmstrip column and select 'Sync Settings' from the selection box. A dialog box will appear, allowing you to choose which settings to synchronise and apply to the remaining photos.
You can also use Adobe Bridge to open and edit multiple photos in Camera Raw. To do this, open the folder containing your photos in Bridge, select the images you want to edit, and choose 'Open in Camera Raw' from the File menu.
Another way to streamline your workflow is to use Adobe Camera Raw (ACR) presets. You can create your own presets or use pre-made ones to apply a set of adjustments to multiple photos at once.
Simplesafe Camera Costs: Monthly Fees or One-Time Payment?
You may want to see also
![]()
Saving edited photos as a JPG
Saving your edited photos as a JPG is a straightforward process. Here are the steps you need to follow:
- Open your Camera Raw file in Adobe Photoshop.
- Make the desired adjustments to your photo using the various tools and tabs available in Camera Raw, such as the Basic tab, Detail tab, and Tone Curve tab.
- Once you are happy with the adjustments, click the "Open Image" button in the bottom-right corner of the Camera Raw dialog box. This will open your photo in Photoshop.
- In Photoshop, go to "File" > "Save As" to save your file. Choose "JPEG" as the file format and specify the desired location to save your file.
- Click "Save," and your edited photo will now be saved as a JPG file.
It is important to note that when you save a file as a JPEG, it will be compressed and lose some information compared to the original raw file. However, this loss of information is usually negligible for most purposes, and JPEG is a widely compatible format suitable for web use, printing, and sharing with others.
Additionally, if you want to keep the original raw file intact and create a separate edited version, you can choose to "Save As" a new file instead of overwriting the original. This way, you will always have the original raw data to go back to if needed.
Fujifilm Camera: Converting RAW to JPEG Simplified
You may want to see also
![]()
Editing individual photographs
To open a single image in Camera Raw, you can do so from Adobe Bridge, Photoshop, or After Effects. In Bridge, open the folder containing your image, right-click on the image, and choose "Open in Camera Raw" from the drop-down menu. In Photoshop, go to "File > Open" and navigate to your image file.
Once your image is open in Camera Raw, you can begin editing. The Basic tab in the Camera Raw dialog box contains most of the adjustments you'll need to make, including white balance, temperature, tint, exposure, highlights, shadows, whites, and blacks. You can also use the Auto button to let Camera Raw analyze your image and apply approximate tonal adjustments.
If you want to make more advanced adjustments, you can use the other tabs in the Camera Raw dialog box, such as the Detail tab for sharpening and noise reduction, the Optics tab for removing chromatic aberration or distortion, or the Effects tab for adding grain or a vignette.
After you've made your adjustments, you can save the image as a JPEG, PSD, TIFF, or DNG file, or open it in Photoshop or After Effects for further editing.
- Play around with the different sliders and tools to see how they affect your image.
- Pay attention to the histogram, which can help you identify areas of your image that are too bright or too dark.
- Use the Adjustment Brush to make local adjustments to specific areas of your image.
- Don't be afraid to experiment and make mistakes—most changes in Camera Raw are non-destructive, and you can always revert to the original settings.
- If you're not sure where to start, try using a preset. You can find many free presets online or create your own by adjusting an image to your liking and saving those settings as a preset.
Battery Life of Wireless Security Cameras: How Long?
You may want to see also
Frequently asked questions
You can open multiple files in Camera Raw from either Bridge or Photoshop. In Bridge, open the folder with your photos, Shift + Click all the images you want, then choose File > Open in Camera Raw.
Once your images are open in Camera Raw, press Ctrl + A (or Command + A on a Mac) to select all. Now, any adjustments you make will be applied to all selected images.
Yes, that's one of the benefits of using Camera Raw. You can apply the same edits to multiple photos simultaneously, which is especially useful if your images were taken in similar environments and require similar adjustments.
After applying your preset and making any additional adjustments, click 'Done' if you want to keep the files in RAW format with the changes. If you want to export the images as JPEGs, select the images, right-click, and choose 'Save Images'. Specify your desired settings and output location.
Yes, batch processing does not limit you from further editing individual images. You can select each photo and continue editing, or tweak the batch processing you made earlier.