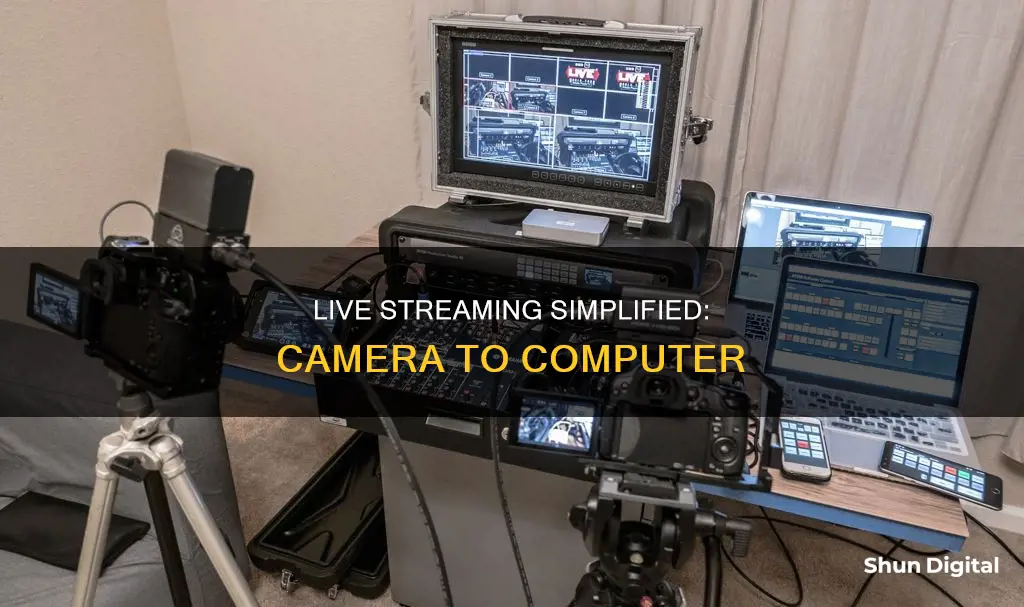
Live streaming from a camera to a computer is a great way to enhance the quality of your video content. While some people use their computer's built-in webcam, you can easily set up a separate camera to live stream. This can be done by connecting your camera to your computer using a USB cable, a capture card, or a switcher.
Using a USB cable is a straightforward method, as you can simply transfer images from your camera to your computer through virtual camera software provided by manufacturers such as Sony, Canon, Nikon, Fujifilm, and Panasonic. However, this approach only transfers images without sound, and the image resolution and code flow are relatively low.
For a more advanced setup, you can use a capture card or a switcher. A capture card allows you to connect your camera to your computer through an HDMI interface, providing high-quality digital audio and video signals. When choosing a capture card, look for one that supports 4K resolution and audio input.
Alternatively, a switcher offers sound mixing and special effects capabilities, which are essential for live streaming. You can connect your camera to the switcher's HDMI interface and then either push the stream directly through the switcher or use a USB cable to link it to your computer.
By following these methods, you can easily set up live streaming from your camera to your computer, resulting in improved video quality and enhanced production value.
| Characteristics | Values |
|---|---|
| Camera | Video camera, DSLR camera, Mirrorless camera, Compact camera, Webcam, Digital camera |
| Connection | USB cable, HDMI interface unit, HDMI cable, SDI, Capture card, Switcher, A/V cable |
| Software | OBS Studio, YouTube, Facebook Live, mimoLive®, Canon Webcam Utility, EOS Webcam Utility, Webcam Utility, FUJIFILM X Webcam, LUMIX Webcam Software |
| Accessories | Microphone, Rode NT-USB, Rode NT-USB Mini, Power adapter, HDMI interface unit, Elgato Cam Link 4K, Elgato HD60 S+ |
What You'll Learn

Connect camera to computer with a USB cable
To connect your camera to your computer using a USB cable, you'll need to follow these steps:
Firstly, ensure that your computer is turned on. Next, turn on your camera. The method for doing so will vary depending on the model of your camera, but it often involves using a dial near the top of the device.
Now, take your USB cable and plug the smaller end into your camera. The port for this cable is often located under a plastic flap with "Video Out" written on it. Then, plug the other end of the USB cable into a USB port on your computer. Ensure that the hollow side of the USB connection is facing upwards.
Once the cable is connected, your camera's drivers should install automatically. If this is the first time you have connected your camera, this may take a few minutes. Once the drivers are installed, a pop-up window should appear, asking you what you would like to do.
From here, you can double-click on "My Computer" and locate your camera's name in the "Devices and Drives" section. Double-click on your camera's name, and then double-click on the camera's storage folder. This is usually called "DCIM", and it may contain another folder named after the camera brand.
And that's it! You have now successfully connected your camera to your computer and can begin transferring your photos and videos.
Unlocking Adobe Camera Raw 9: Unveiling the Power
You may want to see also

Use a capture card to connect camera to computer
A capture card is a hardware device that records on-screen gaming footage and transmits it to dedicated software for editing and uploading. It records live streams over your console, PC, or video camera and converts them into a format that a PC can read. After that, it facilitates the transfer of the converted video into software on the receiving PC. From there, you can easily edit the video and then upload it onto an online platform.
Capture cards come in two types: internal and external. Internal capture cards are installed directly into the computer that you use to play games. They are designed to fit into the PCI slot on the motherboard of the CPU of a desktop computer. External capture cards, on the other hand, are usually no larger than a USB stick and are designed for streamers who use gaming consoles. They are more convenient and portable, but may come with higher latency due to the bandwidth limitations of USB ports.
To set up an external capture card, you will need two HDMI cables and a USB cable. One HDMI cable connects to the gaming console (PC, Xbox, PS4, etc.), while the other connects to a television or monitor. The USB cable is used to connect the capture card to your PC.
For internal capture cards, you will need to shut down your PC and disconnect the cords attached to the back of the CPU component. Then, you will need to unscrew the front cover of the CPU unit and the bracket in the back that lines up with the PCI port. Next, plug your capture card into an empty PCI slot and screw it in place. Re-attach the front panel and bracket, and then connect the necessary cables. Finally, open your computer and install the required drivers and software.
Charging the Eufy 2C: Know When It's Ready
You may want to see also

Use a switcher to connect camera to computer
To connect your camera to your computer for live streaming, you can use a switcher. Switchers can be physical devices or software. Hardware switchers are freestanding devices with buttons to switch between video signals and input and output jacks to connect to your video sources and PC. Software switchers are usually included as a feature in encoding software and are more cost-effective but harder to use.
When choosing a video switcher, consider the following:
- Number of cameras or video input devices: Ensure the switcher has enough input ports to accommodate all your cameras or video sources.
- Type of input and output: Confirm the switcher is compatible with your camera's output (usually HDMI or SDI) and has the necessary input jacks.
- Power source: Switchers can be battery-powered or corded. Battery-powered switchers offer portability but may need recharging during your stream. Corded switchers are more reliable but add another cord to your setup.
- Ease of use: Consider the learning curve of the switcher, especially if multiple people will be operating it.
- Video quality: Look for a switcher that can stream in at least 720p resolution, with 1080p being preferable. Also, choose a switcher with low latency to ensure smooth transitions between video sources.
- Determine the number of cameras or video input devices: This will help you choose a switcher with the appropriate number of input ports. If you find a switcher you like that doesn't have enough ports, you can adjust your camera angles to match the switcher's configuration.
- Consider the type of input and output: Ensure the switcher is compatible with your camera's output and has the necessary input jacks.
- Evaluate the power source: Understand the pros and cons of battery-powered and corded switchers and choose the one that best suits your needs.
- Assess the ease of use: Consider the learning curve of the switcher, especially if multiple people will be operating it.
- Check the video quality: Look for a switcher that meets your resolution and latency requirements to ensure optimal video quality and smooth transitions.
- Connect your camera to the switcher: Use the appropriate cables (e.g., HDMI) to connect your camera to the switcher.
- Connect the switcher to your computer: Depending on the switcher's output, you may need a capture card to convert the signal into a digital video feed that your computer can recognize.
- Configure your streaming software: Set up your streaming software to recognize the switcher as the video source. You may need to install drivers or adjust settings to ensure the switcher is detected.
- Test your setup: Before going live, test the connection between your camera, switcher, and computer to ensure everything is functioning correctly. Make any necessary adjustments to optimize video and audio quality.
- Go live: Once you have confirmed that your setup is working properly, you are ready to start live streaming. Ensure you have a stable internet connection and all necessary permissions to stream on your chosen platform.
Using a switcher to connect your camera to your computer for live streaming offers flexibility and professionalism to your setup. By following these steps, you can effectively utilize a switcher to enhance your live streaming experience.
Long Exposures: How They Affect Your Camera's Battery Life
You may want to see also

Use a video camera instead of a webcam
Using a video camera instead of a webcam can instantly boost the quality of your live streams. While most people settle for their built-in webcams, assuming that setting up a separate camera is too difficult, it's actually a super simple process.
Benefits of Using a Video Camera
- Improved Look and Feel: A video camera is designed to deliver higher-quality footage than a standard webcam. With the right camera, you can capture a shallow depth of field, creating a blurred background that separates the subject from the background.
- Better Low-Light Performance: Video cameras can perform much better in low-light settings, enhancing the lighting of your content.
- Manual Settings and Auto Focus: Cameras offer tons of manual settings that give you more control over the shot's overall look and feel. You can adjust contrast, frames per second, resolution, focus, and more. Cameras are also generally better at auto-focusing, ensuring a seamless streaming experience for your viewers.
- Use of Additional Accessories: If you've invested in accessories like microphones, teleprompters, and portable lights for filming content, you can easily connect and use these accessories when live streaming with a video camera.
Disadvantages of Using a Video Camera
- Battery Life: The biggest downside to using a video camera as a webcam is battery drain. Live streaming content can quickly drain your camera's battery, so you may need to purchase a power adapter that's compatible with your camera.
- Audio Sync Issues: Audio sync issues are common when using a streaming video camera, usually due to a misstep in the setup process. However, there are easy fixes, such as connecting your microphone directly to the camera to ensure audio and video are synced.
Setup Options for Using a Video Camera as a Webcam
There are two main options for setting up your video camera as a webcam: using an HDMI interface unit or the camera's USB port.
Option 1: HDMI Interface Unit
This method involves using a small device called an HDMI interface unit to connect your camera directly to your computer through the camera's HDMI port and your computer's USB port. The Elgato Cam Link 4K is a popular choice for an HDMI interface unit. This method is compatible with a wide range of cameras and doesn't require installing any additional software on your computer.
Option 2: Camera's USB Port
Some cameras have a USB port that can be connected directly to your computer's USB port. Simply connect the camera using a USB cable, and you can start using it as a webcam. However, this method may not work for every camera, and you might need to download additional software. Major camera brands like Panasonic and Sony have developed apps that make the camera-to-webcam transition simple and smooth.
Setup Process
Regardless of the method you choose, the general setup process involves the following steps:
- Download the specific webcam software based on your camera's make and model.
- Connect your camera to your computer using either USB or HDMI, and turn on the camera.
- Make any necessary changes to the camera settings, such as switching to 'Video Mode'.
- Launch your live streaming software or connect to a conferencing app like Zoom.
Troubleshooting Audio Sync Issues
If you encounter audio sync issues, try the following:
- Connect your microphone directly to the camera to ensure the audio and video are synced before being imported to the computer.
- Make manual adjustments within your live streaming software to fine-tune the audio and video sync.
Cropping Images in Camera Raw: Sizing Mastery
You may want to see also

Use a third-party application to stream from your webcam
Using a Third-Party Application to Stream from Your Webcam
If you want to stream from your webcam, you can use a third-party application. Here are some popular options:
- OBS Studio: OBS Studio is a free and open-source software that allows you to stream your webcam to various platforms, including Twitch, YouTube, and Facebook. It offers a wide range of features, such as scene templates, audio and video filters, and customisable transitions.
- YouCam: YouCam is a user-friendly software that enhances your video quality and adds fun effects to your streams. It offers features such as face tracking, background removal, and beautification tools.
- Riverside: Riverside is a great option for large conferences or online events as it supports up to 1,000 audience members. It also offers recording and editing features, making it suitable for video podcasts.
- AlterCam: AlterCam is perfect for those who want to maintain their anonymity while streaming. It offers features like face pixelation, voice morphing, and background replacement.
- SplitCam: SplitCam allows you to use your webcam with multiple apps simultaneously without receiving a "webcam busy" error. It also has multistreaming capabilities and customisable tip notifications.
- Webcamoid: Webcamoid is an open-source software that offers a wide range of lighting adjustments and over 60 fun filters and effects. However, it lacks default settings, and you may need to re-enter your preferences each time.
Dummy Battery Camera: What's the Deal?
You may want to see also
Frequently asked questions
You will need to enable your channel for live streaming, and use Google Chrome 60+ or Firefox 53+. Then, click "Go Live" in the upper right corner, select "Webcam", enter a title and description, and select a privacy setting.
Video cameras offer improved lighting, a shallower depth of field, more manual settings, and better auto-focus. They also allow you to use additional camera accessories, such as microphones, teleprompters, and portable lights.
The main disadvantages are shorter battery life and potential audio sync issues. However, these issues can be easily addressed by purchasing a power adapter and connecting your microphone directly to the camera.
There are several ways to connect your camera to your computer, including using a USB cable, a capture card, or a switcher. If your camera has a USB port, you can simply connect it to your computer using a USB cable. Alternatively, you can use a capture card or a switcher with an HDMI interface to connect your camera to your computer.


