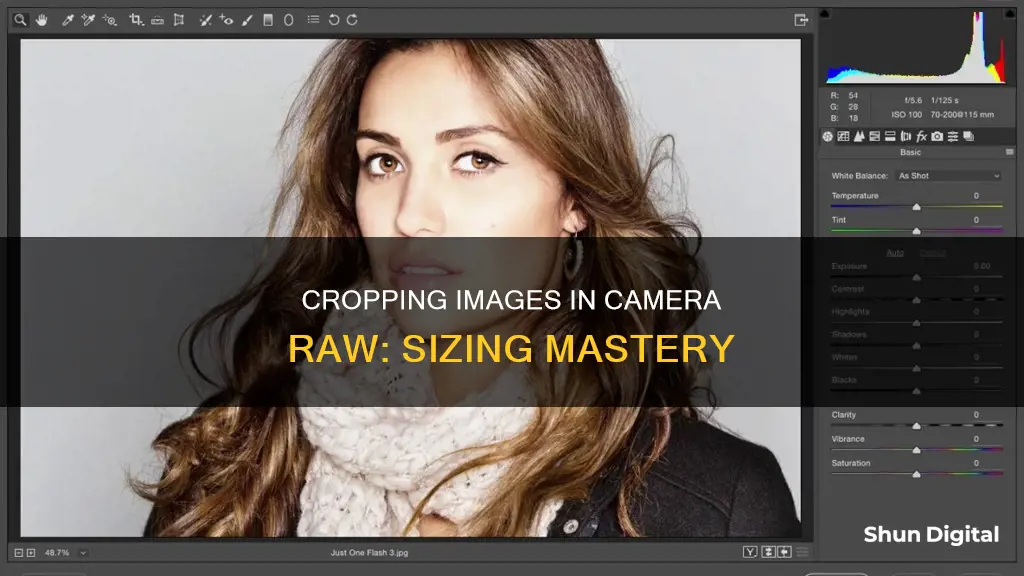
Adobe Camera Raw is a parametric-based image editor that allows users to make changes to their images without permanently altering the original pixels of the image. This is because Camera Raw uses a series of instructions to display a live preview of the image on the screen, which can be easily adjusted. To crop an image by size in Camera Raw, users can select the Crop Tool, which works similarly to the Crop Tool in Photoshop. By clicking and holding the mouse button on the Crop Tool icon, users can access additional options such as preset aspect ratios or a custom aspect ratio. After selecting the desired aspect ratio, users can drag out an initial crop box and then resize and reshape it as needed. The area outside the box will be cropped away, and the area inside will be retained. Users can also rotate the crop box to straighten the image or add visual interest. Once the desired crop has been achieved, users can accept the crop by pressing Enter (Windows) or Return (Mac). It is important to note that cropping in Camera Raw is non-destructive, meaning that the original image is not altered, and users can always go back and change their crop settings.
| Characteristics | Values |
|---|---|
| Crop Tool Selection | Click on the Crop Tool icon in the toolbar; press "C" on your keyboard; click and hold the mouse button on the Crop Tool icon to view additional options |
| Initial Crop Box | Click somewhere in the image and drag diagonally outward; press and hold "Shift" for a perfect square; press and hold "Alt" (Win) / "Option" (Mac) to draw the box out from its center; press and hold "Spacebar" to reposition the box |
| Resizing the Crop Box | Click and drag any of the handles located around the box |
| Repositioning the Crop Box | Position the mouse cursor inside the box, click and drag with the mouse button held down |
| Rotating the Crop Box | Position the mouse cursor outside the box, click and drag with the mouse button held down |
| Aspect Ratio | Choose from preset options in the Crop Tool menu or set a custom ratio |
| Accepting the Crop | Press "Enter" (Win) / "Return" (Mac) on your keyboard or double-click inside the crop box |
| Cancelling the Crop | Choose "Clear Crop" from the Crop Tool menu or press "Esc" on your keyboard |
What You'll Learn
![]()
How to select the crop tool in Camera Raw
To select the Crop Tool in Camera Raw, you can either click on the Crop Tool icon in the toolbar in the top left corner of the Camera Raw dialog box or simply press 'C' on your keyboard. However, clicking on the icon and holding down your mouse for a second will open a menu with additional options for the Crop Tool, including some preset aspect ratios.
The Crop Tool in Camera Raw works in a similar way to Photoshop's own Crop Tool. When you select the tool, you can drag out an initial crop box, and then resize and reshape it as needed. The area outside the box will be cropped away, and the area inside will be kept. If you want to force the crop box into a perfect square, hold down the Shift key while dragging. To draw the crop box from its center, hold down the Alt (Win) / Option (Mac) key while dragging. To draw a perfect square from the center, hold down Shift+Alt (Win) / Shift+Option (Mac) while dragging. You can also reposition the crop box by pressing and holding the spacebar and dragging the box into position.
The Crop Tool in Camera Raw also includes a feature that can help with your composition. By selecting 'Show Overlay' from the Crop Tool menu, you can display a 3x3 grid inside the crop box. This is based on the Rule of Thirds, which states that placing your subject at or near one of the spots where the grid lines intersect can add more interest to your image.
You can also rotate the crop box to straighten a crooked image. Move your mouse cursor outside the crop box, and when the cursor changes into a curved, double-sided arrow, click and drag your mouse to rotate the box. The Show Overlay option can also be used to display a grid that helps you straighten the image. Simply rotate the crop box to line up the grid lines with something in the photo that should be straight.
If you need to crop the image to a specific aspect ratio, the Crop Tool in Camera Raw offers several preset aspect ratios to choose from. You can also set a custom aspect ratio by choosing 'Custom' from the Crop Tool menu.
Overnight Charging: Is It Damaging Your Camera Battery?
You may want to see also
![]()
How to use the crop tool in Camera Raw
The Crop Tool in Camera Raw is located in the toolbar on the top left of the Camera Raw dialog box. To select it, click on the Crop Tool icon or simply press 'C' on your keyboard.
If you want to select a specific aspect ratio for your crop, click on the Crop Tool icon and hold your mouse button down for a second. This will open a menu displaying various options for the Crop Tool, including some handy preset aspect ratios at the top that you can choose from. At the top of the menu is an option called ''Normal' which is the default mode for the Crop Tool. This will allow you to freely crop the image to any aspect ratio you like.
Once you've selected your aspect ratio, click inside your image and drag out an initial cropping box. The area inside the crop box is what you'll keep, while everything surrounding the box will be cropped away. You can then resize and reshape the cropping box as needed by clicking and dragging any of the handles located around it.
If you need help with your composition, you can turn on the overlay by clicking and holding on the Crop Tool icon and choosing 'Show Overlay' from the list. This will display a 3x3 grid inside the crop box, which can help you compose your image using the Rule of Thirds.
You can also rotate the crop box to straighten a crooked image or to add visual interest. To do this, position your mouse cursor outside the crop box and click and drag to rotate it. If you have the Show Overlay option turned on, Camera Raw will display a different grid designed to help you straighten your image. Simply rotate the crop box to line up the grid lines with something that should be straight, either vertically or horizontally.
To accept the crop, press 'Enter' (on Windows) or 'Return' (on Mac). As everything in Camera Raw is non-destructive, you can always go back and change your crop by selecting the Crop Tool again.
London Congestion Charge Cameras: Locations and Fines
You may want to see also
![]()
How to rotate the crop box in Camera Raw
To rotate the crop box in Camera Raw, you must first select the Crop Tool. This can be found in the toolbar on the top left of the Camera Raw dialog box. Once the Crop Tool is selected, you can click inside your image and drag out an initial cropping box.
To rotate the box, move your cursor outside the crop box, and click and drag to rotate the box. Unlike in Photoshop, where the image rotates while the cropping box remains in place, in Camera Raw, the cropping box rotates while the image remains locked in place.
To help you straighten your image, you can select the "Show Overlay" option from the Crop Tool menu. This will display a grid overlay inside the crop box, which you can use as a guide to rotate your image. Simply rotate the crop box to line up the grid lines with something in the photo that should be straight, either vertically or horizontally.
Once you have everything lined up, you can resize your crop box as needed by dragging its handles. To accept the crop, press Enter (Windows) or Return (Mac).
Camera Battery Care: How to Know if It's Dead
You may want to see also
![]()
How to resize the crop box in Camera Raw
To resize the crop box in Camera Raw, you must first select the crop tool. You can do this by either clicking the crop tool icon in the toolbar or by pressing the letter 'C' on your keyboard.
Once the crop tool is selected, you can click and drag to draw your initial crop box. To resize the crop box, click and drag any of the handles (the little squares) located around it. You can also press and hold the 'Shift' key while dragging the edge or corner of the crop frame to resize the crop while maintaining the custom ratio.
If you want to force your initial crop box into a perfect square, press and hold the 'Shift' key on your keyboard while dragging. To draw the crop box out from its centre, rather than from a corner, press and hold the 'Alt' key (Windows) or 'Option' key (Mac) while dragging. To draw a perfect square from the centre, press and hold 'Shift' + 'Alt' (Windows) or 'Shift' + 'Option' (Mac) while dragging.
You can also move and reposition the crop box by placing your mouse cursor inside the box, clicking, and dragging the box with your mouse.
Reviving Dionic Camera Batteries: Charging Tips and Tricks
You may want to see also
![]()
How to cancel the crop operation in Camera Raw
To cancel the crop operation in Camera Raw, you can use either of the following methods:
- Press the Esc key with the Crop Tool active.
- Click and hold the Crop Tool button and choose "Clear Crop" from the menu.
- Click the "Cancel" button or deselect the Crop Tool and press Esc.
These methods will clear the crop box and restore the entire original image.
It is important to note that cropping in Camera Raw is non-destructive, meaning that even after accepting the crop, you can always bring back the crop box and the area that was cropped away by simply selecting the Crop Tool again. This flexibility allows you to make changes or cancel the crop operation at any time without permanently losing any part of the original image.
Action Camera Batteries: How Long Do They Really Last?
You may want to see also
Frequently asked questions
To select the crop tool, you can either press "C" on your keyboard or click on the Crop Tool icon in the toolbar in the top left of the Camera Raw dialog box.
To crop your image to a specific aspect ratio, click and hold on the Crop Tool icon and choose a preset from the menu. If you have already drawn your crop box, it will snap to the chosen aspect ratio.
To rotate the crop box, position your mouse cursor outside the box. When your cursor changes into a curved, double-sided arrow, click and drag your mouse to rotate.
To cancel a crop, choose "Clear Crop" from the Crop Tool menu or press the "Esc" key on your keyboard.