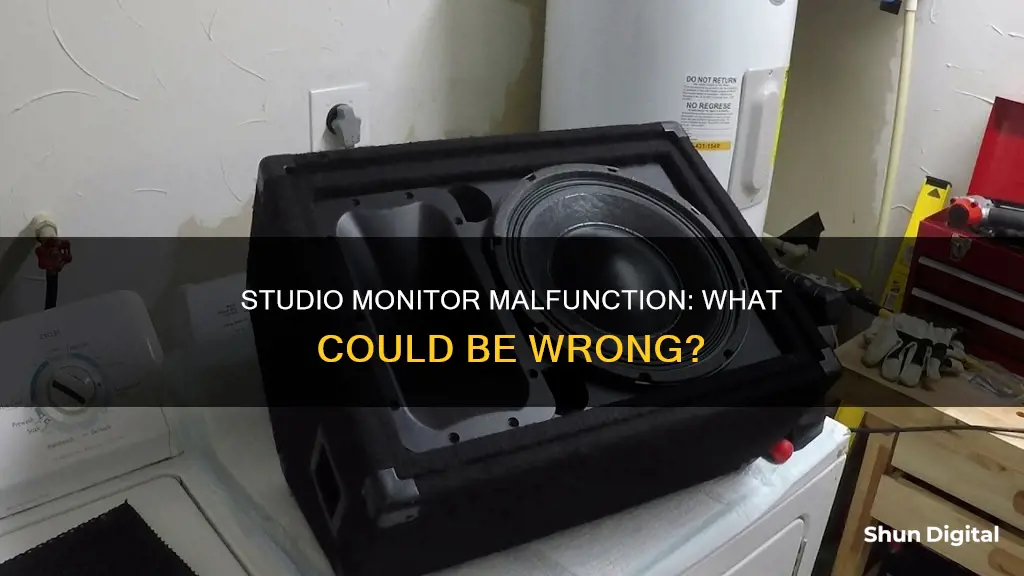
Studio monitors are an essential component of any recording or mixing setup. However, issues can arise, and sometimes they may even break. There are several reasons why a studio monitor may not be working correctly, including blown speakers, damaged fuses, or faulty voltage regulators. In some cases, the issue may be as simple as a loose connection or a need for a burn-in period. To determine the cause of the problem, it is important to inspect the studio monitor and perform some basic troubleshooting steps. If the issue cannot be identified or resolved, it may be necessary to seek the assistance of a professional technician or repair service.
| Characteristics | Values |
|---|---|
| Problem | Uncontrolled woofer movement and awful bumping noise after 5 minutes of powering on |
| Diagnosis | Damaged voltage regulator |
| Solution | Replace the voltage regulator |
| Other possible solution | Resolder the three voltage regulator joints |
| Location of the fuse | Inside a small plastic drawer next to the power connector on the backside of the unit |
| Cost of repair | $10-$100 |

Fuse replacement
If your studio monitor is not turning on, it could be due to a blown fuse. Before attempting to replace the fuse, it is important to rule out other potential issues. Firstly, test your studio monitor with a different power source, preferably in another room. If that does not work, try using a different power cable.
If your studio monitor still fails to turn on, it is likely that the fuse has blown and needs to be replaced. The fuse is typically located on the backside of the unit, near the power connector. In some cases, it may be housed within a small plastic drawer that can be opened using a screwdriver.
When replacing the fuse, ensure that you purchase the correct one for your specific studio monitor model. Fuses are inexpensive and can be found at most music or electronic retailers, as well as local shops that supply electrical parts.
To replace the fuse, follow these steps:
- Turn the studio monitor around and remove the power cable to prevent any possibility of electrical shock.
- Locate the fuse holder, which is usually positioned just below the power plug-in.
- Using a small flat-headed screwdriver, gently prize open the fuse holder.
- Inspect the fuse; if it appears dark in colour, it has blown and needs to be replaced.
- If there is a spare fuse in the holder, swap it with the blown fuse and close the holder.
- If there is no spare fuse, obtain a new fuse of the exact same rating and replace the blown fuse.
- Re-test the studio monitor by plugging it into a power source.
It is important to note that studio monitors contain lethal voltages inside, so if you are unsure or uncomfortable with any part of the process, it is best to seek the assistance of a professional technician.
Enhancing Your ASUS Monitor: Adding Speakers for Immersive Audio
You may want to see also

Speaker replacement
If you're looking to replace your studio monitor speakers, there are a few things you need to keep in mind. Firstly, it's important to identify the specific model of your studio monitors and the type of speakers they use. Different models may use different types of speakers, such as woofers, tweeters, or a combination of both. You can usually find this information in the product manual or on the manufacturer's website.
Once you know the type and size of speakers you need, you can start looking for replacements. There are many online retailers, such as Amazon, that offer a wide range of replacement speakers for studio monitors. When choosing a replacement speaker, make sure to match the specifications, such as impedance, power handling, and frequency response, to your original speakers as closely as possible. This will ensure optimal performance and sound quality.
In some cases, you may need to consider repairing or re-soldering the existing speakers instead of replacing them. This can be a more cost-effective option, especially if the issue is minor, such as a loose connection or a faulty solder joint. However, if the speakers are physically damaged or blown, replacement is often the best course of action.
- Compare prices and read reviews before purchasing replacement speakers to ensure you're getting a good deal and a quality product.
- If you're uncomfortable with the repair process or unsure about the specifics of your studio monitors, consider seeking professional help from an audio technician.
- When working with electronic components, always make sure to disconnect the power source and exercise caution to avoid electrical shocks or damage to the equipment.
- Consider upgrading your speakers to a higher-end model to improve sound quality and performance, especially if your current speakers are outdated or no longer meet your needs.
- Keep your studio monitors properly maintained and protected to prolong their lifespan and reduce the need for repairs or replacements.
Cardiac Monitoring: Understanding Heart Health and Vital Signs
You may want to see also

Soldering
If you're experiencing issues with your studio monitors, it may be due to a faulty solder joint on the input board. This is a common problem with KRK monitors. You can attempt to fix this yourself by soldering the joint back together, but proceed with caution as there are exposed points in the power supply carrying lethal voltages inside the monitor.
Step 1: Unplug the IEC power cable from the back of the monitor.
Step 2: Remove the screws around the edge of the rear panel. You may need to use a knife or thin screwdriver to loosen the panel, even with all the screws removed.
Step 3: Carefully remove the amplifier panel to expose the pot terminals. Be sure not to disconnect the leads going to the drivers (the speaker elements).
Step 4: Visually inspect the soldered connections on the volume pot.
Step 5: If any of the solder joints are cracked or if any of the three solder tabs on the pot are broken, you will need to re-solder them. Move the pot and look for any solder joints that move.
Step 6: If all the connections look solid, you probably need to replace the pot. This will require partial removal of the input board.
Step 7: If you don't have experience soldering, bring it to an electronics technician to avoid the risk of electrical shock or other damage.
Removing Servers from Nagios Monitoring: A Step-by-Step Guide
You may want to see also

Speaker placement
The placement of your studio monitors is key to achieving the best sound quality. Here are some tips to optimise your setup:
- Symmetry is Important: Place your speakers symmetrically in the room, preferably along the short wall. This helps to minimise imbalances between the left and right sides of the stereo field.
- Positioning Along the Short Wall: Reflections from nearby walls can interfere with the sound. Positioning your monitors along the short wall reduces the impact of early reflections and provides more accurate results.
- Get Your Monitors at Ear Level: Adjust the height of your speakers so that the tweeters are at ear level. This ensures the most consistent sound as you move around the room. Use speaker stands if necessary.
- Avoid Reflections from Hard Surfaces: Hard, non-absorptive surfaces like windows and drywall can cause comb filtering, altering the sound. Use a mirror to identify these reflective surfaces and apply absorption treatment if necessary.
- Adjust the Monitors: Play music you're familiar with and adjust the position and settings of your monitors until they sound "right". Move them away from boundaries to reduce bass and use any built-in adjustments to get the desired sound.
Additional Tips:
- Listening Area: Identify the listening area and place your setup accordingly. For music production, the front area is best, with an angle of 60 degrees between the left and right monitors. For film production, use the rear area.
- Monitor Height: The recommended height for the monitor acoustical axis is at ear level, usually between 1.2 and 1.4 metres from the floor. Placing them higher with a slight tilt minimises floor reflections.
- Monitor Distance from Walls: Avoid placing monitors too close to side walls, the ceiling, or floor, as reflections from these surfaces can interfere with the sound. A distance of more than 60cm from the wall behind the monitor is recommended to prevent audio cancellation.
- Subwoofer Placement: For low-frequency reproduction, place the subwoofer(s) along the front wall, slightly off-centre. Using two subwoofers can provide a flatter response.
Easy Guide: Setting Up Powered Monitors for Beginners
You may want to see also

Speaker angle
The ideal setup for correct stereo imaging is to have your head and your two monitors form an equilateral triangle, with the monitors turned in to aim towards your ears at a 30-degree angle. This is known as the "sweet spot" and will give you a natural stereo image.
The height of the monitors should be either slightly above or below the midpoint between the floor and ceiling, with the tweeters at the same height as your ears when seated. This is typically about 47-55 inches (120-140 cm) from the floor. The speakers can be placed slightly higher and tilted downwards if you need to clear the top of your computer monitor, but be careful to avoid the speakers toppling over.
The distance from the back of the speaker to the wall behind it should be different from the distance between the speaker and the side wall, and also different from the distance to the floor or ceiling. This will randomise the peaks and troughs created by low-frequency energy reflecting off the wall.
If your speakers have a rear port, keep them away from the wall by at least the same distance as the diameter of the port (usually about 5 to 10 cm). If your speakers are placed close to the front wall, their bass response will be exaggerated by up to 6dB.
Daisy Chaining Studio Monitors: The Ultimate Guide
You may want to see also
Frequently asked questions
If you hear heavy distortion, pops, hissing, cracks, or no sound at all, your studio monitor may be broken. You can also test your studio monitor by connecting it to another computer. If the monitor doesn't turn on, it is likely broken.
There are several reasons why your studio monitor might be broken, including faulty, broken, or damaged components such as wires, chassis, drivers, suspension, voice coil, or magnets. Power surges can also blow internal components.
It may be possible to fix a broken studio monitor, depending on the issue. For example, if the woofer's dust cap has come loose, you can reattach it with glue. However, for more serious issues, you may need to replace the entire monitor.
To prevent your studio monitor from breaking, make sure to purchase the correct powered amplifier for your passive studio monitor. Also, ensure that your house wiring is up to scratch and use a surge protector to protect against power surges and lightning strikes.
While studio monitors do not need to be "broken in" in the traditional sense, many people believe that they need to be used for a period of time before they can produce the best sound. This is because the break-in period allows the speakers to become more flexible and better able to reproduce sound accurately.


