Water can enter a surveillance camera in a number of ways, from rain and flooding to condensation and accidental submersion. The impact of water damage on surveillance cameras can be significant, causing corrosion, short circuits, blurry or distorted images, and even complete system failure. To prevent water ingress, it is crucial to choose cameras designed for outdoor use, ensure proper installation, and adopt effective waterproofing techniques. This article will explore the various ways water can enter surveillance cameras, the potential consequences, and the preventive measures that can be implemented to safeguard these valuable devices.
| Characteristics | Values |
|---|---|
| Reason for water ingress | Rain, flooding, accidental spills, condensation, leaks in the camera housing or mounting brackets, humidity, improper installation |
| Impact on camera performance | Corrosion, blurry or distorted images, malfunctioning features, complete failure of the camera, image distortion or loss of image quality |
| Waterproofing techniques | IP ratings, silicone seals, gaskets, O-rings, built-in heaters |
| Preventative measures | Choose a camera designed for outdoor/wet environments, install in a protected location, use outdoor PoE switches, regular maintenance and inspection |
What You'll Learn
![]()
Waterproofing Techniques for Surveillance Cameras
Waterproofing your surveillance camera is essential to prevent water ingress, which can cause significant damage to the device and compromise its functionality. Here are some detailed techniques to waterproof your surveillance cameras:
Choose a Water-Resistant Camera:
Select a camera with an IP (Ingress Protection) rating of at least IP65. The IP rating indicates the level of protection against solid objects (first digit) and moisture or water (second digit). For instance, an IP68 rating means the camera is dust-tight and can withstand continuous immersion in water.
Proper Installation:
Install your camera in a protected location, such as under the eaves of the roof or any overhang, to shield it from direct exposure to rain and snow. Ensure proper installation by following the manufacturer's guidelines and regularly inspecting the camera to maintain its functionality.
Use Camera Covers:
If your installation location doesn't have a suitable overhang, consider using protective camera covers. These covers come in various types, including hoods and shields, offering an additional layer of defence against the elements.
Silicone Seals, Gaskets, and O-Rings:
Manufacturers often use silicone seals, gaskets, and O-rings to prevent water from entering the device. These components create a tight seal, ensuring that water doesn't seep into the camera's internal components.
Built-in Heaters:
Some cameras are equipped with built-in heaters to prevent condensation from forming inside the device. This feature is particularly useful in preventing moisture accumulation due to temperature differences between the camera's internal and external environments.
Protective Housing and Mounts:
Use specialised heavy-duty security mounts and protective housings for your cameras, especially if they are installed in uncovered locations. While these won't protect against rain, they can safeguard your camera from heavy winds and slow down the deterioration of camera pigtails.
Waterproof Connectors and Cables:
Use waterproof connector shields or rubber sleeves to protect the connection between the camera and Ethernet cable from water ingress. Additionally, consider using direct-burial type cables (CMX cables) that can be buried directly in the ground and are more resistant to water ingress and extreme temperatures.
Outdoor PoE Switch:
For outdoor camera installations, consider using an outdoor PoE (Power over Ethernet) switch, which provides a safe and stable network connection, along with an uninterruptible power source, ensuring the continuous operation of your security cameras.
By implementing these waterproofing techniques, you can effectively protect your surveillance cameras from water damage and ensure their optimal performance in various environmental conditions.
Mastering Rack Focus: Camera Techniques for Sharp Cinematography
You may want to see also
![]()
How to Prevent Water Damage
Water can enter a surveillance camera in several ways, including rain, flooding, or accidental spills. To prevent water damage to your surveillance camera, follow these steps:
Choose the Right Camera
Select a camera designed for outdoor or wet environments. These cameras are built to withstand harsh weather conditions and typically feature higher water resistance standards. The IP rating system indicates the level of protection a camera has against water and other elements. For instance, the IP68 rating means the camera can withstand continuous immersion in water.
Install in a Protected Location
Place the camera in a covered area, such as under roof overhangs or eaves, to shield it from rain and water runoff. If installing in an uncovered location is necessary, opt for a camera with a protective cover to guard against rain and water accumulation on the lens, which can result in foggy footage.
Ensure Proper Installation
Improper installation can leave cameras vulnerable to water damage. Follow the manufacturer's instructions carefully during the installation process to ensure all components are correctly sealed and protected.
Regular Maintenance and Inspection
Regularly inspect and maintain your surveillance camera to identify any potential issues, such as leaks or damage, and address them promptly. This proactive approach can help prevent water damage and ensure the camera functions optimally.
Select the Right Cabling
Choose outdoor Ethernet cables that are waterproof and shielded with a UV-resistant jacket. Direct-burial type cables can be buried directly underground without conduits. Avoid using PVC conduits as they can trap water vapour, gradually damaging the cables. CMX cables, with their double-layered outdoor-rated Polyethylene jacket, are ideal for outdoor applications as they offer protection against extreme temperatures and water ingress.
Waterproof Connections
Water damage can occur when moisture enters the connection between the camera and the Ethernet cable. To prevent this, use a waterproof connector shield or a rubber sleeve to seal the connection. Alternatively, a junction box can provide a protective housing for the cable, ensuring no moisture can enter.
Provide a Reliable Power Supply
Use an outdoor PoE (Power over Ethernet) switch to transmit power and data to outdoor cameras. These switches are designed for harsh environments and can withstand water, extreme temperatures, shocks, and corrosion. They provide a stable network connection and an uninterruptible power source for continuous camera operation.
The Evolution of Colored Cameras: A Historical Perspective
You may want to see also
![]()
What to Do if Your Camera Gets Wet
Water and cameras are not a good mix. Whether it's rain, a spill, or your camera being fully submerged, water can cause significant damage to your device.
- Switch off your camera. It is important to do this as soon as possible to avoid causing further damage to the electronics.
- Remove the memory card and batteries. Most memory cards are weather-resistant, but it is still important to remove them to ensure you do not lose any data. Removing the batteries is also essential, as you will need to let them dry out.
- Remove the lens. Before removing the lens, dab the area to ensure no water leaks into the sensor. Only remove the lens if there is no water lining the seal where it connects to the camera. Replace it with the cap to seal it off so the sensor is protected.
- Clean the lens. It is important to do this as soon as possible, especially if the camera has fallen into salt water, to avoid further damage. Always dab the lens gently when cleaning to avoid scratching or putting pressure on the lens.
- Dry the exterior of the camera. Use a dry towel to wipe any water off the outside of the camera.
- Allow the camera to dry. Place the camera in a warm, dry location for at least 24-48 hours to allow any internal moisture to evaporate. If water has entered the battery or memory card compartments, use a small cloth to gently dab the inside and soak up any water.
- Rinse the camera. If your camera has been dropped in salt water, it is important to rinse it to avoid rust or corrosion. Fill a large bowl with fresh water and dip your camera in for no more than 5 seconds, then pat it dry. Alternatively, wet a cloth and wipe the camera to remove any salty residue.
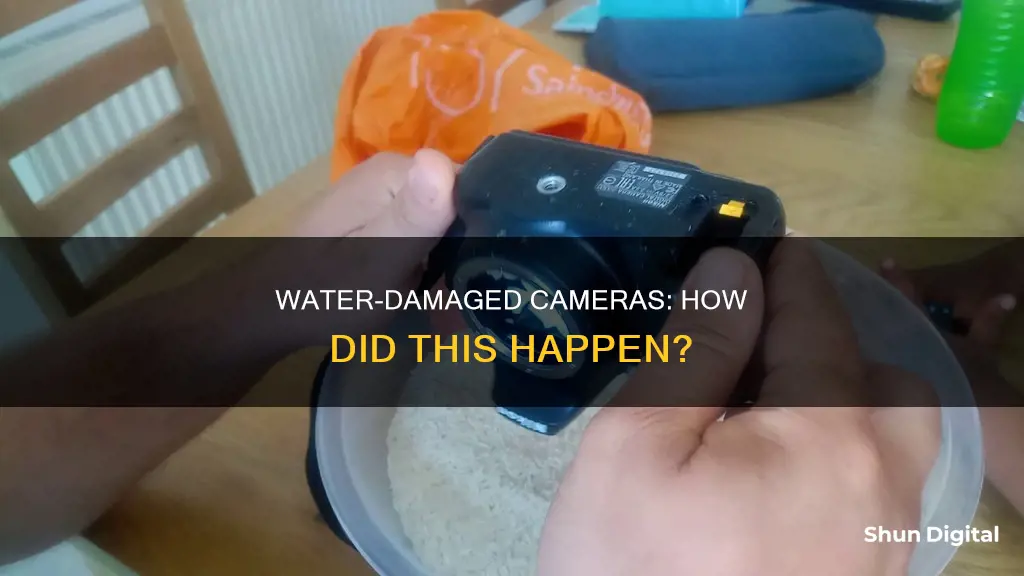
- Use rice to absorb moisture. Place your camera in a sealed bag of rice and leave it for a few days to absorb any remaining moisture.
- Contact a professional. If your camera is not working after it has dried, take it to a local repair store or contact the manufacturer for assistance.
It is important to act quickly if your camera gets wet to minimize damage. These steps may not guarantee that your camera will be fully functional again, but they can help increase the chances of a positive outcome.
Unleashing Camera Raw: Mastering the Art of Masking
You may want to see also
![]()
How to Remove Condensation from a Camera Lens
Condensation on a camera lens can be a result of changes in air temperature or humidity. It can also occur when water gets into direct contact with your camera due to rain or a wet surface. While condensation does not ruin your camera lens, a build-up of condensation over a long period can lead to the growth of mould and fungus, which can cause serious damage to the internal workings of your equipment.
Using Silica Gel
Silica gel is a mix of water and silica, the main component in sand. It absorbs water from moist air and dries out anything around it.
- Put the silica gel in a zip bag, plastic bag, or airtight container.
- Disassemble your camera lens from the camera.
- Place the camera lens inside the bag or container with the front element facing down.
- Seal the bag or container tightly to avoid air from getting in.
- Leave the bag or container in a warm area for approximately 50+ hours for the gel to completely absorb the water from the lens.
Using Uncooked Rice
Uncooked rice has the capacity to absorb moisture. Its hygroscopic nature makes it a useful desiccant for removing water from a camera lens.
- Place the camera lens face down in an airtight bag or container.
- Add 3-4 cups of uncooked rice to the bag or container.
- Leave it for a few days (preferably 2-3 days) for the rice to completely absorb the water.
Using an Airtight Bag
- Put the camera in an airtight bag and get as much air out of it as possible.
- Put something in the bag to wick moisture away, such as a towel or uncooked rice.
- Wait until the camera comes up to temperature and all condensation has dissipated.
Using a Hair Dryer
Use a hairdryer on low heat, waving it around so the heat is not concentrated on any one spot.
Using a Warm Vehicle
Place the camera in a warm vehicle, such as inside the cabin or in the boot, which tends to be cooler than the passenger area.
Using a Waterproof Cover
Use a waterproof cover to protect the camera from getting wet.
Using a Ziplock Bag and Silica Gel
- Before entering a warm area, put the lens and camera in a zip lock bag, trying to equalise the temperature.
- Place the zip lock bag with the camera inside an airtight container with some silica gel packets.
- Put the container above a turned-on lightbulb to keep it warm.
Using an Oven
Bake the camera in the oven at the lowest temperature setting.
Using Direct Sunlight
Please note that this method is risky and can cause irreversible damage to the internal parts of the lens.
Place your camera lens in direct sunlight. The sun will soak the water or moisture from the inner elements of the lens.
While the above steps can help remove condensation, they may not always be successful, especially in the case of impure water getting into the lens. Getting professional help is a surefire way to get water out of your camera lens.
Panorama Mode: Capturing Wide-Angle Views with Your Camera
You may want to see also
![]()
How to Install a Surveillance Camera to Prevent Water Damage
Water damage can cause surveillance cameras to malfunction or fail completely. To prevent this, it is important to choose the right type of camera, install it properly, and take measures to protect it from water ingress. Here are some detailed instructions on how to install a surveillance camera to minimise the risk of water damage.
Choose the Right Camera
Not all cameras are designed to withstand harsh weather conditions. For outdoor installations, it is crucial to select a camera designed specifically for outdoor use. These cameras are built to withstand wind, rain, heat, and other environmental factors. Check the IP (Ingress Protection) rating of the camera—the higher the rating, the better protected it is against water and dust ingress. For example, an IP66-rated camera can withstand powerful jets of water, while an IP68-rated camera can be submerged in water.
Install in a Protected Location
Even outdoor cameras can be vulnerable to water damage if installed in an exposed location. Try to mount the camera in a covered area, such as under the roof overhang, eaves, or soffit. Avoid placing the camera in areas where water can run off from the gutters or roof and directly onto the camera. If you must install the camera in an exposed location, consider using a camera with a protective cover to shield it from direct water contact.
Use Proper Installation Techniques
Proper installation is essential to prevent water ingress. Ensure that all cables and connectors are securely sealed and waterproofed. Use cable connector waterproof lips or plastic conduits to protect wired cameras. If using a junction box to conceal cables and connectors, fill any holes with waterproof materials such as silicone or duct seal. Leave drip loops in the cables to prevent water from running down to the power outlets.
Protect Against Condensation
Condensation can occur when there is a significant temperature difference between the camera's internal and external environments. To prevent condensation, consider placing a small packet of silica gel inside the camera housing to absorb moisture. Regularly inspect the camera for any signs of moisture accumulation and ensure that the housing is properly sealed.
Use Weatherproof Enclosures
For added protection, consider installing the camera in a weatherproof enclosure. These enclosures are designed to protect against rain, snow, hail, and high winds. They also provide additional security against theft and vandalism. Waterproof camera enclosures are a worthwhile investment to safeguard your surveillance equipment.
Additional Considerations
- Use security mounts designed to withstand weather conditions and protect against theft and vandalism.
- If using an indoor camera outdoors, take extra precautions to shield it from the elements.
- Be cautious when choosing the installation spot, even with water-resistant cameras. Avoid direct sunlight and exposure to harsh weather without any shelter.
- Regularly clean the camera and its housing to remove dust, dirt, and insect infestations.
- Ensure proper grounding if mounting the camera to a metal surface to minimise the risk of electrical damage.
Uniview Cameras: Where Are They Manufactured?
You may want to see also
Frequently asked questions
Water can enter a surveillance camera through various means, including rain, flooding, accidental spills, and condensation. Poor manufacturing or installation, or wear and tear over time, can cause gaps or openings in the camera housing, allowing water ingress.
Water ingress can cause blurry or distorted images, malfunctioning features, or complete camera failure. It can lead to corrosion, short circuits, and damage to internal components such as the lens, circuit board, and wiring.
To prevent water damage, choose a camera with a high IP rating designed for outdoor or wet environments. Install the camera in a protected location, such as under a roof overhang or eave, and keep it away from water runoff. Regularly inspect and maintain the camera to ensure proper functioning.
If water gets into your surveillance camera, immediately turn it off to avoid further damage. Remove the memory card and batteries, and dry the camera with a towel. Leave the battery and memory card compartments open and place the camera in a warm, dry location for at least 24-48 hours to allow any internal moisture to evaporate. If the camera still does not work after drying, consult an authorized service technician.