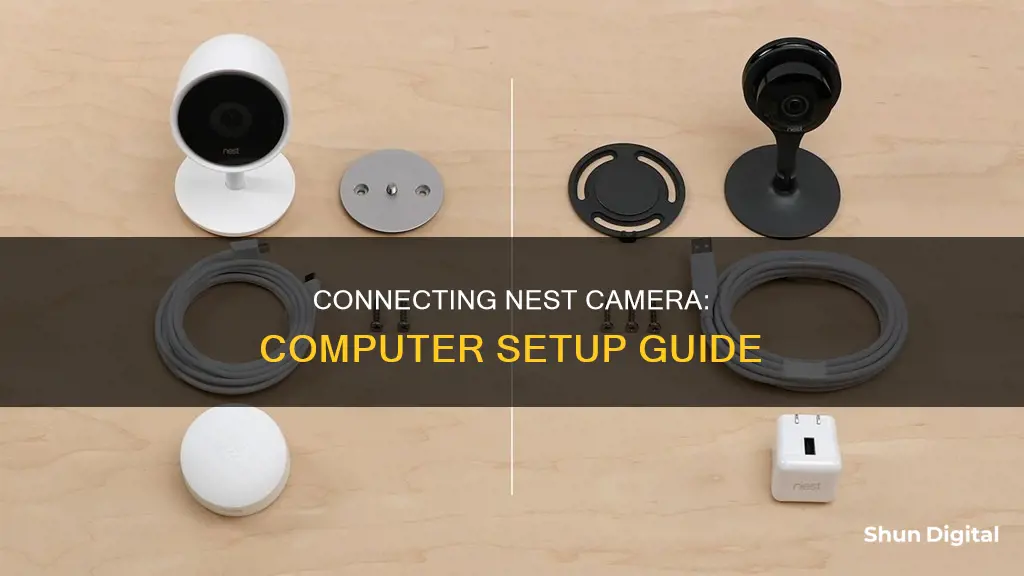
If you want to connect your Nest camera to your computer, you can do so by using the Nest app or Google Home app on your phone or tablet to connect it to Wi-Fi. If you have issues with the app, some older Google Nest camera models can be set up on a computer instead. You can use a Mac or Windows computer to set up Nest cameras, but newer models such as the Nest Cam battery and Nest Cam IQ cannot be set up on a computer and must be set up with the Google Home app or Nest app.
What You'll Learn

Connecting Nest Cameras to a computer
You can connect your Nest camera to your computer by setting it up on a Windows or Mac computer. This method is only compatible with older Google Nest camera models, as newer models (such as Nest Cam battery, Nest Doorbell battery, Nest Cam IQ, etc.) must be set up with the Google Home app or Nest app.
- Place your camera: For the Nest Cam Indoor, place your camera near where you want to mount it. For the Nest Cam Outdoor, start inside your home, near your Wi-Fi router and an indoor power outlet. You will go outside later to test your Wi-Fi connection and mount your camera.
- Plug your camera into your computer: Use the included USB cable to plug your camera directly into a USB port on your computer. Do not use third-party cables as they may not deliver enough power. Ensure you plug your camera directly into your computer and not into an external USB hub. If you encounter any issues during setup, try using a different USB port.
- Wait for the camera to start up: The light on the front of your camera should glow blue to indicate that it is starting up. After a moment, the light should begin to blink.
- Double-click the setup icon: Once your camera finishes its startup, a window should pop up on your computer with Nest Cam setup icons for both Mac OS and Windows. Double-click on the icon that matches your computer's operating system. Keep your camera plugged into your computer until prompted.
- Follow the on-screen instructions: After double-clicking the Nest icon, an app should launch and guide you through the setup process. This typically includes creating an account, connecting your camera to Wi-Fi, naming your camera, and finishing the setup.
- Bookmark the Nest web app: After setting up your camera, bookmark the Nest web app in your browser for quick access to your camera's video stream and settings management.
It is important to note that Google has recently introduced the "Google Home for web" app, which allows users to access their Nest camera and doorbell feeds directly from a web browser. This app is still in its early stages but offers features such as live streaming, two-way audio, and automation adjustments.
Arri Cameras: Where Are They Manufactured and Assembled?
You may want to see also

Using the Google Home app
To set up your Nest camera using the Google Home app, you need to first download the app on your phone. The Google Home app is used to set up the following Nest cameras:
Nest Cam with Floodlight
You can download the Google Home app from the Apple App Store or the Google Play Store. Once you have the app, open it and sign in with your Google Account. If you don't have a Google Account, you will need to create one.
After signing in, follow these steps:
- Tap 'Devices' and then 'Add Google Nest or partner device'.
- Choose the home you want to add your camera to, or select 'Add another home' to create a new one. Then, tap 'Next'.
- The app will now look for nearby devices. When prompted, select the camera model you have as the device you want to set up.
- Use your phone's camera to scan the QR code on the back of your camera. Alternatively, you can tap 'Continue without scanning' and enter the setup code. If you can't find the setup code, tap 'Find the code' for help.
- The app will now walk you through the setup and installation process.
Note: It is important to connect your camera to the app before you install or mount it.
Charging Casio Exilim: A Step-by-Step Guide
You may want to see also

Troubleshooting connection issues
If you're having trouble connecting your Nest camera to your computer, there are several troubleshooting steps you can take to resolve the issue.
First, ensure that your camera is set up correctly and connected to the internet. Check that your camera is within range of your wireless router or access point. Try moving your camera closer to the router, or if it's already mounted and can't be moved, try moving the router closer to the camera.
If your camera is too close to the router, it can also cause connection problems, so keep it a few feet away. Restart your camera and router to refresh their connection. Check that your home Wi-Fi is working by testing the connection with another device. If you can't get online with another device, try restarting your router and modem.
Check your internet bandwidth and speed. Your camera or doorbell might need a certain amount of bandwidth to maintain a stable Wi-Fi connection and upload video to the cloud. Use a mobile device to run an internet speed test near your camera. If the speed is lower than expected, your camera might be out of range of your router, or something might be interfering with the Wi-Fi signal.
Move your camera, router, or other objects that could be causing wireless interference. Your camera might disconnect when it's slightly out of range of your Wi-Fi or due to interference from other electronics, large furniture, appliances, or structural elements like walls and floors. Try moving your camera a foot or two away from its original location, or move the router and camera closer to each other.
If you've tried these steps and are still experiencing connection issues, you may need to consult the Nest support website for further troubleshooting advice or contact their customer support team for assistance.
Samy's Camera and Texas Sales Tax: What's the Deal?
You may want to see also

Viewing Nest Cameras on a web browser
To view your Nest cameras on a web browser, you can use Google Home for web on a computer or mobile device. This is how you do it:
Step 1: Go to home.google.com
Open a web browser like Chrome and go to home.google.com. Make sure your browser supports WebRTC and Media Source Extensions (MSE). Note that Internet Explorer doesn't support Google Home for web.
Step 2: Sign in to your Google Account
Sign in to the Google Account that you use to manage your devices in the mobile app. If you've signed out since your last visit, select "Go to Google Home" to sign in again.
Step 3: View your cameras
Once you're signed in, you'll be able to view your cameras. Click "Cameras" to see each linked camera as a tile in your grid view. To open a larger view for a specific camera, click its tile.
Step 4: Control your camera view
You can control your camera view in several ways. You can turn the camera on or off, start a live video, expand the video to full screen, zoom in and out, mute and unmute the sound, and check the battery percentage (for battery-powered cameras). You can also create, save, and view video clips of your camera footage.
Step 5: View camera video history
If you're a Nest Aware subscriber, your Nest camera's video history will be stored automatically in the cloud. You can watch this video history on a computer by signing in to your account at home.google.com or home.nest.com and selecting a camera with a Nest Aware subscription. Your camera's video history will include a timeline that helps you scan for important events, such as motion or sound. You can click on different parts of the timeline to jump to different parts of the video history.
Focusing Non-SLR Cameras: Easy Tips for Sharp Shots
You may want to see also

Nest Camera compatibility with Google Home
Google Nest cameras are designed to work with Google Home, and they integrate seamlessly. Nest camera feeds are readily accessible through the Google Home app, allowing users to monitor their homes directly from the app's home controls on Android devices.
To set up a Nest camera with Google Home, you can use either the Google Home app or the Nest app, depending on the camera model. The Nest Cam with Floodlight, for instance, is set up using the Google Home app. The setup process involves downloading the appropriate app, signing in with your Google Account, and scanning the QR code on the camera to add it to the app.
It's important to note that newer Nest camera models, such as the Nest Cam battery, Nest Doorbell battery, and Nest Cam IQ, cannot be set up on a computer and must be configured using the Google Home or Nest app.
In addition to Nest cameras, Google Home also supports a wide range of other camera brands, including Arlo, Eufy, Tapo, and Wyze. However, the live camera feeds for these brands may not be directly viewable in the Google Home app. Instead, users can employ a Google Nest Hub display or ask Google Assistant to show the feed.
Surveillance Cameras: Privacy's Double-Edged Sword
You may want to see also
Frequently asked questions
You can use either the Google Home app or the Nest app to set up your Nest camera. Download the app you need from the Apple App Store or the Google Play Store.
No, newer models such as the Nest Cam battery, Nest Doorbell battery, and Nest Cam IQ cannot be set up on a computer and must be set up with the Google Home app or Nest app.
Go to home.google.com on your desktop computer and sign in with the same Google account you use in the Google Home app. You'll be able to see live streams from your cameras straight away.


