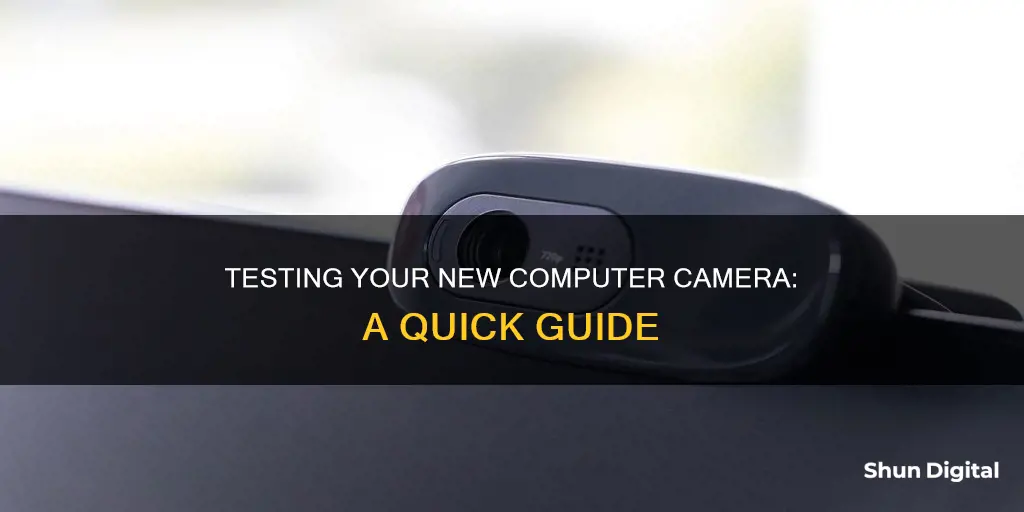
Testing a new computer camera is a simple process, but one that is important to get right to ensure you are seen and heard clearly during online meetings and webinars. There are several ways to test your camera, including using a free online webcam test site, testing it with a friend or colleague, or checking the platform's compatibility. If you are using Windows, you can use the built-in camera app to test your device. For MacOS, you can use the Photo Booth app.
| Characteristics | Values |
|---|---|
| Online webcam test | Use a free online webcam test site like WebCamMicTest, WebcamTests, or OnlineMicTest |
| Offline test | For Mac, go to Applications > Photo Booth. For Windows 10, type "Camera" in the search box |
| Test with a friend | Schedule a quick call with a friend or colleague to test your camera |
| Check platform compatibility | Check that your computer meets the minimum requirements for your chosen platform |
| Run a connectivity speed test | Try a third-party speed test to check your download and upload speeds |
| Ensure webcam video quality | Check the video quality specifications on the product's packaging or in your webcam's settings |
What You'll Learn
![]()
Check the camera feed
Checking the camera feed is a crucial step in testing a new computer camera. This step will help you verify if your webcam is working correctly and providing a clear image. Here is a detailed guide on how to check the camera feed on different operating systems:
Windows:
- Open the Start menu by clicking the Start button or pressing the Windows key on your keyboard.
- In the Start menu, search for "Camera" and select the Camera app from the list of applications.
- If you have multiple cameras, you can switch between them by selecting "Change Camera" in the top-right corner of the Camera app.
- Once the Camera app is open, your webcam feed should appear on the screen.
MacOS:
- Click on the Finder icon in the Dock bar, usually located at the bottom of your screen.
- In the Finder window, navigate to the "Applications" folder.
- Inside the Applications folder, locate and double-click on the "Photo Booth" app.
- The Photo Booth app will open your webcam's feed.
- If you have an external webcam, you may need to select it from the Photo Booth app's menu bar at the top of the screen.
Ubuntu Linux:
- Press the Windows/Option key on your keyboard to open the search menu.
- In the search menu, look for and open the "Cheese" app, which is a free photo booth app included with Ubuntu.
- The Cheese app will automatically display the feed from your webcam.
Online Testing Websites:
- You can also test your webcam using online testing websites such as Webcamtests.com or Webcammictest.com.
- Simply visit the website, grant permission for the website to access your webcam, and follow the on-screen instructions.
- These websites will typically provide a live preview of your webcam feed and may offer additional technical information about your camera.
BestBuy's Camera Restocking Fee: Why the Extra Charge?
You may want to see also
![]()
Test with a friend
Testing your new computer camera with a friend is a great way to ensure it's working properly. Here's a detailed guide on how to do it:
Set Up a Call with a Friend:
- Schedule a quick video call with a friend or colleague. This can be done using any video conferencing platform, such as Zoom, Skype, Google Meet, or Microsoft Teams.
- Before the call, ensure that you have a stable internet connection. A slow or unreliable connection can affect the quality of your video and audio.
Join the Call and Test Your Camera:
- Join the video call with your friend. Once you're connected, start testing your new computer camera.
- Position yourself in front of the camera and check if your friend can see you clearly. Ask them to provide feedback on the video quality, including lighting, focus, and clarity.
- If possible, try moving to different locations with varying lighting conditions (natural light, low light, etc.) to see how your camera adjusts.
Test Your Audio:
- In addition to video, it's important to test your audio quality. Speak to your friend and ask them to provide feedback on your audio.
- Ensure that your microphone is capturing your voice clearly and that there is no background noise or echo interfering with the audio.
- If your friend is experiencing issues with your audio, try adjusting your microphone settings, or consider using an external microphone for improved quality.
Experiment with Different Browsers and Devices:
- To further test your new computer camera, consider switching to different web browsers, such as Chrome, Firefox, or Safari. This will help you determine if there are any browser-specific issues.
- Additionally, if you have access to multiple devices, such as a laptop and a desktop computer, try joining the call from each device to see how your camera performs across different setups.
Record a Video:
- During your call with your friend, record a short video clip. This will allow you to review the footage afterward and assess the video and audio quality in more detail.
- Pay attention to factors such as frame rate, resolution, and audio synchronization when reviewing the recorded video.
By following these steps and testing your new computer camera with a friend, you can ensure that it is functioning optimally and that you're ready for your next video call or online meeting.
Unlocking Camera Raw: Unlicensed Lightroom Upgrade Secrets
You may want to see also
![]()
Check the USB connection
When testing a new computer camera, checking the USB connection is a crucial step to ensure a successful setup. Here are some detailed instructions to guide you through the process:
Use the Correct USB Cable:
It is important to use the USB cable that came with your camera. These supplied cables are typically optimised for your device. If you don't have the original cable, purchase a commercially available cable that supports your camera's connection type, such as USB Type-C. Ensure the cable supports data transfer and charging.
Inspect the USB Ports:
Before connecting, inspect the USB ports on both your camera and computer for any dust or debris. Use a soft, dry cloth to gently clean the ports if necessary.
Connect the Camera Properly:
Firmly insert the USB cable into the corresponding ports on your camera and computer. Ensure that the connections are tight and secure. If your camera has a USB Type-C terminal, consider using a USB 3.1 compatible USB Type-C cable for faster data transfer.
Try Different USB Ports:
If the initial connection is unsuccessful, try connecting the camera to a different USB port on your computer. Sometimes, a specific port may have an issue, so it's worth trying alternative ports to establish a stable connection.
Connect Directly to the Computer:
If you're using a USB hub to connect your camera, try plugging the USB cable directly into the computer's USB port. This step can help determine if the issue lies with the hub or the camera/computer connection.
Check the Camera's Battery:
Ensure that your camera's battery is sufficiently charged. A low battery can sometimes prevent a successful connection.
Refer to the Instruction Manual:
Consult the camera's instruction manual to verify if there are any model-specific connection requirements or troubleshooting steps. Different camera models may have unique connection procedures or settings.
Restart Your Computer:
If all else fails, try restarting your computer. This simple step can sometimes resolve minor glitches and allow your computer to recognise the camera connection.
By following these comprehensive steps, you can effectively check the USB connection when setting up your new computer camera.
Complete Recharge: DMC-ZS60 Camera Battery Charging Guide
You may want to see also
![]()
Check the device manager
If you're using a Windows computer, you can check for your camera in the Device Manager. Here's how to do it:
Step 1: Open the Device Manager
Use the Windows search function to search for "Device Manager" and open the application.
Step 2: Navigate to the Cameras section
In the Device Manager window, look for the "Cameras" section. Your camera should be listed here. If you can't find it, don't worry—there are a few other places it might be grouped.
Step 3: Check other device groups
If your camera isn't under the "Cameras" section, try looking in "Imaging devices" or "Sound, video and game controllers." If you're using an external camera, you may also want to check under "USB devices" or "USB device hub."
Step 4: Scan for hardware changes
If you still can't find your camera, select the Action menu in the Device Manager and choose "Scan for hardware changes." This will prompt the Device Manager to look for any new hardware that may have been missed previously.
Step 5: Update device drivers
If your camera still isn't showing up, it's possible that your device drivers need to be updated. To do this, visit your computer manufacturer's website (e.g., Dell, HP, Lenovo, or Acer) and download the latest webcam drivers. Follow the on-screen instructions to complete the installation.
Step 6: Add a legacy camera driver
If your drivers are all up to date but your camera is still missing, try adding a camera manually. Go to the Action menu in the Device Manager and select "Add legacy hardware." Follow the on-screen instructions to add your camera device.
If you're using a Mac, you can check for your camera in the Photo Booth app. Simply click on the Finder icon in the Dock, select "Applications", and open the Photo Booth app. Your webcam's feed should appear if the camera is functioning properly.
Protect Your Privacy: Disable Your Computer's Camera
You may want to see also
![]()
Check the webcam settings
Checking your webcam settings is an important step in testing a new computer camera. This process can vary depending on the specific settings you want to adjust and the operating system you are using. Here is a detailed guide on how to check and adjust your webcam settings:
Windows 11:
In Windows 11, you can manage the cameras connected to your device through the Camera settings page. To access this page, type "manage cameras" in the search bar on the Start menu and select "Manage cameras" from the results. Here, you can view and manage the cameras connected to your device.
If you want to adjust the default settings for a specific camera, select the camera from the list of connected cameras. Windows will display a preview and allow you to adjust various settings, such as brightness, contrast, saturation, and sharpness. You can also adjust the rotation and enable features like background blur, eye contact correction, and automatic framing.
Windows 10:
On Windows 10, you can adjust your webcam settings by accessing the Camera app. Type "camera" in the search box next to the Start Menu icon and select the Camera app from the search results.
Once the Camera app is open, click on the Settings gear icon in the top-left corner. From here, you can adjust settings such as the framing grid, resolution for photos and videos, time-lapse timer, and flicker reduction. If you want to adjust the brightness, you will need to enable Pro Mode.
Privacy Settings (Windows 10):
To adjust privacy settings related to your webcam, go to the Start Menu and click on the Settings gear icon in the lower-left corner. In the Windows 10 Settings menu, select "Privacy," then "Camera" under App Permissions. Here, you can manage privacy settings such as letting apps access your camera and choosing which specific apps can access it.
MacOS:
If you're using a Mac, you can test and adjust your webcam settings using the Photo Booth app. Click on the Finder icon in the Dock bar, select "Applications," and then open the Photo Booth app. If you have an external webcam in addition to the built-in one, you may need to select it from the Photo Booth app's drop-down menu.
Zoom:
To test and adjust your webcam settings in Zoom, sign in to your account and click on your profile picture. From the menu, select "Settings," then click on the "Video" tab. Follow the instructions provided to test and adjust your webcam settings.
Skype:
To test your webcam with Skype, launch the app and click on the Skype button in the menu bar. From there, select "Preferences" on Mac or "Options" on Windows, followed by "Audio/Video" (Mac) or "Video Settings" (Windows).
Google Meet:
To test your webcam with Google Meet, launch the app and enable the browser to access your microphone and camera when prompted. From the settings menu, select "Camera" and choose your webcam from the drop-down menu.
Microsoft Teams:
To test your webcam with Microsoft Teams, navigate to the Settings option next to your profile picture. Choose "Devices" from the menu, then select your webcam from the "Camera" drop-down menu.
Chrome:
To test your webcam with Chrome, go to the Settings menu and click on the More Options icon (three dots) in the upper right-hand corner. From there, select "Privacy and Security," then "Site Settings," and finally, "Camera" to select your preferred device.
Online Webcam Testing Sites:
There are also free online webcam testing sites that you can use, such as Webcamtests.com and Webcammictest.com. These sites provide a simple way to test your webcam and will display a live preview of your webcam feed, allowing you to check the image quality. However, be aware that some sites may record your video or gather your data for advertising purposes.
By following these steps, you can effectively check and adjust your webcam settings to ensure your new computer camera is functioning properly.
Meta's Camera: Surveillance or Innovation?
You may want to see also
Frequently asked questions
You can test both your new computer camera and microphone by running an online webcam test. There are many free online webcam test sites available, such as WebCamMicTest and WebcamTests. These sites will allow you to check your camera feed and audio quality.
You can also test your new computer camera using a computer application such as Skype, FaceTime, Google Chat, or Facebook Messenger. Additionally, if you're using a Windows operating system, you can use the built-in Camera app to test your camera. If you're using a Mac, you can use the Photo Booth app.
If your new computer camera is not working, there are a few troubleshooting steps you can try. First, make sure that the camera is properly plugged into your computer. If it's an external webcam, try plugging it into a different USB port. You can also try updating your webcam drivers or checking your camera settings to ensure that it is enabled.
To check if your computer has a built-in camera, go to the Device Manager and look for Imaging Devices. If you have a webcam, it should be listed there.
Yes, it's important to note that some online webcam test sites may have provisions in their terms of use stating that users "may be recorded." Additionally, these sites may gather your data for their own purposes, such as advertising. If you have privacy concerns, you may prefer to use offline methods or test your webcam using a trusted application.