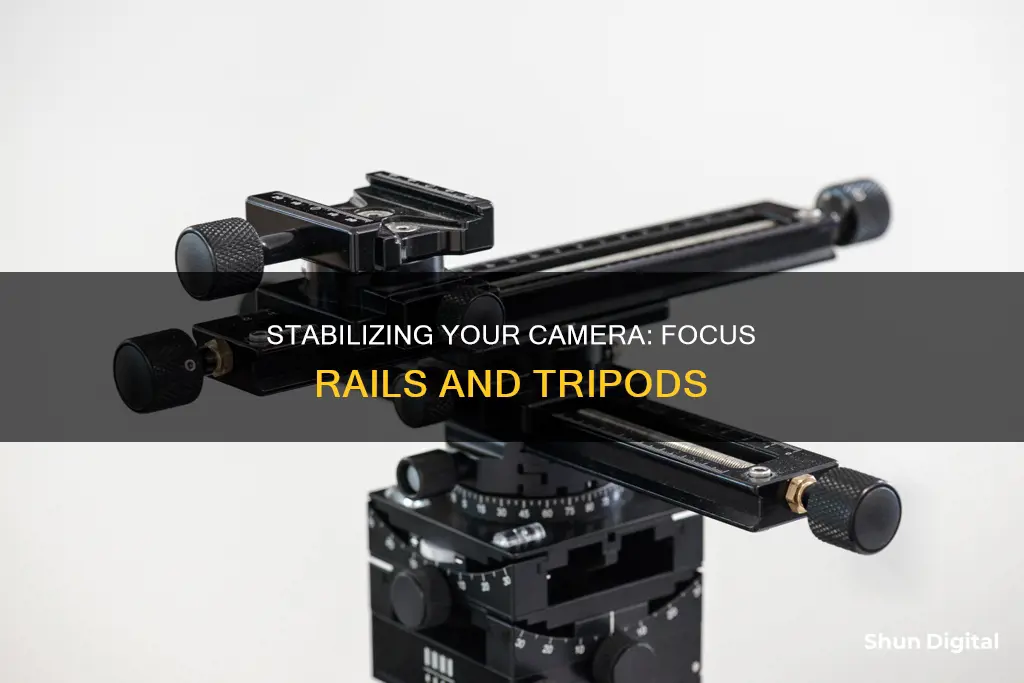
Stabilising a camera on a focus rail can be a challenging task, especially when dealing with macro photography, where even the slightest movement can result in blurry or out-of-focus shots. One way to achieve stability is by using a macro focusing rail, which offers several advantages. These include the ability to make micro-adjustments to the focus, compatibility with tripods, and precise control over the camera's movement. Additionally, focus stacking, a technique that involves combining multiple images with different focus points, can also aid in stabilisation. This can be achieved through post-processing software such as Adobe Photoshop, Lightroom, and Zerene Stacker. Proper tripod setup, camera settings, and focus techniques also play a crucial role in stabilising the camera on a focus rail.
| Characteristics | Values |
|---|---|
| Purpose | Stabilize camera on focus rail |
| Use | Capturing sharp and in-focus macro shots |
| Compatibility | Can be mounted on any brand or type of tripod |
| Adjustment | Micro-adjustments to focus within a scene |
| Direction | Allows movement of the camera forwards, backwards, and sideways |
| Measurement | Features precise measurements to control the movement of the rail |
| Focus Stacking | Enables capturing multiple shots with different focus points |
| Software | Compatible with editing software like Adobe Photoshop for focus stacking |
| Limitations | Not suitable for shorter focal distances, bigger objects, or complex scenes with occlusions |
What You'll Learn

Use a macro focusing rail to stabilise your camera
A macro focusing rail is a great tool for stabilising your camera when shooting macro photography. It allows you to move your camera forwards, backwards, and even sideways, while keeping your camera stable and eliminating camera shake. This is crucial in macro photography, as even the slightest movement can result in blurry or soft photos.
Benefits of a Macro Focusing Rail
A macro focusing rail offers several advantages for macro photographers. Firstly, it allows you to adjust your focus in small or micro amounts, making it easier to achieve sharp and precise focus. Secondly, it makes it easier to stitch images together using a technique called focus stacking, where you take multiple shots of the same image with different focus points and then combine them in editing software. Finally, it is compatible with tripods, so you can mount it on any brand or type, adding extra stability to your setup.
How to Use a Macro Focusing Rail
Using a macro focusing rail is straightforward. Simply attach your camera and lens to the rail, usually via the tripod thread on the bottom of your camera. If you are using a telephoto macro lens, connect it to the rail via the tripod collar. Once your camera is set up, you can start adjusting the focus. Decide if you want to start focusing on the front or back of your subject, as this will determine where you attach the camera to the rail.
Shooting Your Images
When shooting your images, it's important to check the first and last frame to ensure you have enough space and headroom around your subject for easier merging later. The number of images you need to capture will depend on your depth of field. A shallower depth of field or a closer distance to your subject will require more images shot in smaller intervals. Make sure there are no focus gaps when you shoot, so that the images overlap slightly and can be combined seamlessly in post-processing.
Post-Processing
After capturing your images, you can use software like Lightroom and Photoshop to edit and combine them into a single, sharply focused composite image. Import your images to Lightroom and make basic edits to improve contrast, adjust shadows and highlights, and tweak clarity and vibrance. Then, open the images as layers in Photoshop, auto-align them, and auto-blend them, choosing the "Stack Images" option under Blend Method. Finally, save your photo and make any further adjustments as needed.
Campark Cameras: Where Are They Manufactured?
You may want to see also

Attach your camera to the rail using a quick-release plate
To attach your camera to the rail using a quick-release plate, you must first locate the mounting screw on the tripod head. This is usually a small screw located in the centre of the tripod head. Next, attach the quick-release plate to the bottom of your camera. The plate should have a screw that matches the mounting screw on the tripod head. Ensure that the plate is securely attached to your camera.
Once the quick-release plate is attached to your camera, you can then slide the plate into the quick-release plate on the tripod head. Make sure it clicks into place and is secure. Tighten the screw on the quick-release plate to ensure your camera is securely in place. You can then adjust the tripod head to the desired angle and tighten the knobs to lock it in place.
It is important to note that different tripod brands and models may have slightly different methods for installing and adjusting quick-release plates. Always refer to the manufacturer's instructions for specific details and guidance. Additionally, some newer tripods may come with built-in quick-release systems that do not require a separate plate.
Auto-Focus Camera Tips for Self-Portrait Perfection
You may want to see also

Adjust the focus by moving the camera back and forth
Adjusting the focus by moving the camera back and forth is a critical skill at any level of video production. Here are the steps to do it effectively:
Setting Up the Camera
- Set up your tripod and mount the focusing rail on top. Ensure that you are moving towards your subjects and through the focus plane, rather than parallel to the scene. It is ideal to be level with the subjects rather than looking down or up at them.
- Set your camera and lens to manual focus. This is imperative for the process to work.
- Adjust your camera settings, including ISO, aperture, and shutter speed. With light and dark subjects, check the exposure of your first and final shots to determine an exposure that works well throughout.
Adjusting the Focus
- Start by focusing manually on the nearest subject. Set your focus manually to be pin-sharp on the object in the foreground, and do not refocus. Moving the camera forwards while also focusing in a new place will not work.
- Use the focus ring to adjust the focus until the picture is sharp. Turn the ring clockwise for a closer focus and anti-clockwise for a more distant focus.
- If your camera has an LCD screen, switch to live view mode to fine-tune the focus. This allows you to see a more accurate representation of the focus and make adjustments as needed.
- Check the distance from a still subject to the lens for perfect focus. The numbers on the focus ring tell you where the lens is focusing. Set your focus distance and position your subject at that exact distance from the lens.
- If you are shooting in the field and cannot make exact measurements, estimate the distance and adjust the focus using the LCD screen.
Capturing the Images
- Capture a series of images with different focus points. The distance between each shot will depend on your depth of field, which is dictated by your aperture and distance from the subject.
- Ensure that there are no focus gaps when shooting. The focal points should still overlap slightly so that when you combine the shots, they blend seamlessly.
- Depending on the level of precision you require, you can adjust the focus at small intervals (e.g., 10-micron intervals) and capture a large number of images.
- For casual macro photography, you can typically achieve good results by capturing between 10 to 45 images at longer intervals, especially for broader or larger subjects like food and nature.
Unlocking Creative Photography with the Sports Mode
You may want to see also

Shoot in manual focus to maintain pin-sharp images
Shooting in manual focus is imperative for the focus stacking process to work. Set your camera and lens to manual and set your focus manually to be pin-sharp on the subject in the foreground. Do not re-focus again. Moving your camera forwards while also focusing in a new place will not work.
- Turn on Live View. It is usually easy to see if a shot is sharp or not by using the LCD screen instead of the viewfinder. Zoom in on your subject; it is easier to see if the subject is sharp as you turn the focus ring.
- Try pre-focusing for action. While autofocus is usually best for action shots, there are some scenarios where manual focus still wins out. Pre-focusing on a distance where you expect the subject to be allows you to capture shots with manual focus quickly.
- Use camera-assisted manual focus. Camera manufacturers know how difficult it is to use manual focus, so many of them equip their cameras with features to help. On a Nikon camera, a circle will appear when your image is in focus. On a Canon camera, the focus point that is in focus will light up when the proper focus is achieved.
- Use a magnifying viewfinder eyepiece. This is a cheap 'quick-fix' for sharper manual focus shots. You can replace your current eyecup with one that has a tiny magnifying lens built into it.
- Use a video loupe. This is a large viewfinder that covers the entirety of your LCD screen and displays an image in an eyecup that you hold up to your eye. You attach this by screwing a plate into the base of your camera via the tripod mount and then slot the video loupe viewfinder in.
Charging Camera Batteries: First-Time User Guide
You may want to see also

Use focus stacking to create a composite image with a deeper depth of field
Focus stacking is a powerful technique in photography that can be used to create a single image with a deeper depth of field. It is particularly useful in close-up and macro photography, where the shallow depth of field can result in blurry or soft photos. Here's a step-by-step guide on how to use focus stacking to create composite images with a deeper depth of field:
Step 1: Set Up Your Equipment
- Attach your camera and lens to a macro focusing rail. This tool allows you to move your camera forwards, backwards, and sideways for precise adjustments.
- Set up your tripod and mount the focusing rail on top. Ensure that you are level with your subjects rather than looking down or up at them.
Step 2: Camera Settings
- Set your camera and lens to manual mode. This is crucial for maintaining consistent focus throughout the process.
- Dial in your ISO, aperture, and shutter speed. Keep in mind that you cannot change these settings during the shooting process, so choose values that will work well for all your images.
- Set your focus manually to be pin-sharp on the subject in the foreground. Do not re-focus again as you move your camera.
Step 3: Capture Multiple Images with Different Focus Points
- Start capturing images by moving your camera along the focusing rail. Make small, precise movements to adjust your focus gradually.
- Take multiple shots, focusing on different areas of the scene. The number of images you need will depend on the depth of field you want to achieve. For a deeper depth of field, you may need to capture dozens of images.
- Ensure that there are no focus gaps between your shots. The focal points should overlap slightly so that the composite image appears seamless.
Step 4: Edit and Combine Your Images
- Import your images into photo editing software like Adobe Photoshop or Lightroom.
- Align the photos so that their content is overlaid pixel by pixel. This step ensures that all the images are in the correct position for combining.
- Create a composite image by selecting the sharpest regions from each photo. You can do this manually using layer masks or use specialized software that automatically blends the images.
- Adjust the lighting, contrast, colours, and other settings to ensure consistency across all the images.
By following these steps, you can create composite images with a deeper depth of field, resulting in sharper and more detailed photographs. Focus stacking is a versatile technique that can be applied to various types of photography, including macro, landscape, and product photography.
Unlocking Camera Raw Power in Elements
You may want to see also
Frequently asked questions
You will need to attach a quick-release plate to the base of the macro rail. Then, use the thumbscrew to attach the camera to the upright.
You can use a macro rail or vary the focus of the lens. Macro rails are a good choice for tiny objects and are much easier to automate. However, they are not a good choice for larger objects or complex scenes with occlusions.
First, set up your tripod and mount the focusing rail on top. You want to be moving towards your subjects and through the focus plane. Set your camera and lens to manual and focus on your subject. Dial in your ISO, aperture, and shutter speed. Use the crank to move your camera in small increments and start shooting. You can then edit your images in Lightroom and Photoshop.
Macro focusing is the process of focusing on macro photography subjects. This involves shooting small objects and enlarging them to life-size. To achieve true macro, you need to capture the subject above a 1:1 ratio.


