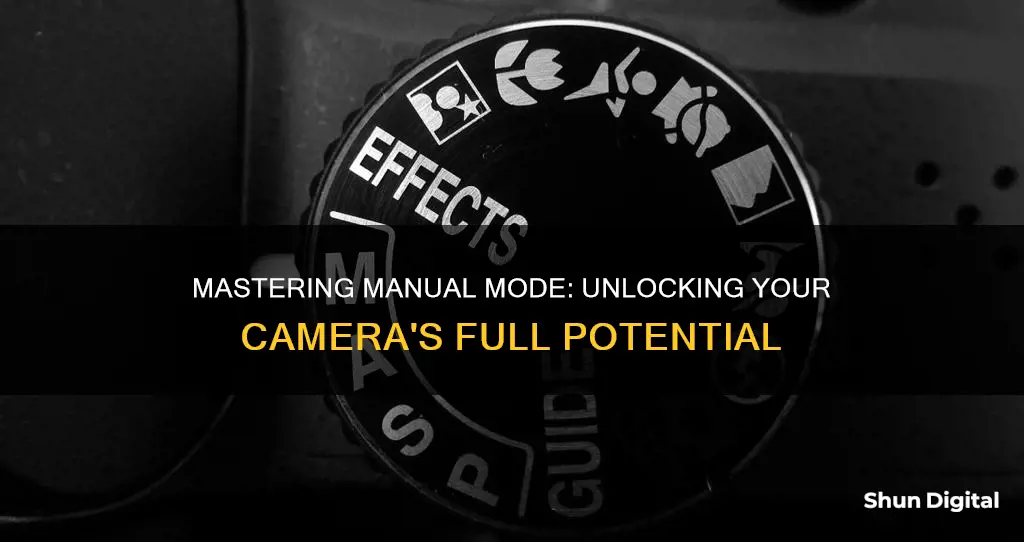
Shooting in manual mode can be intimidating, especially if you’re trying it for the first time. However, it gives you a lot of flexibility that other camera modes, such as Auto, can't match. Manual mode gives you complete control over your camera settings, including the three key exposure variables: ISO, aperture, and shutter speed. Together, these three elements determine the overall brightness of your photos (exposure) and affect your photos in other ways, such as sharpness, depth of field, and overall quality.
ISO controls your camera’s sensitivity to light. A higher ISO means more exposure, and vice versa. Aperture is the hole in the back of your lens that controls light and depth of field via f-numbers. A low f-number for a wide aperture will get your foreground or subject in focus, but the background will stay blurry. A high f-number for a narrow aperture will keep both the foreground and the background in focus. Shutter speed refers to how fast you take a photo. Slow shutter speeds let in more light than faster ones.
| Characteristics | Values |
|---|---|
| Camera mode | Manual |
| Camera settings | Aperture, Shutter speed, ISO, White balance, Metering method |
| Aperture | Hole in the back of the lens that controls light and depth of field via f-numbers |
| Shutter speed | Speed at which the shutter opens and closes to allow light to hit the sensor |
| ISO | Camera's sensitivity to light |
What You'll Learn

Aperture controls the light and depth of field
Aperture is one of the essential elements of photography. It controls the amount of light that passes through the lens and hits the camera's sensor. The size of the aperture is expressed as a number known as the f-stop or f-number. A larger aperture, denoted by a smaller f-stop number, lets in more light and results in a shallower depth of field, blurring the background and keeping the subject in focus. This technique is commonly used in portrait photography to emphasise the subject. Conversely, a smaller aperture, denoted by a larger f-stop number, lets in less light and results in a greater depth of field, keeping most or all of the image in focus. Landscape photography often uses a smaller aperture to capture as much detail as possible in the foreground and background.
The aperture also controls the depth of field, or the zone within a photo that appears sharp and in focus. The depth of field can be deep or shallow. A deep depth of field keeps the entire shot sharp, from the foreground to the background. This technique is useful for landscape photography, where you want to capture every detail of the scene. A shallow depth of field, on the other hand, has a very small zone of focus, with the subject in sharp focus and the background blurred. Portrait photography often uses a shallow depth of field to draw attention to the subject while blurring the background.
The depth of field is influenced by three main factors: the aperture setting (f-stop), the distance between the lens and the subject, and the focal length of the lens. A wider aperture results in a shallower depth of field, while a narrower aperture provides a deeper depth of field. Moving closer to the subject also reduces the depth of field, while increasing the distance has the opposite effect. Additionally, longer focal lengths produce shallower depth of field effects, and shorter focal lengths create deeper depth of field effects, assuming the aperture and distance from the subject remain constant.
Beach Camera Sales Tax: What You Need to Know
You may want to see also

Shutter speed determines how long the shutter stays open
Shutter speed is one of the three most important settings in photography, the other two being aperture and ISO. Shutter speed determines how long the shutter stays open, exposing light onto the camera sensor. Essentially, it’s how long your camera spends taking a photo. This has a few important effects on how your images will appear.
Shutter speed is measured in fractions of a second when they are under a second. For example, 1/4 means a quarter of a second, while 1/250 means one-two-hundred-and-fiftieth of a second (or four milliseconds). Most modern DSLRs and mirrorless cameras can handle shutter speeds of 1/4000th of a second at the fastest, while some can handle even quicker speeds of 1/8000th of a second and faster. On the other hand, the longest available shutter speed on most DSLRs or mirrorless cameras is typically 30 seconds. You can use a longer shutter speed by using external remote triggers, if necessary.
The faster the shutter speed, the less light gets to the sensor. Using a slower shutter speed allows more light into the camera. With a slow shutter speed (also known as a "slow" shutter speed), you end up exposing your sensor for a significant period of time. The first big effect of it is motion blur. If your shutter speed is long, moving subjects in your photo will appear blurred along the direction of motion. This effect is used quite often in advertisements for cars and motorbikes, where a sense of speed and motion is communicated to the viewer by intentionally blurring the moving wheels.
Slow shutter speeds are also used to photograph the Milky Way or other objects at night, or in dim environments with a tripod. Landscape photographers may intentionally use long shutter speeds to create a sense of motion on rivers and waterfalls while keeping everything else completely sharp.
On the other hand, shutter speed can also be used to freeze motion. If you use an especially fast shutter speed, you can eliminate motion even from fast-moving objects, like birds in flight, or cars driving past. If you use a fast shutter speed while taking pictures of water, each droplet will hang in the air completely sharp, which might not even be visible to our own eyes.
Shutter speed also has an impact on exposure, which relates to the brightness of an image. If you use a long shutter speed, your camera sensor gathers a lot of light, and the resulting photo will be quite bright. By using a quick shutter speed, your camera sensor is only exposed to a small fraction of light, resulting in a darker photo.
A fast shutter speed is typically whatever it takes to freeze action. If you are photographing birds, that may be 1/2000th of a second or faster. However, for general photography of slower-moving subjects, you might be able to take pictures at 1/200th of a second, 1/100th of a second, or even longer without introducing motion blur.
Long shutter speeds are typically above 1 second – at which point, you will need to use a tripod to get sharp images. You would use long shutter speeds for certain types of low-light and night photography, or to capture movement intentionally. If anything in your scene is moving when you use long shutter speeds, it will appear very blurry.
In between, shutter speeds from 1/100th of a second to 1 second are still considered relatively slow. You may not be able to handle them without introducing camera shake from your hands, especially close to the one-second mark.
Overcoming Low Battery: Tips for Photographers
You may want to see also

ISO controls the camera's sensitivity to light
ISO, or ISO speed, is a standard set by the International Organization for Standardization that measures a camera's sensitivity to light. The higher the ISO number, the more sensitive the camera is to light, and the less light is required to take a high-quality image. This is particularly useful when shooting in low-light conditions, such as at night or indoors, as it can compensate for a lack of natural light.
However, there is a trade-off. As the ISO number increases, so does the amount of noise in your photos, which can make them look grainy and blurry. This is because the ISO setting has a direct influence on the amplifier before the analogue-to-digital converter (ADC), with higher ISO numbers giving more amplification. Therefore, it is generally recommended to keep the ISO number as low as possible to achieve the best image quality.
When shooting in manual mode, you have complete control over your ISO settings, as well as your aperture and shutter speed settings. This gives you full creative control over your images, allowing you to achieve the exact shot you desire.
Finding Camera Raw Preferences: A Quick Guide
You may want to see also

White balance removes colour casts
White balance is a setting that tells your camera how to register colour temperature. In photography, white balance is a feature that successfully removes unrealistic colour casts, making the clip appear dull, tinted, and not of accurate colour. Different lighting conditions will portray an array of colour casts. For example, fluorescent light may cause video footage to have a green hue overlay, while warm light can portray an orange and yellow hue over the video footage.
The purpose of white balance photography is to assist creators when shooting video footage or photography in different types of lighting situations. The feature will capture an image or video with an accurate colour instead of appearing to have different colour casts.
White balance is the process of removing unrealistic colour casts, so that objects that appear white in person are rendered white in your photo. Our eyes are very good at judging what is white under different light sources, but digital cameras often have great difficulty with auto white balance and can create unsightly blue, orange, or even green colour casts.
The simple solution to neutralizing a photo's colour cast in Lightroom is by using the White Balance Selector, usually referred to as the eyedropper. It's in the Basic panel, in the White Balance section, next to the WB, left of the Temp and Tint sliders. The eyedropper is designed specifically for correcting colour casts fast! It's not always perfect, but when you know what to do, it's the best way to start correcting colour in your photo.
To use the eyedropper, select the tool by clicking on the icon in the White Balance section. Without clicking again, hover the tip of the eyedropper on or near something by your main subject that is a best guess for a colour that is supposed to be "neutral". The target grid is actually the image under the eyedropper tip highly magnified. Look over your photo for a white shirt or handkerchief, grey pants, a grey wall, or a dull silver object (but not the highlight) in your photo. When you have the tip of the eyedropper over a neutral colour, click once.
Clicking the eyedropper on or near your main subject should render better colour and subject skin tones in your photo. This eyedropper click in the right place tells Lightroom that these pixels shouldn't really have any colour at all. They should simply be "neutral" with no hint of colour, and Lightroom adjusts the Temperature of the entire photo based on your eyedropper's selection.
Colour casts can also be corrected in Photoshop with relative ease. To properly remove a colour cast in a photo, we must correct the White Balance of the image. Photoshop has three eyedropper icons used to set white, grey, and black points in an image. When there is a colour cast in an image, it is as if the image is "confused" about what is supposed to be white, black, and neutral grey. We "fix" the problem by showing Photoshop where these points of reference can be found in the photograph with these eyedropper tools.
The Ultimate Guide to Charging Your Doorbell Camera
You may want to see also

Metering mode evaluates the scene and gives metering readings
Metering mode is a setting on your camera that helps you control the brightness of your photos. It does this by evaluating the light in a scene and determining the correct exposure.
The most common metering modes are:
- Matrix/Evaluative Metering
- Centre-Weighted Metering
- Spot Metering
- Highlight-Weighted Metering
Matrix/Evaluative Metering is the default setting on most cameras. It works by dividing the frame into multiple zones and analysing each one to determine the correct exposure. This mode is a good option if you want to get the exposure as close to correct as possible for the entire scene.
Centre-Weighted Metering evaluates the light in the middle of the frame and its surroundings, ignoring the corners. This mode is useful when you want the camera to prioritise the middle of the frame, such as when taking a headshot of a person with the sun behind them.
Spot Metering evaluates the light around your focus point and ignores everything else. This mode is useful when you want to expose for a very particular area of the scene, such as when photographing the moon or a bird in the corner of the frame.
Highlight-Weighted Metering is similar to Spot Metering but gives more weight to reducing clipping. It's useful when you have bright areas near your subject that you don't want to overexpose.
You can change the metering mode on your camera through a dedicated button or via the photo shooting menu. The specific steps will depend on your camera model and manufacturer.
The metering mode you choose will depend on the lighting conditions and the type of scene you're shooting. In complex lighting situations, professional photographers often switch to manual mode rather than relying on a setting determined by the camera.
Game Winner Camera: How Many Batteries Are Required?
You may want to see also
Frequently asked questions
Manual mode gives you complete control over your camera settings. You can adjust each and every setting your camera offers.
The exposure triangle is made up of your aperture, shutter speed, and ISO. You use these three components to get your light meter to be at zero.
Aperture is the hole in the back of your lens that controls light and depth of field via f-numbers.
ISO is used in manual mode to keep light sensitivity in check. The higher your ISO value, the more exposed your photo will be and vice versa.
Shutter speed is the amount of time that your shutter is open. When looking at your camera your shutter speed is written as 1/(a number). This means that your shutter is open for 1/(whatever the #) of a second.


