Adobe Camera Raw (ACR) is a powerful tool that offers access to the features of ACR in your Photoshop workflow. It allows you to make adjustments within ACR at any time during your workflow, rather than limiting its usage to the RAW processing stage only. To access the Camera Raw filter, simply select Filter > Camera Raw Filter from the Filter menu. The Camera Raw filter can be used to fine-tune adjustments after RAW processing, apply certain adjustments that are difficult to do in Photoshop’s main interface, make quick adjustments to specific parts of the image, add vignettes, and make final tweaks before finishing your image. The Camera Raw settings can be managed by navigating to Edit > Preferences > Camera Raw (Windows) or Photoshop > Preferences > Camera Raw (macOS).
| Characteristics | Values |
|---|---|
| How to access the filter | Go to Filter>Camera Raw Filter |
| How to install presets in Windows | Navigate to "C:\Users\UserName\AppData\Roaming\Adobe\CameraRaw\Settings" and paste the desired preset folder(s) inside |
| How to install presets on a Mac | Open a new Finder window and go to "UserName > Library > Application Support > Adobe > Camera Raw > Settings" and paste the desired preset folder(s) inside |
| How to set default settings for raw images | In the Camera Raw dialog box, click the Open Preferences Dialog Button. Or, in Photoshop, choose Edit > Preferences > Camera Raw (Windows) or Photoshop > Preferences > Camera Raw (macOS) |
| How to set default settings to be applied to new raw images | In the Camera Raw dialog box, click the Open Preferences Dialog Button. Or, in Photoshop, choose Edit > Preferences > Camera Raw (Windows) or Photoshop > Preferences > Camera Raw (macOS). Then, select Raw Defaults from the Camera Raw Preferences dialog box and select from the Master drop-down menu |
| How to set raw defaults specific to camera model | In the Camera Raw dialog box, click the Open Preferences Dialog Button. Or, in Photoshop, choose Edit > Preferences > Camera Raw (Windows) or Photoshop > Preferences > Camera Raw (macOS). Then, select Raw Defaults from the Camera Raw Preferences dialog box, select "Override master settings for specific cameras" under Raw Defaults, and select a camera model from the Camera drop-down menu |
| How to set raw defaults specific to ISO values | Open at least two raw images with different ISO values, specify the settings for each image, select the images in the filmstrip and click the Presets icon, then click the three-dot icon and select Create Preset. Specify the preset's name, group, and settings, and ensure Create ISO Adaptive Preset is selected |
| Location of raw default settings | macOS: /Users/ |
What You'll Learn
- Camera Raw settings can be managed in the Camera Raw dialog box
- Presets can be saved and deleted using the buttons at the bottom of the Presets tab
- Camera Raw settings can be copied and pasted from one image file to another in Adobe Bridge
- The Camera Raw Filter can be found under the Filter menu in Photoshop
- Camera Raw settings can be set up for specific camera models
![]()
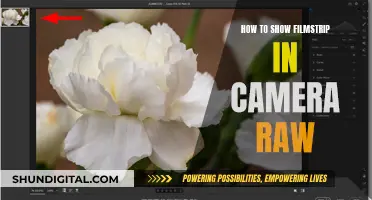
Camera Raw settings can be managed in the Camera Raw dialog box
At the top of the Camera Raw dialog box, you will find the Title Bar, which displays the version of Camera Raw installed. Below this, there is a bar showing the camera raw file name and the camera used to capture the photo. On the right end of this bar are the "Convert and Save Image," "Open Preferences Dialog," and "Toggle Full Screen Mode" buttons. Clicking the "Open Preferences Dialog" button opens the "Camera Raw Preferences" dialog box, where you can set default settings for raw images.
On the right side of the Camera Raw dialog box is the toolbar, which contains buttons for editing and correcting images. From top to bottom, these buttons include "Edit," "Crop & Rotate," "Red Eye Removal," "More Image Settings," "Zoom Tool," and "Hand Tool." The dialog box also includes tabbed panels for "Edit," "Crop & Rotate," or "Red Eye Removal" tools.
In the upper-right corner of the Camera Raw dialog box, you will find the histogram, which displays the tonal range of the image based on its current settings. Above and below the histogram are the RGB and image information. By hovering your pointer over the preview image, you can view the corresponding RGB information at the top of the histogram for the selected point in the image.
Below the preview image in the Camera Raw dialog box, you will find a 5-star scale where you can rate the photo. There is also a "Cycles between Before/After Views" button that allows you to cycle through different "Before/After" views to choose how changes appear in the preview area.
At the bottom of the Camera Raw dialog box, there are buttons to open a web page about using the dialog box, choose the desired bit depth for the camera raw image file, apply process settings changes, cancel changes, reset the dialog box, and open the image in the Photo Editor.
You can also create and manage snapshots using the Snapshots tab of the Camera Raw dialog box. Snapshots allow you to record and compare the effects of adjustments made to an image during the editing process.
Fuji Batteries: Are They Made by Fuji Camera Company?
You may want to see also
![]()
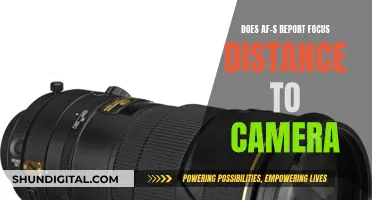
Presets can be saved and deleted using the buttons at the bottom of the Presets tab
Presets are a special type of file that contains settings that create nice-looking effects on your images. They are useful when you are unsure about which settings to use. You can load each of the presets until you get a result that you like, and then make small changes to the settings until you get the desired result.
In the Camera Raw dialog box, you can click on the Camera Raw Settings menu button and choose from the following options:
- Save the current settings as a preset
- Save the current settings as the new default settings for other images
- Reset the default settings
- Open the Load Raw Conversion Settings dialog box
In addition to the Camera Raw filter, you can also use the Snapshot tool to record the state of an image at any time. Snapshots are stored renditions of an image that contain all the edits made up until the snapshot is created.
Charging Your Canon Camera Battery via USB: How Long?
You may want to see also
![]()
Camera Raw settings can be copied and pasted from one image file to another in Adobe Bridge
To copy and paste Camera Raw settings, follow these steps:
- Open the raw images you want to edit in Photoshop.
- Edit one of the images and select it. The selected photo will have a white border around it.
- Copy the edit settings of the edited image by right-clicking or using the Command + click shortcut.
- Paste the edit settings onto the unedited image(s) by right-clicking or using the Command + click shortcut.
You can also copy and paste Camera Raw settings between layers by converting the image layers to Smart Objects and then opening Camera Raw by going to "Filter > Camera Raw Filter". Make your edits in the Camera Raw window and click "OK". Then, hold Alt/Option and drag the Smart Filter to the new layer.
Additionally, you can save and reuse Camera Raw settings as presets. These presets can be applied to other photos that need similar corrections. Presets appear in the "Presets" tab, in the "Edit > Develop Settings" menu in Adobe Bridge, and in the context menu for camera raw images in Adobe Bridge.
Airline-Approved: Small Cameras with Lithium Batteries
You may want to see also
![]()
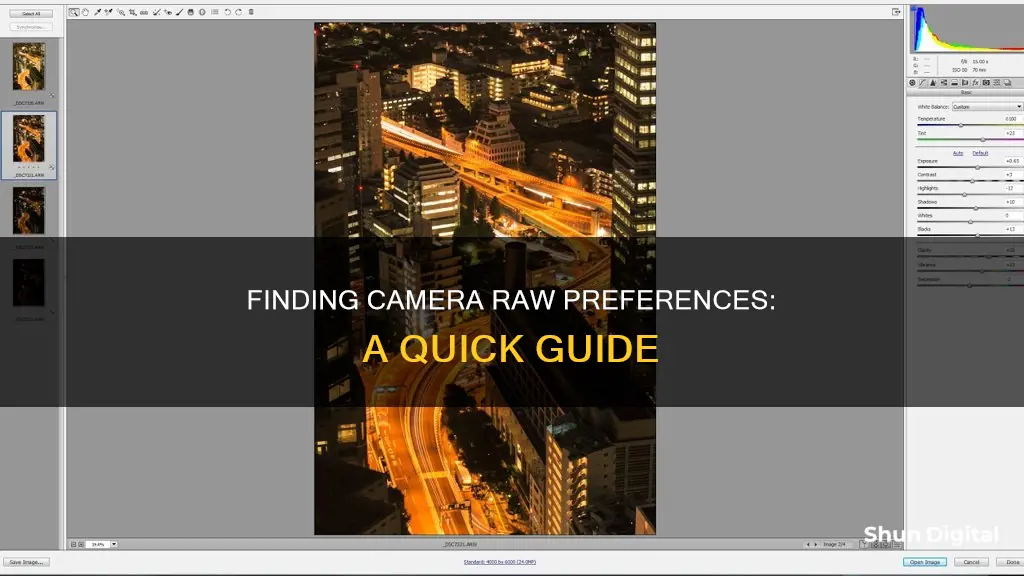
The Camera Raw Filter can be found under the Filter menu in Photoshop
The Camera Raw Filter is a powerful tool that offers access to the features of Adobe Camera Raw (ACR) within your Photoshop workflow. It allows you to make adjustments within ACR at any time during your workflow, rather than limiting its usage to the RAW processing stage only.
To access the Camera Raw Filter in Photoshop, simply go to the Filter menu and select "Camera Raw Filter". A dialog box will pop up. Before doing this, you may want to combine all your layers into a new layer to work from by stamping your layers using the Ctrl/Cmd+Shift+Alt/Opt+E shortcut.
The Camera Raw Filter has a wide range of functionality and is packed with tools. It can be used for fine-tuning adjustments, applying local adjustments, adding vignettes, and making final tweaks to your images. It is especially useful for quick edits like exposure, contrast, and vibrancy adjustments, as well as for making tricky adjustments like clarity and global contrast.
While the Camera Raw Filter is a versatile tool, it does have some limitations. For example, you will lose some functionality of the white balance adjustment and the Crop and Rotate tools that are available when working with RAW files in ACR. Additionally, there are a few options in the Photoshop Camera Raw Filter menus that are not available in ACR. It is important to note that you will have less information to work with when using the Camera Raw Filter in Photoshop, as you are not working with a RAW file at this stage.
To make the most of the Camera Raw Filter, it is recommended to get your images as close to perfect as possible during the RAW processing stage. This will give you more information to work with and added versatility when using the filter in Photoshop.
How Long to Charge Mobius Cameras Fully?
You may want to see also
![]()
Camera Raw settings can be set up for specific camera models
You can then select a camera model from the list and choose whether to apply Adobe default settings, keep the camera settings, or apply a preset to your raw images. These default settings will be applied to all raw images taken with the selected camera model.
Additionally, you can set up default settings for specific ISO values. This allows you to create an ISO adaptive preset and set it as the default. For example, you can specify different settings for ISO 400 and ISO 1600 in your preset, and the software will automatically apply the appropriate settings based on the ISO value of the image you are working on.
By setting up Camera Raw defaults for specific camera models and ISO values, you can streamline your editing workflow and ensure consistent settings for images captured with specific equipment.
Charging the Kimuvin Spy Pen Camera: A Step-by-Step Guide
You may want to see also
Frequently asked questions
Go to the Filter menu and select Camera Raw Filter.
In Photoshop, go to Edit > Preferences > Camera Raw (Windows) or Photoshop > Preferences > Camera Raw (macOS).
In the Camera Raw dialog box, click the Open Preferences Dialog Button. Then, in the Camera Raw Preferences dialog box, select Raw Defaults and choose your desired default settings.
First, download and unzip the Lightroom presets. Then, copy the desired preset folder(s) containing the XMP file(s) and paste them into the Settings folder. The specific location will depend on your operating system.