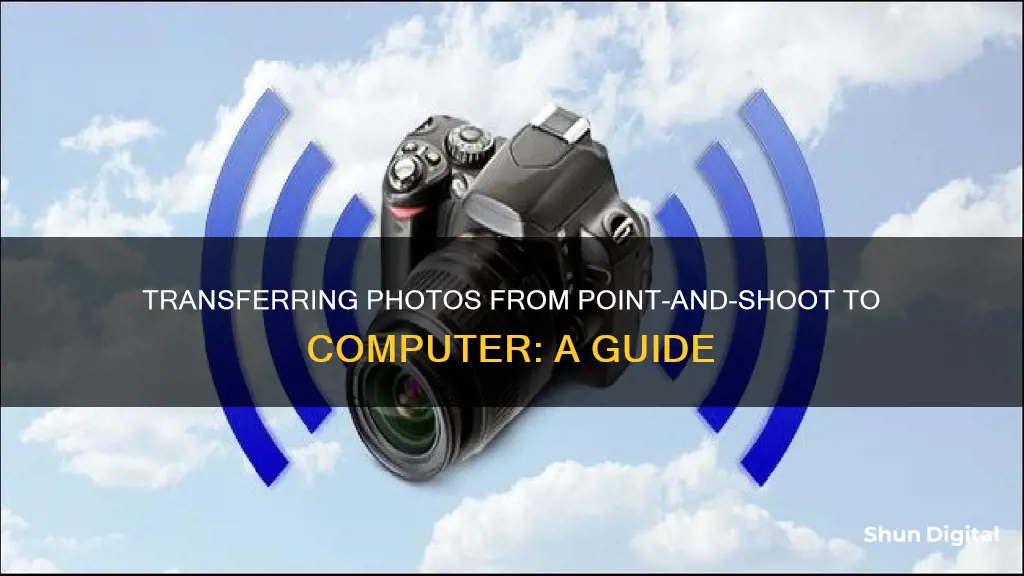
If you want to transfer photos from your point-and-shoot camera to your computer, there are several methods you can use. You can connect your camera to your computer using a USB cable, insert the camera's SD card into your computer, or use a photo app to import and organise your photos.
To use a USB cable, simply connect the camera to your computer using the cable that came with your device. Turn on your camera, and view the DCIM folder on your computer to select the photos you want to transfer. You can then create a folder on your computer and copy or move the photos there.
If you'd prefer to use an SD card, remove the card from your camera and insert it into your computer's card reader slot. From there, you can follow the same steps as above to transfer your photos.
Finally, you can use a photo app such as Picasa to import and manage your photos. Simply connect your camera or SD card to your computer, open the Import tab in Picasa, and select the photos you want to import.
| Characteristics | Values |
|---|---|
| Connection type | USB cable, SD card |
| Computer operating system | Windows, macOS |
| Camera type | Digital camera |
| File location | DCIM folder |
What You'll Learn

Using a USB cable (Windows)
To transfer photos from a point-and-shoot camera to a Windows computer using a USB cable, follow these steps:
Firstly, ensure that your computer is turned on. This method will work on Windows 11, 10, 8, or earlier. Then, locate the USB port on your camera. It may be hidden behind a small panel that can be flipped open. Use the USB cable that came with your camera to connect it to an open USB port on your computer. If you don't have this cable, you will need to purchase a replacement that fits your camera model.
Once the camera is connected, turn it on. Your computer should recognise it immediately. You may need to switch the camera into 'Review' mode for it to connect to your computer fully. This process will vary depending on your specific camera model.
Next, the AutoPlay window should pop up. Click on the "AutoPlay" box, usually found in the bottom-right corner of the screen. Select "Open folder to view files". This will open the File Explorer, where you can locate your photos. Alternatively, you can open this folder manually: right-click on the Start menu and select File Explorer. Click on your camera device listed on the left panel, and then click on the SD card.
You should now see your photos. They will usually be in a folder labelled 'DCIM' (Digital Camera Images). Select the photos you want to transfer. You can transfer individual photos or select all the photos in the folder by pressing CTRL + A.
Now, drag the selected pictures to a new location on your computer. You can drag them into the Pictures folder or create a new folder. The transfer time will depend on the number of files and your computer's specifications.
If you want to delete the photos from your camera's SD card, wait for the files to finish transferring. Then, return to the SD card folder, select all the photos, right-click, and click Delete.
Finally, eject the camera before unplugging it from your computer. To do this, click on the arrow in the bottom-right corner of the taskbar, click on the device icon, and then click Eject.
Speeding Tickets by Camera: Moving Violations or Not?
You may want to see also

Using a USB cable (Mac)
To transfer photos from a point-and-shoot camera to a Mac using a USB cable, follow these steps:
- Turn on your computer: Ensure your Mac is turned on and is running on macOS Ventura, Monterey, or earlier.
- Connect the camera: Use the USB cable that came with your camera to connect it to an open USB port on your computer. If you can't find the port on your camera, check for any panels that can be flipped open. If your computer or laptop doesn't have a USB-A port, you'll need to purchase an adapter.
- Open the Photos app: Look for the multi-coloured flower icon and open the Photos app.
- Turn on your camera: Your computer should recognise your camera immediately. If not, try switching your camera into Review mode. This process may vary depending on your specific camera model.
- Select the photos you want to transfer: Click on each photo you want to transfer. You can also drag your cursor to select multiple photos at once.
- Import the selected photos: Click on "Import Selected" to transfer the chosen photos. Alternatively, click on "Import All New Photos" in the top-right corner to import all the new photos from your camera.
- Specify the save location (optional): By default, imported photos will be saved to the "All Photos" folder. If you want to change this, click on the drop-down menu next to "Import to" and select a new destination folder.
- Eject your camera: Before disconnecting your camera, open the Finder, locate the camera in the left sidebar, and then click the eject icon (usually an up-arrow symbol) to safely eject it.
By following these steps, you can easily transfer photos from your point-and-shoot camera to your Mac using a USB cable.
Preventing Unwanted Auto-Focus: Tips for Sharp Photography
You may want to see also

Using an SD card (Windows)
To transfer photos from a point-and-shoot camera to a Windows computer using an SD card, follow these steps:
- Remove the SD card from your camera: Open the panel that contains the internal storage, then press the SD card to unlock it from your camera.
- Insert the SD card into your computer's card reader: If your computer doesn't have a built-in card reader, you can purchase an external SD card reader that connects via USB.
- Open the File Explorer on your computer: Right-click the Start menu and select "File Explorer."
- Locate your SD card in the File Explorer: Click on your SD card in the left panel. If you don't see it, click the arrow on the left of "This PC" to expand the options. If you don't see the photos immediately, double-click the "DCIM" folder, which is the standard folder for digital camera images.
- Select the pictures you want to transfer: You can transfer individual photos or press "Ctrl + A" to select all the photos in the folder. To select multiple photos, hold "Ctrl" and click on each photo.
- Drag the selected pictures to a new location on your computer: You can drag the photos into the "Pictures" folder or create a new folder. The transfer time will depend on the number of files and your computer's specifications.
- Eject the SD card when the transfer is complete: Click the arrow in the bottom-right corner of the taskbar. Click the flash drive icon, and then click "Eject." You can now insert the SD card back into your camera.
By following these steps, you can efficiently transfer photos from your point-and-shoot camera to your Windows computer using an SD card.
Understanding Raw Camera Shooting: Capturing Unprocessed Images
You may want to see also

Using an SD card (Mac)
To transfer photos from a point-and-shoot camera to a Mac computer using an SD card, follow these steps:
Firstly, ensure that your Mac has an SD card slot. If it does not, you will need to purchase an external card reader that plugs into your Mac's USB port. Once you have confirmed that you have an SD card slot or a card reader, turn your attention to the camera.
Remove the SD card from your camera. The method for doing so will vary depending on your camera model, but it typically involves opening a small compartment on the camera body and pulling the card out. With the SD card now in hand, locate the SD card slot on your Mac or the external card reader. Insert the SD card into the slot, ensuring that it is firmly seated.
Now, open the Photos app on your Mac. This is where you will be able to view and import the photos from your SD card. In the Photos app, look for the Import heading in the sidebar on the left side of the screen. Under this heading, you should see your SD card listed by name; click on it.
If your SD card does not appear in the sidebar, there is another method to locate it. Click on "File" in the toolbar at the top of the screen, then select Import from the drop-down menu. A Finder pop-up window will appear, allowing you to select your SD card and choose the images you wish to import.
With your SD card selected, the photos on it will be displayed in the centre of the Photos app window. Here, you will see three buttons: "Import All New Items", "Import Selected", and "Delete After Import". If you wish to import all the photos on the SD card, click "Import All New Items". Otherwise, select the individual photos you want by clicking on them, then click "Import Selected".
Finally, you can choose whether to delete the photos from your SD card after importing them to clear up space. To do so, check the box next to the "Delete After Import" option. This will erase the photos from your SD card once they have been imported to your Mac.
And that's it! You have now successfully transferred photos from your point-and-shoot camera to your Mac computer using an SD card.
Focusing Telescope Images: Camera Setup Guide
You may want to see also

Using a photo app
To transfer photos from your point-and-shoot camera to your computer using a photo app, you can follow these steps:
Using a USB Cable (Windows):
- Turn on your computer. Ensure you have Windows 11, 10, 8, or an earlier version.
- Connect your camera to the computer using the USB cable that came with your camera. If you don't have this cable, you will need to purchase a compatible one.
- Turn on your camera. Your computer should recognize the device immediately. If not, try switching your camera to "Review" mode to establish the connection.
- An AutoPlay window should pop up. Click on this.
- Select "Open folder to view files." This will open the File Explorer, where you can browse your camera's files.
- Click on the "DCIM" folder, which typically contains your photos.
- Select the photos you want to transfer. You can select multiple photos by holding the CTRL key and clicking on each photo.
- Drag and drop the selected photos to your desired location on your computer, such as the "Pictures" folder or a new folder you create.
- Once the transfer is complete, safely eject your camera before unplugging it from the computer.
Using a USB Cable (Mac):
- Turn on your computer, ensuring it is running macOS Ventura, Monterey, or an earlier version.
- Connect your camera to the computer using the USB cable that came with your device. If you don't have the cable, purchase a compatible replacement. If your computer or laptop doesn't have a USB-A port, you'll need an adapter.
- Turn on your camera. Your computer should recognize it. If not, try switching your camera to "Review" mode.
- Open the Photos app on your Mac.
- Select the photos you want to transfer by clicking on each photo. You can also drag your cursor to select multiple photos at once.
- Click "Import Selected" or "Import All New Photos" in the top-right corner.
- Eject your camera by opening Finder, locating the camera in the left sidebar, and clicking the eject icon.
- Now you can safely disconnect your camera from the computer.
Using an SD Card (Windows):
- Remove the SD card from your camera.
- Insert the SD card into your computer's card reader. If your computer doesn't have a built-in card reader, purchase an external SD card reader that connects via USB.
- Open the File Explorer on your computer.
- Click on your SD card in the left panel. If you don't see it, click the arrow on the left of "This PC" to expand the options.
- Double-click the "DCIM" folder if you don't see your photos immediately.
- Select the pictures you want to transfer. You can select all photos by pressing CTRL + A.
- Drag and drop the selected photos to your desired location on your computer, such as the "Pictures" folder or a new folder.
- Eject the SD card by clicking the arrow in the bottom-right corner of the taskbar, then clicking the flash drive icon, and finally clicking "Eject."
Using an SD Card (Mac):
- Remove the SD card from your camera.
- Insert the SD card into your computer's card reader. If your Mac doesn't have a built-in card reader, purchase an external SD card reader that connects via USB.
- Open the Finder on your Mac.
- Click on your SD card in the left panel of the Finder window.
- Double-click the "DCIM" folder if you don't see your photos immediately.
- Select the pictures you want to transfer. You can select all photos by pressing CMD + A.
- Drag and drop the selected photos to your desired location on your Mac, such as the "Pictures" folder or a new folder.
- Eject the SD card by finding it in the left panel of the Finder and clicking the eject icon.
The Evolution of Mobile Cameras: How Are They Made?
You may want to see also
Frequently asked questions
First, connect your camera to your computer using a USB cable. Then, open the File Explorer and locate your camera device in the left panel. Click on the DCIM folder, select the photos you want to transfer, and drag them to your desired location on your computer.
Connect your camera to your Mac using a USB cable. Open the Photos app and select the photos you want to transfer. Click "Import Selected" or "Import All New Photos" in the top-right corner. Choose your desired save location, and then eject your camera before disconnecting it from your Mac.
If you don't have a USB cable, you can transfer photos using the camera's memory card. Simply remove the memory card from your camera and insert it into the card reader slot on your computer. If your computer doesn't have a built-in card reader, you can purchase an external card reader that connects via USB. Once your computer mounts the card as a new drive, locate the DCIM folder and transfer your photos to your desired location on your computer.
The easiest way to transfer photos may be to use a photo app, such as Picasa, to import and manage your photos. First, download and install the desired photo app. Then, connect your camera to your computer or insert your camera's memory card into the card reader slot. Open the Import tab in the photo app, select the photos you want to import, set your import options, and then click "Import" to transfer the photos to your computer.


