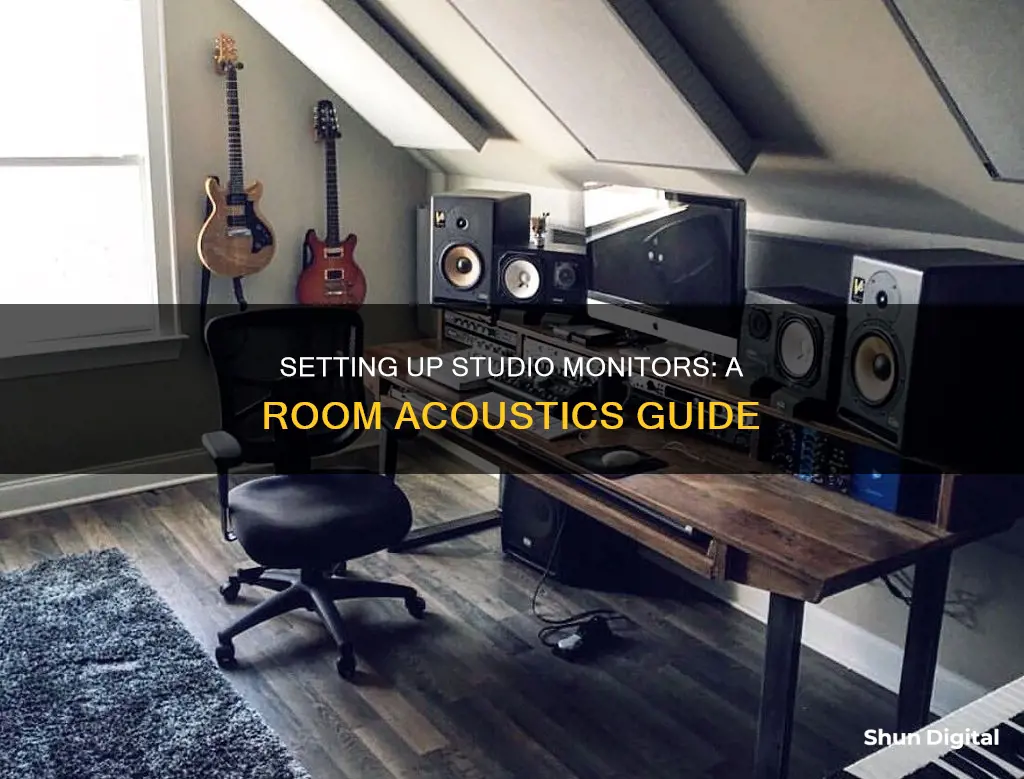
Setting up studio monitors in a room is a crucial step in achieving optimal sound quality for recording or mixing. The placement of speakers and listening positions significantly impact the accuracy of the frequency response and stereo image. The ideal setup involves forming an equilateral triangle between the two monitors and the listener, with the speakers pointed directly at or slightly behind the listener's head. This ensures that high frequencies, which are more directional, are heard accurately. Additionally, the height of the monitors should be adjusted so that the tweeters are at the listener's ear level when seated.
To minimize the impact of room acoustics on sound quality, it is essential to consider the room's dimensions and reflective surfaces. Placing monitors along the short wall of the room can yield better results in smaller spaces. It is also crucial to avoid positioning the listening area at the halfway point of the room, as this can cause a dip in bass response. Acoustic treatment, such as bass traps and acoustic panels, can further enhance the sound by reducing reflections and standing waves.
Proper studio monitor placement is key to achieving a well-balanced mix and ensuring that recordings translate well to other playback systems. By following these guidelines and making adjustments based on listening tests, individuals can optimize their studio setup for the best sound experience.
| Characteristics | Values |
|---|---|
| Speaker placement | Should form an equilateral triangle with the listener |
| Speaker direction | Should point directly at the listener's head |
| Speaker height | Should be at the listener's ear level |
| Speaker distance from walls | Should be varied to avoid room modes |
| Speaker bass ports | Should face forward, not backward |
| Speaker stands | Should be used to avoid early reflections from the desktop |
| Speaker isolation pads | Should be used to decouple the speakers from the desk |
| Speaker tilt | Should be used to aim the tweeter at the listener's ears |
| Speaker angle | Should be 30 degrees from the direction of listening |
| Listener position | Should be centred between the sidewalls |
| Listener height | Should not be halfway between the ceiling and floor |
| Listener distance from walls | Should not be halfway between the front and back walls |
| Acoustic treatment | Should be placed at initial reflection points |
What You'll Learn

Speaker placement and geometry
The placement of your speakers and listening position in your studio will determine how well you achieve an accurate frequency response and a solid stereo image. Here are some tips for speaker placement and geometry:
Symmetry
Symmetrical rooms are best as any sound imbalances will be uniform for the left and right sides of the stereo field. Centre your speakers on a single wall instead of setting them up in the corner of a rectangular room.
Speaker Height
The ideal height for your speakers is for the tweeters to be at the same height as your ears when seated, typically about 47-55 inches (120-140 cm) from the floor. Speakers can be placed slightly higher and tilted towards you if you need to clear the top of your computer monitor, but be careful to avoid the speakers toppling over.
Speaker Distance
The ideal distance between the left and right speakers and the distance from each speaker to the back of your head should be equal, forming an equilateral triangle. This ensures a natural stereo "sweet spot" that lets you move around a bit and even have a collaborator sit next to you. The recommended distance between speakers is 67.5 inches (171.5 cm), but this is just a starting point and will depend on the size of your room and desk setup.
Speaker Direction
Studio monitors sound their best when listened to on-axis, so ensure the monitors point directly at, or slightly behind, your head. High frequencies are more directional than lower frequencies, so you may not hear the high frequencies accurately if the speakers are pointing too far off-axis.
Speaker-Wall Distance
Place your monitors either almost against the front wall or at least 43 inches (110 cm) away from it. If your speakers are placed close to the wall, their bass response will be exaggerated. If your speakers have a rear port, keep them away from the wall at least the same distance as the diameter of the port, usually about 5 to 10 cm. Speakers placed with their front surface more than 15 inches (38 cm) and less than 44 inches (110 cm) from the front wall run the risk of creating uneven bass response due to low-frequency reflections.
Efficiently Erase Performance Monitor Log Data
You may want to see also

Positioning your head inside the triangle
To achieve the ideal listening position, you need to position your head inside the triangle formed by the two monitors. This is known as the equilateral triangle setup, where the distance between the left and right speakers and the distance from each speaker to the back of your head are equal. This setup ensures a natural stereo "sweet spot", allowing you to move around a bit and even have a collaborator sit next to you.
To achieve this setup, use a tape measure, a piece of string, or even a guitar cable to ensure equal distances. While there are recommended starting measurements for the triangle, the most important thing is to maintain symmetry, with each side of the triangle being the same length. This setup helps to achieve an accurate frequency response and a solid stereo image.
When positioning your head inside the triangle, make sure your ears are directly in front of the speakers. The directional pattern of sound emanating from the speaker, known as horizontal and vertical dispersion, varies as you move from the front and centre of the speaker. Facing the speakers directly at ear level will give you the most consistent and accurate sound.
The ideal height for your studio monitors is for the tweeters to be at head height or ear level when you are seated. Typically, this is about 47-55 inches (120-140 cm) from the floor. However, if you need to clear the top of your computer monitor, you can place the speakers slightly higher and tilt them down towards you. Just be careful not to tilt them more than 15 degrees from vertical, as this can affect the frequency response if you move slightly forward or backward.
Additionally, when positioning your head inside the triangle, ensure that you are not sitting right against the back wall. This position can cause issues with comb filtering, where the sound is altered due to reflections from the rear wall. It is recommended to maintain a distance of at least 10 feet between the rear wall and your ears, or treat the wall with acoustic absorption if it is reflective.
Removing the Red Target Symbol from Your AOC Monitor
You may want to see also

Speaker isolation pads
Foam-Based Isolation Pads
Foam-based isolation pads, such as the Auralex MoPads, are a simple and inexpensive solution. They are made of dense foam and help to reduce low-end vibration transfer to the desk or stand. The original MoPads offer a fixed tilt angle, but Auralex also offers the ProPADs, which feature a Melamine-wrapped MDF base and an ISO-Plate top to prevent slippage and enhance acoustic isolation. The ProPADs also allow for upward tilts and come in different sizes to accommodate various monitor dimensions.
Multi-Layer Isolation Pads
For even greater isolation, multi-layer isolators like the Primacoustic RX7 combine multiple materials for enhanced performance. The RX7, for instance, has three layers: a high-density urethane foam base for acoustic isolation, a neoprene layer for slip resistance and shock absorption, and a steel plate for added mass and stability. The RX7 comes in different sizes and tilt options to suit various monitor configurations.
Padded Isolation Stands
Isolation stands, such as the Ultimate Support MS-80, offer both height and tilt adjustability, making them a versatile option. They typically feature a metal base plate with decoupling spikes that minimize direct contact with the desk, reducing sound transfer. The MS-80 also includes a precision tilt adjustment crank, allowing for fine-tuned tilt angle adjustments. While more expensive, these stands provide superior isolation and flexibility.
Modular Isolation Stands
The IsoAcoustics ISO-L8R155 takes a unique approach to monitor isolation, offering a highly flexible and adjustable stand. It provides multiple tilt options and height adjustment capabilities, ensuring optimal positioning for your monitors. The modular design might make setup a bit more complicated, but the performance and flexibility of these stands have earned them rave reviews.
Advanced Decoupling Solutions
For the ultimate in decoupling performance, Auralex offers the ProPod and ProPod Lite. These innovative designs feature four separate feet per monitor, providing exceptional vibration isolation. The ProPod has gained a reputation as one of the most effective decouplers available, and its unique design and performance have been showcased in real-world tests.
In summary, speaker isolation pads and stands are essential for achieving accurate sound reproduction from your studio monitors. The options outlined above represent some of the best solutions currently available, offering varying levels of isolation, adjustability, and affordability to suit your specific needs.
Kids' Monitor Size: Big or Small Screen?
You may want to see also

Room modes explained
Room modes, also known as room resonances, occur when certain wavelengths of specific audio frequencies correlate to the fundamental resonances of a room. These frequencies can boom and produce longer release times. At certain positions within the room, they are either much louder or quieter than they are supposed to be. The fundamental resonances are determined by the room's dimensions.
The main contributing factor to room modes is the geometry of the room itself. As their name suggests, standing waves are stationary and always the same within a given room. They are generated principally between parallel surfaces. The distribution of sound velocity looks exactly opposite to the distribution of sound pressure, to which the human ear is sensitive. Microphones can also be sensitive to sound velocity.
The effects of room modes are usually most noticeable up to 350 Hz. The so-called Schroeder Frequency is a way to determine this limit for any room.
To minimise the effects of room modes, it is better to spread those waves across multiple frequencies, as opposed to having many waves at the same frequency. This can be done by varying the distances between your monitors and each wall.
- Position monitors against the longest wall: When it comes to the width of your room, you cannot vary the distances from the side walls because you need to maintain a symmetrical stereo image. In this case, set up your monitors against the longest wall to minimise problems from side reflections.
- Vary the distances: Ensure that the height of your monitors is either slightly above or below the midpoint between the floor and ceiling. Measure the distance between the monitors and the side walls to ensure they are neither the same nor an exact multiple of the previous two distances.
- Create space between the monitors and the rear wall: Because bass frequencies project outward in all directions, much of that sound travels backward and reflects off the rear wall of your room. To solve this problem, pro studios often build their monitors directly into the wall, thus eliminating all rear reflections. Since this solution is far too expensive for home studios, the next best option is to create maximum separation between the wall and the monitors that the room size will allow.
- Find a good head position: Centre your chair between the side walls to maintain a symmetrical stereo image. Set the chair height so your head is not halfway between the ceiling and floor. Set the chair/desk position so that it is not halfway between the front and back walls. Measure and compare the distances on all three dimensions to ensure they are neither the same nor exact multiples of each other.
Asus Monitor Power Cord Length Options Explored
You may want to see also

Acoustic treatments and fine-tuning
Every room will require some form of acoustic treatment. Fitting a room with carpet is probably the most significant thing you can do to control room reverb behaviour. Without spending a fortune, you can fine-tune your listening environment by adding squares of acoustic foam to the sidewalls to either or both sides of your listening position to help minimise flutter echoes and clean up the stereo imaging. If you're working in a room with a low ceiling, a foam square mounted to the ceiling above the mixing board or console will help tame ceiling reflections. You may also want to mount some acoustic foam behind your monitors if they are positioned close to the wall in a small room. Avoid over-treating the walls, as this can lead to a "boxy" or "honky" sounding room.
Well-placed acoustic treatments will minimise fluttering echoes and clean up your stereo imaging. Bass traps are another essential acoustic treatment. The absolute best way to minimise the problems caused by reflected bass frequencies from your rear wall is to add bass traps directly behind each monitor.
Speaker isolation pads help mitigate vibrations and resonances by absorbing the vibrations before they can transfer to the furniture. Simple and inexpensive isolation pads are made of dense foam, while multi-layer isolators provide even more isolation. Other more sophisticated isolators use techniques like non-resonant spring systems and provide isolation as well as height adjustment.
To further fine-tune your setup, you can use electronic room correction software to really dial in the final touches to your monitors.
Best Monitor Size for Dell Latitude 5490
You may want to see also
Frequently asked questions
The ideal setup for studio monitors is to form an equilateral triangle with your listening position, with the monitors angled slightly inwards towards your ears. The height of the monitors should be such that the tweeters are at your ear level when seated.
It is recommended to place studio monitors either almost against the front wall or at least 43 inches (110 cm) away from it. Speakers placed close to the wall will have their bass response exaggerated, while placing them further away minimises the impact of low-frequency reflections.
The ideal listening position, also known as the "sweet spot", is typically centred between the sidewalls to achieve a balanced stereo image. It is recommended to avoid sitting in the exact centre of the room or right against the back wall due to bass null issues.
Acoustic treatment is crucial to optimise the sound of studio monitors. Bass traps, acoustic panels, and diffusion can help minimise reflections and improve stereo imaging. Carpeted floors, acoustic foam on sidewalls, and ceiling treatments can also enhance the listening experience.


