Arduino is a popular platform for building electronic projects and one common task is connecting an LCD display to show information. While there are many tutorials for connecting a regular LCD, there are fewer resources for those wanting to use a serial LCD, which only requires 4 pins instead of 16. This guide will focus on how to send serial monitor data to an LCD on an Arduino, covering the necessary hardware connections, software libraries, and code examples to get your LCD displaying data from the serial monitor.
| Characteristics | Values |
|---|---|
| LCD Screen | Compatible with Hitachi HD44780 driver |
| Pin Headers | Soldering to the LCD display pins |
| Potentiometer | 10k ohm |
| Resistor | 220 ohm |
| UART Pins | GND, VCC, SDA, SCL |
| Jumper Wires | 4 male-to-female wires (red, black, green, yellow) |
| Arduino IDE | Liquid Crystal library |
| Sketch | Available for download |
What You'll Learn

Using the Liquid Crystal Library
The Liquid Crystal Library is a powerful tool that allows you to control LCD displays compatible with the Hitachi HD44780 driver. This library is especially useful when working with Arduino boards, as it simplifies the process of sending data from the Arduino to the LCD screen.
To begin using the Liquid Crystal Library, you first need to include the library in your Arduino sketch by adding the line `#include
Next, you need to define the pins on the Arduino that will be connected to the LCD. The LiquidCrystal function sets the pins used to connect to the LCD. Here's an example of how to define the pins:
Cpp
LiquidCrystal lcd(12, 11, 5, 4, 3, 2);
In this example, the pins 12, 11, 5, 4, 3, and 2 on the Arduino are connected to the corresponding pins on the LCD. You can use any of the Arduino's digital pins to control the LCD by specifying the pin numbers inside the parentheses in the order shown: RS, E, D4, D5, D6, and D7.
Once you have defined the pins, you need to initialize the LCD in the setup section of your code. This is done using the `lcd.begin()` function, which sets the dimensions of the LCD. For a 16x2 LCD, you would use `lcd.begin(16, 2)`.
Now, you can start using the various functions available in the Liquid Crystal Library to control the LCD display. Here are some commonly used functions:
- `lcd.print()`: This function is used to print text or data to the LCD. You can use quotation marks to print text ("Hello, world!") or print numbers without quotation marks (12345).
- `lcd.clear()`: This function clears any text or data already displayed on the LCD.
- `lcd.setCursor()`: This function allows you to set the cursor position on the LCD, specifying the column and row coordinates.
- `lcd.cursor()`: This function creates a visible cursor, a horizontal line below the next character to be printed.
- `lcd.noCursor()`: This function turns off the cursor.
- `lcd.blink()`: This function creates a blinking block-style cursor.
- `lcd.noBlink()`: This function turns off the blinking cursor.
- `lcd.display()`: This function turns on any text or cursors printed to the LCD.
- `lcd.noDisplay()`: This function turns off the display without clearing the LCD's memory.
- `lcd.scrollDisplayLeft()`: This function moves the displayed text or data to the left.
- `lcd.scrollDisplayRight()`: This function moves the displayed text or data to the right.
These are just a few examples of the functions available in the Liquid Crystal Library. By using these functions, you can control the LCD display, print text and data, manipulate the cursor, and perform various other operations to create interactive projects with your Arduino and LCD combination.
Monitoring Memory Usage: Cisco RV325 Guide
You may want to see also

Wiring the LCD screen
Before you begin, it is recommended to solder a pin header strip to the connector of the LCD screen. The LCD screen typically has a 14 or 16 pin count, so you will need to solder the pin header strip accordingly. This provides a secure base for the wiring connections.
Now, let's move on to the wiring connections between the LCD screen and the Arduino board:
- Connect the LCD RS pin to digital pin 12 on the Arduino board.
- Connect the LCD Enable pin to digital pin 11 on the Arduino board.
- Connect the LCD D4 pin to digital pin 5 on the Arduino board.
- Connect the LCD D5 pin to digital pin 4 on the Arduino board.
- Connect the LCD D6 pin to digital pin 3 on the Arduino board.
- Connect the LCD D7 pin to digital pin 2 on the Arduino board.
Additionally, you will need to wire a 10k ohm potentiometer to adjust the brightness or contrast of the LCD screen. Connect the potentiometer to +5V and GND, and connect its wiper (output) to the VO pin on the LCD screen, which is typically pin 3.
For powering the backlight of the LCD display, you can use a 220-ohm resistor. Connect the resistor to pin 15 and 16 of the LCD connector.
Now that the wiring is complete, you can move on to the next steps of configuring the software and testing the setup. Remember to double-check all connections before powering on the devices to ensure everything is securely connected.
Choosing the Right-Sized Drawing Monitor for Your Needs
You may want to see also

Using UART to send and receive serial communications
UART, or Universal Asynchronous Receiver-Transmitter, is a serial communication protocol that allows two devices to communicate. UART is asynchronous, meaning it does not use a clock signal to synchronize data transmission between devices. However, both devices must agree on the baud rate or speed of transmission.
In UART communication, data is transferred serially, bit by bit, at a predefined baud rate. UART uses a single data line for transmitting (TX) and one for receiving (RX). UART ports allow communication with other devices, such as microcontroller boards, computers, sensors, GPS or Bluetooth modules, and certain types of displays.
The UART logic levels may differ between manufacturers. For example, an Arduino Uno has a 5V logic level, but a computer's RS232 port has a +/-12V logic level. Connecting an Arduino Uno directly to an RS232 port will damage the Arduino. If both UART devices don't have the same logic levels, a suitable logic level converter circuit is needed.
The Arduino makes it easy to use the built-in UART hardware by using the serial object, which has the necessary functions for easy use of the Arduino's UART interface. The easiest way to configure the Arduino's UART is by using the function Serial.begin(speed). The speed parameter is the baud rate that we want the UART to run. Using this function will set the remaining UART parameters to default values.
If the default settings don't work, use the function Serial.begin(speed, config) instead. The additional parameter config is used to change the settings for data length, parity bit, and number of stop bits.
To check if there is data waiting to be read in the UART buffer, use the function Serial.available(). This function returns the number of bytes waiting in the buffer. To read the data, use the function Serial.read(). This function returns one byte of data read from the buffer.
To send data via Arduino's TX0 pins, use the function Serial.write(val). The val parameter is the byte or series of bytes to be sent.
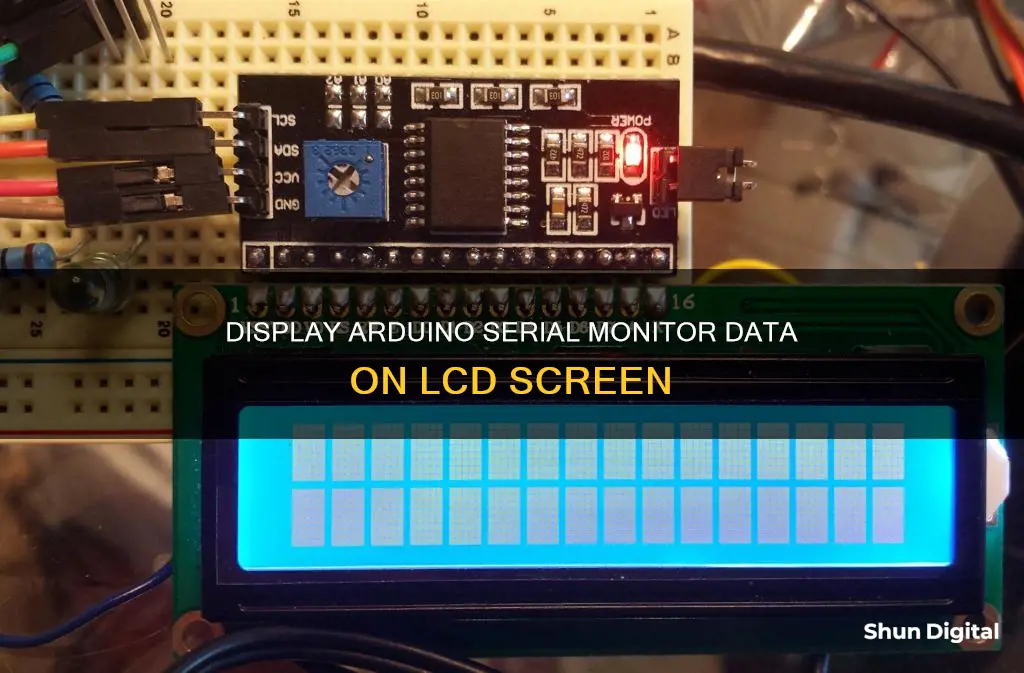
The UART or serial module attached to the back of an LCD is responsible for sending and receiving serial communications between the Arduino and the LCD.
Monitoring Employee Emails: Ethical or Not?
You may want to see also

Downloading the Liquid Crystal library
To download the LiquidCrystal library, you have a few options. The LiquidCrystal library is used to allow an Arduino board to control liquid crystal displays (LCDs) based on the Hitachi HD44780 (or compatible) chipset, which is found on most text-based LCDs.
Arduino Library Manager
Open your Arduino IDE. Go to Sketch > Include Library > Manage Libraries. Search for LiquidCrystal and click Install.
Arduino ZIP Installation
Download the latest ZIP release of the LiquidCrystal library. Open your Arduino IDE, click on the toolbar Sketch > Include Library > Add .ZIP Library. Navigate to the LiquidCrystal ZIP file and select it.
Manual Installation
Download the latest ZIP release of the LiquidCrystal library. Extract the files and open your Arduino "libraries" folder. Make a new folder in "libraries" called "LiquidCrystal" and open it. Copy all the files you extracted from the ZIP archive into the "LiquidCrystal" folder. The LiquidCrystal library should automatically register with the Arduino IDE on the next start or restart.
Alternative Libraries
There are also alternative libraries available, such as LiquidCrystal I2C, which is a library for I2C LCD displays. This library might not be compatible with existing sketches. To install it, open the Library Manager in the Arduino IDE and install it from there.
Another alternative is the LiquidCrystal NKC library, which is designed to work with the same commands as the LiquidCrystal and LiquidCrystal I2C libraries, while also retaining alias commands to remain compatible with the original SerialLCD library. To install it, follow the same steps as the standard LiquidCrystal library, searching for LiquidCrystal NKC instead.
Triple Monitor Setup: Choosing the Right Screen Size
You may want to see also

Writing code to display text on the LCD
To display text on the LCD, you will need to write code that communicates with the LCD and sends the text data to it. Here is a step-by-step guide on how to do this:
Step 1: Include Necessary Libraries
Start by including the required libraries in your code. The LiquidCrystal library is essential for controlling the LCD display. You can download this library from the official Arduino website or other sources and then include it in your sketch. Here's how:
C++
#include
Step 2: Define LCD Pins and Configuration
Next, you need to define the pins and configuration of your LCD. This includes specifying the number of columns and rows of your LCD, as well as the pins connected between the Arduino and the LCD. Here's an example:
C++
LiquidCrystal lcd(8, 9, 4, 5, 6, 7); // Connect pins 8, 9, 4, 5, 6, 7 of Arduino to LCD's RS, Enable, D4, D5, D6, D7
Step 3: Initialize the LCD
In the setup section of your code, initialize the LCD by specifying its dimensions and turning on the backlight:
C++
Void setup() {
Lcd.begin(16, 2); // Initialize a 16x2 LCD
Lcd.backlight(); // Turn on the backlight
}
Step 4: Set Cursor Position and Print Text
To display text on the LCD, you need to set the cursor position and then use the print function. Here's how you can do this:
C++
Void loop() {
Lcd.setCursor(0, 0); // Set cursor to the first column and row
Lcd.print("Hello, LCD!"); // Print text on the LCD
}
Step 5: Compile and Upload Code
After writing your code, compile it in the Arduino IDE to check for any errors. If the code compiles successfully, upload it to your Arduino board. Make sure your Arduino is connected to your computer before uploading.
Step 6: Test the Display
Once the code is uploaded, you should see the text "Hello, LCD!" displayed on your LCD screen. If you don't see the text, double-check your connections and ensure that you have selected the correct LCD type in your code.
Remember that the pin connections and LCD dimensions used in this example may vary depending on your specific LCD module and Arduino board. Always refer to the documentation or datasheet of your LCD to identify the correct pins and configuration.
Palletizing LCD Monitors: A Step-by-Step Guide
You may want to see also
Frequently asked questions
You need to connect the board to your computer and use the Arduino Software (IDE) serial monitor to communicate with it.
The Liquid Crystal Library allows you to control LCD displays that are compatible with the Hitachi HD44780 driver. You can usually identify them by their 16-pin interface.
You can use 4 coloured jumper wires to connect the electronics. Connect the VCC from the UART to the VCC on the Arduino using a red wire. Use a black wire to connect the GND from the UART to the GND on the Arduino. With a green wire, connect the SDA from the UART to the SDA on the Arduino. Finally, use a yellow wire to connect the SCL from the UART to the SCL on the Arduino.
Replace all instances of Serial.print(something); with Serial.print(something); lcd.print(something);.
You can use the following code:
```
void loop() {
char TestData;
if(Serial.available() ) {
TestData = Serial.read();
lcd.print (TestData);
}
}
```


