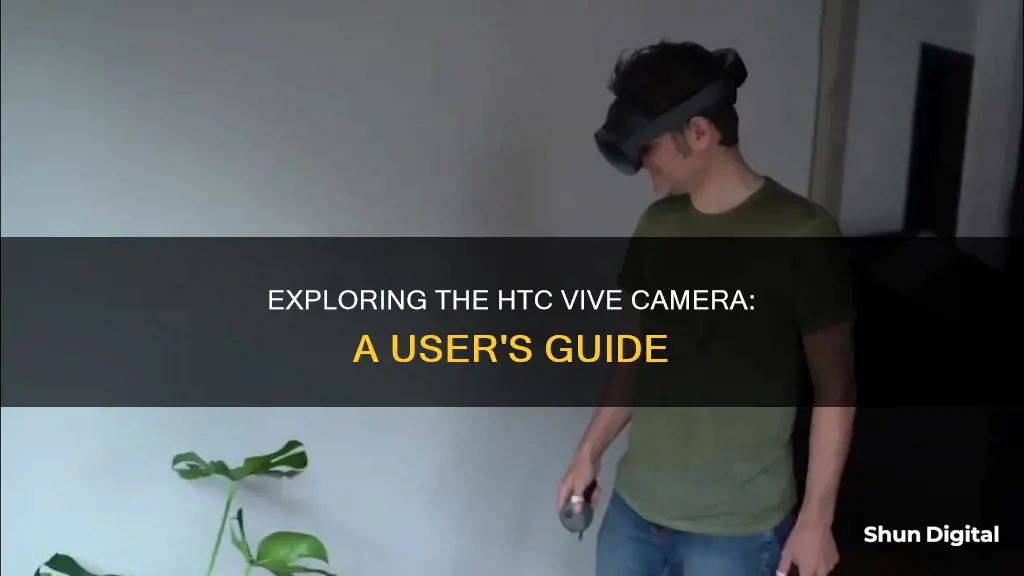
The HTC Vive's front-facing camera can be used to show wearers what's in front of them in the real world. This is useful for orientation and locating objects or pets. To enable the camera, users need to open SteamVR and go to the 'Camera' tab in the 'Settings' menu. Once the camera is enabled, users can set their preferred camera permissions, such as automatically activating the camera when Chaperone boundaries are hit. To use the camera, users can double-click the system button to access Room View or use the physical button on the Vive headset to toggle the camera on and off.
| Characteristics | Values |
|---|---|
| How to enable the camera | Open SteamVR, go to Settings, click on the Camera tab, enable the camera, select your camera permissions, and restart SteamVR |
| How to use the camera | Double-click the system button, double-click the SteamVR menu button on the controller, or push the button on the left side of the HMD |
| Purpose of the camera | To allow the user to see their real environment and avoid obstacles, locate objects, and avoid pets |
| Camera specifications | Single image sensor, wide-angle field of view, no native stereo depth |
What You'll Learn

How to enable the front-facing camera on the HTC Vive
The HTC Vive's room-scale VR comes with a special mode to help you see obstacles in your way. It also has a built-in front-facing camera that allows you to activate a small window into the real world. This is useful if you need to do something like answer your phone or pick up a drink.
Step 1: Open SteamVR
Open SteamVR on your computer and wait for it to boot up.
Step 2: Go to Settings
Once SteamVR has loaded, go to the Settings tab.
Step 3: Select the Camera Tab
In the Settings menu, scroll through the options until you see a tab marked "Camera". Click on this tab.
Step 4: Enable the Camera
In the Camera settings, look for the box that enables the camera. Check this box to turn on the Vive's front-facing camera.
Step 5: Select Your Camera Permissions
After enabling the camera, you can choose from several options to determine the camera's permissions. These include automatically activating the camera in the Dashboard or when you hit Chaperone boundaries. You can also select a button-activated mode for Room View. To use Room View, press the System Button twice in a row, as if double-clicking a mouse button.
Step 6: Restart SteamVR
Once you have selected your permissions and enabled the camera, restart SteamVR and begin your next virtual reality experience.
You can also enable the front-facing camera in the VR monitor settings. Double-click the controller button that brings out the SteamVR overlay, or double-click the small button on the left side of your headset.
Viewing Histograms: In-Camera LCD Screen Guide
You may want to see also

How to use the camera to find your controller
To use your HTC Vive's camera to find your controller, you must first enable it. Here's how:
Enabling the HTC Vive Camera
- Open SteamVR on your computer and wait for it to boot up.
- Go to your Settings tab.
- Click on the Camera tab.
- Check the box to enable the camera.
- Select your camera permissions. You can choose to automatically activate the camera in the Dashboard, when you hit Chaperone boundaries, or use a button-activated mode for Room View.
- Restart SteamVR.
Using the Camera to Find Your Controller
Once you've enabled the camera, you can use it to locate your controller. Here are a few ways to do this:
- Double-click the SteamVR menu button on either Vive controller to toggle TRON mode on/off. This will bring up a small screen attached to your controller that displays the camera view.
- Click the SteamVR button once to bring up the menu. While the menu is open, a small screen will be attached to your controller, showing the camera view.
- Click the SteamVR button, then click on the circle button in the lower right corner of the menu to access the camera.
- In the SteamVR options, enable TRON mode for Chaperone bounds. This will fade in/blend the camera view based on how close you are to your boundaries.
- There is a physical button on the Vive headset itself (on the left side of the device, opposite the IPD wheel) that you can press to toggle the camera on/off.
- Double-tap the system button (the button under the trackpad) or the button on the headset to activate the camera view.
Casting Camera Feeds: Using Chromecast to View Live Footage
You may want to see also

How to activate the camera while in virtual reality
To activate the camera on your HTC Vive while in virtual reality, follow these steps:
Firstly, open the SteamVR app on your computer and wait for it to load. Once it has booted, go to your Settings tab. From there, scroll through the options until you find the 'Camera' tab. Click on this, and then look for the box that says 'Enable Camera'. Check this box to turn on the front-facing camera.
You will then be able to select your camera permissions. You can choose to automatically activate the camera in the Dashboard, when you hit Chaperone boundaries, or you can opt for a button-activated mode for Room View. If you want to use Room View, you will need to press the System Button twice in a row, as if you were double-clicking a mouse.
Finally, restart SteamVR, and you will be ready for your next virtual reality experience, with the ability to see what's going on outside of your VR world when you need to.
Ulta's Camera Surveillance: What You Need to Know
You may want to see also

How to use the camera to avoid tripping over objects
The HTC Vive's room-scale VR comes with a special mode to help you see obstacles in your way and avoid tripping over objects. It includes a built-in front-facing camera that will allow you to quickly activate a small window into the real world. Here's how to use the camera to avoid tripping over objects:
Step 1: Position the Camera Correctly
Place the camera at eye level or slightly above, capturing the entire space you will be using for your VR experiences. Avoid placing it too high or too low, as this can affect the camera’s field of view. Angle the camera slightly downwards to capture the lower portion of the room and avoid pointing it directly at a blank wall or bright light sources as this can cause tracking issues. Instead, position it towards an area with contrasting textures and objects, improving the accuracy and stability of the camera tracking.
Step 2: Secure the Camera
Ensure the camera is securely mounted or placed on a stable surface to prevent unintentional movements or vibrations that can affect its alignment. If you are using a tripod or camera mount, make sure it is tightly secured.
Step 3: Clean the Camera Lens
Use a microfiber cloth or lens cleaning solution to regularly clean the camera lens and maintain optimal image quality. This will ensure that the camera delivers clear and accurate visuals, allowing you to better identify any potential trip hazards.
Step 4: Open SteamVR and Enable the Camera
Open the SteamVR app on your computer and navigate to the settings menu by clicking on the gear icon in the bottom right corner. Select the "Camera" tab and check the "Enable Camera" checkbox. Here, you can also adjust the camera’s refresh rate, brightness, and contrast according to your preferences and lighting conditions.
Step 5: Enable Room View
To use the camera for room monitoring, select the "Enable room view" checkbox in the camera settings. This will allow you to see your real-world surroundings through the camera’s perspective while wearing the headset.
Step 6: Activate Room Monitoring
When wearing the HTC Vive headset, double-tap the system button on the controller to activate room monitoring. This will overlay the camera feed onto your VR environment, providing a live view of your surroundings within a small window. This feature will help you avoid tripping over objects or colliding with furniture.
Cameras 13 and 14: Watch Order and Why It Matters
You may want to see also

How to use the camera to check on your kids while in VR
The HTC Vive's room-scale VR comes with a special mode to help you see obstacles in your environment. It also includes a front-facing camera that allows you to activate a small window into the real world. Here's how to use the camera to check on your kids while in VR:
Step 1: Open SteamVR
Open SteamVR on your computer and wait for it to boot up.
Step 2: Go to Settings
Once SteamVR is open, navigate to the Settings tab.
Step 3: Click on the Camera Tab
In the Settings tab, find and click on the "Camera" tab.
Step 4: Enable the Camera
In the Camera settings, look for the option to enable the camera and check the box to turn it on.
Step 5: Set Camera Permissions
You can set the camera permissions according to your preferences. You have several options: automatically activating the camera in the Dashboard, when you hit Chaperone boundaries, or using a button-activated mode for Room View. To use Room View, press the System Button twice quickly, like a double-click.
Step 6: Restart SteamVR
After setting your permissions and enabling the camera, restart SteamVR and you're ready to go!
While VR can be a fun and immersive experience for kids, it's important to monitor their usage and ensure the content is age-appropriate. VR can cause eye strain, neck strain, and motion sickness, especially in younger children. Set time limits, ensure they take breaks, and be mindful of their overall screen time. Parental controls are available on some VR devices and apps, so you can manage and supervise their VR experiences.
Best Platforms to Stream Crime Caught on Camera
You may want to see also
Frequently asked questions
First, open SteamVR on your computer and wait for it to load. Then, go to your Settings tab and click on the "Camera" tab. Check the box to enable the camera and select your camera permissions. Finally, restart SteamVR.
Double-click the system button (as if double-clicking a mouse) to activate Room View. You can also bind the camera to a controller.
The HTC Vive has a single, front-facing camera with a wide-angle field of view.
The camera can be used to view your real environment and help with orientation, locating objects, and avoiding pets. You can bring up a virtual tablet that shows a live feed from the camera, so you don't have to take off your headset.


