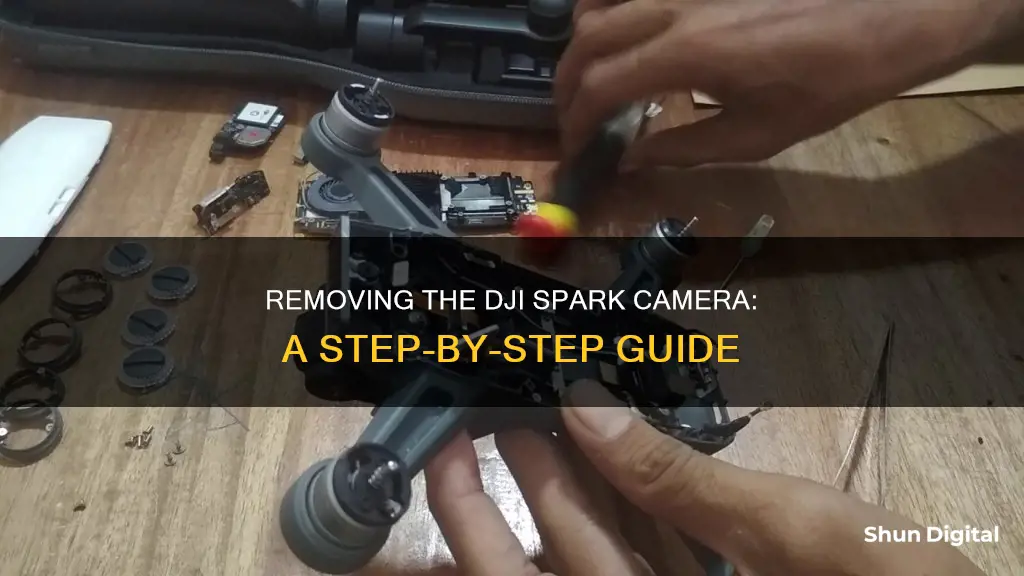
The DJI Spark is a compact drone produced and released by DJI in May 2017. It is primarily used for taking photos and videos. The drone has a 12-megapixel camera and is capable of taking 1080p pictures, as well as 1080p videos at 30 fps. The camera can be replaced if it is no longer taking photos or recording as required. This process involves removing the propellers, battery, and several screws, carefully disconnecting cables, and then removing the gimbal and camera from the top of the device. It is important to note that attempting to dismantle the drone may invalidate the warranty or cause damage to the device.
What You'll Learn

Removing the DJI Spark lid
To remove the DJI Spark lid, you will need a small flat head (around 1.5mm) for levering plastic shell parts. The process is relatively straightforward, but it will void your warranty, so proceed with caution.
Firstly, remove the propellers. Twist them until they feel loose and then pull them off. Next, flip the drone over and remove the battery. With the battery removed, you will see four 1.5mm hex screws (two at the back by the memory card flap and two either side of the label). Remove these screws, and then remove the two further hex screws either side of the camera unit at the front of the drone. Carefully rotate the gimbal over to gain access.
Now, take a plastic opening tool and slide it in between the coloured plastic lid and the grey plastic base. Carefully run it around the craft, releasing all the plastic clips. It is easiest to start at the end closest to the memory card flap. With the plastic clips released, you can remove the lid, revealing the internals.
To reassemble your device, follow these instructions in reverse.
Accessing Your iMac's Camera View: A Step-by-Step Guide
You may want to see also

Removing the receiver board
Now it's time to get serious with this Spark teardown. The GPS/Glonass board is the next component to be removed. The board can be seen sitting on top of the drone at the rear, with the DJI stickers. While they are not directly connected to the receiver board, this is a good time to disconnect the two antennas. To get to the connectors, you need to remove the sticky back foam padding. We advise using a plastic spudger to release these. Once released, you should use the tool to release the ribbon connector cable on the rear edge of the receiver board.
Once the ribbon cable is released, the next step is to remove the four cross-head screws that hold the receiver board in place. Before carefully lifting it off of the mainboard, take your time and be gentle. This compact board is keyed so it can only be re-installed one way, which is important as it likely contains the compass and other directional-dependent sensors.
With the receiver board removed, you can now move on to removing the large motherboard. It is held in by several screws around the edges of the craft. Some people recommend removing the fan and heatsink, but this isn't necessary. You will need to remove the metal right-angle piece to expose the connectors that connect the camera to the mainboard. These are hidden under foil foam tape under the L-shaped piece. Take your time releasing the plugs as they are fragile.
There is another metal locking strip holding down the connectors to the battery and more, at the rear of the craft (also on the left side) that can be identified by the black screws. With all the outer edge screws and communication flex cables removed, you can carefully lift the board and move it backwards away from the front sensor array and out of the chassis. We recommend taking your time with this as it is easy to miss a cable.
Blender Camera Viewing: A Step-by-Step Guide
You may want to see also

Removing the motherboard
To remove the motherboard of your DJI Spark, you will need to first remove the propellers, then flip the drone over and remove the battery. With the battery removed, you will see four 1.5mm hex screws (two at the back by the memory card flap and two on either side of the label) that need to be removed. Next, remove the two hex screws on either side of the camera unit at the front of the drone.
Now, carefully rotate the gimbal to gain access to the internals of the drone. Use a plastic opening tool and slide it between the coloured plastic lid and the grey plastic base. Carefully run it around the craft to release all the plastic clips. With the plastic clips released, you can remove the lid.
Disconnect the two gold antennas next to the internal GPS while removing the motherboard. Remove all the Phillips #0 screws attaching the motherboard to the drone. It is the piece with both the fan and GPS module on it. Remove the 3.0 mm Phillips #000 screw, as well as the two Phillips #0 screws on the right and left sides.
With all the screws removed, carefully lift and move the motherboard backward away from the front sensor array and out of the chassis. Take your time with this step, as it is easy to miss a cable.
Infrared Camera Hack: See-Through Clothes Vision
You may want to see also

Removing the gimbal and camera
First, remove the propellers and flip the drone over. Remove the battery, and then the four 1.5mm hex screws (two at the back by the memory card flap and two either side of the label). Next, remove the two hex screws either side of the camera unit at the front of the drone. Carefully rotate the gimbal over to gain access to the internals. Use a plastic opening tool to slide between the coloured plastic lid and the grey plastic base, carefully running it around the craft to release all the plastic clips. With the plastic clips released, you can remove the lid.
Now you can gently remove the gimbal and camera from the top of the device. They will lift out together as one unit.
To reassemble your device, follow these instructions in reverse.
Who's Behind the Camera? Unseen Office Camerman
You may want to see also

Reassembling the device
To reassemble your DJI Spark drone, follow these steps in reverse order.
First, gently place the gimbal and camera back into the top of the device. Ensure they are securely attached before proceeding. Next, reconnect the two gold antennas next to the internal GPS while reinstalling the motherboard. Reattach the motherboard to the drone using the Phillips #0 screws.
Now, replace the top lid of the drone by aligning it with the perimeter and pressing down gently until it clicks into place. Secure the lid by reinserting the four 1.5mm Hex screws and the two 1.5mm Hex screws near the camera head. You may need to use a spudger to replace any plastic nubs that were removed from the Hex screws.
Flip the drone over and slide the battery back into place until it locks firmly in position. Reattach the propellers by inserting them into the slots and turning them clockwise until they tighten. Finally, turn on your DJI Spark and test the camera to ensure it is functioning correctly.
Vizio Smart TVs: Are There Built-in Cameras?
You may want to see also
Frequently asked questions
You will need a 1.5mm Hex Screwdriver, a plastic opening tool, and a plastic spudger.
First, remove the propellers and flip the drone over. Remove the battery, then the four 1.5mm hex screws. There are two further hex screws either side of the camera unit. Rotate the gimbal over to access the camera.
Use a plastic opening tool to slide between the coloured plastic lid and the grey plastic base. Run the tool around the perimeter of the drone to release the plastic clips. With the plastic clips released, you can remove the lid.
The camera and gimbal are removed together through the top of the chassis. Remove the four silver cross-head screws holding the camera to the frame. The camera and gimbal can then be lifted out as one.


