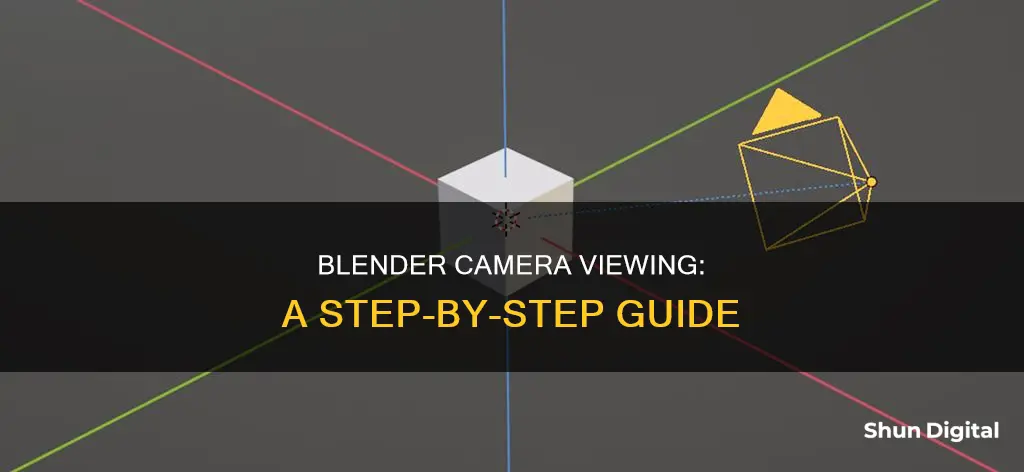
Blender is an open-source software for 3D modelling, animation, and rendering. It offers a Camera View feature that allows users to see the current scene from the active camera's viewpoint. This can be activated by pressing Numpad0. Users can also position and orient the active camera to match their current viewport by moving to a desired position and direction, and then pressing Ctrl-Alt-Numpad0.
| Characteristics | Values |
|---|---|
| How to see the camera | Press Numpad0 |
| How to move the camera | Press G and move the mouse |
| How to rotate the camera | Press R to enter object rotation mode |
| How to roll the camera | Press R, then Z twice |
| How to vertical pan or pitch the camera | Press R, then X twice |
| How to horizontal pan or yaw the camera | Press R, then Y twice |
| How to dolly the camera | Press G, then MMB (or Z twice) |
| How to place the camera at the current view | Ctrl-Alt-0 |
| How to lock the camera to the view | Enable Lock Camera to View in the View panel of the Properties region |
What You'll Learn

How to position and aim your camera
To position and aim your camera in Blender, you can use the following methods:
- Using the Middle Mouse Button and Keyboard Shortcuts: Pan around the viewport using the middle mouse button to rotate and Shift + Middle Mouse Button to move around. Then, centre the object in your view and press Ctrl + Alt + Numpad 0 to align the camera to the set view. Alternatively, go to View > Align View > Align Active Camera to View.
- Using the View Menu: Go to View > Cameras > Active Camera to switch to the view of the active camera. You can also set the current active object as the active camera by going to View > Cameras > Set Active Object as Camera.
- Using Object Constraints: Select the active camera in the 3D viewport or the Outliner. In the properties editor, go to the Object Constraint properties and add a tracking constraint by selecting Add Object Constraint > Track To. Click on the eyedropper in the empty data field for 'Target' and select the object you want the camera to aim at in the 3D viewport or the Outliner.
- Using the Lock Camera to View Option: Press Numpad 0 to go into camera view. Open the context menu by pressing N or clicking on the arrow on the top right of the 3D viewport. Go to the View tab and locate the View Lock section. Toggle "Lock Camera to View". Now, you can move around the camera view using the middle mouse button to rotate and Shift + Middle Mouse Button to move around.
- Using the Fly/Walk Navigation Mode: Press Shift + F to enable Fly/Walk Navigation mode for first-person navigation that moves the active camera.
- Using the Roll, Pan, Dolly, and Track Options: Select the camera and press R to enter object rotation mode. This will rotate the camera along its local Z-axis, which is the definition of a camera "roll". For a vertical pan or pitch, press R, then X twice to rotate along the local X-axis. For a horizontal pan or yaw, press R, then Y twice to rotate around the camera's local Y-axis. To dolly the camera, press G, then Middle Mouse Button or Z twice. You can also press G and move the mouse, using X or Y twice for purely horizontal or vertical tracking.
Watching Camera Footage on PC: Easy Steps to Follow
You may want to see also

How to preview your final rendered image
To preview your final rendered image in Blender, you can use the Camera view. This feature allows you to preview how your scene will look when it is rendered. Here are the steps to preview your final rendered image:
- Activating Camera View: Press Numpad0 on your keyboard to activate the Camera view. This will show you the current scene from the active camera's viewpoint.
- Setting the Render Border: In Camera view, you can define the portion of the 3D View that will be rendered. This is known as the Render Border.
- Zooming and Changing Viewpoint: You can zoom in and out in Camera view, but to change the viewpoint, you will need to move or rotate the camera.
- Locking Camera to View: If you want the camera to follow your viewport movements, you can enable the "Lock Camera to View" option in the View panel of the Properties region. This will keep you in Camera view while allowing you to navigate the 3D View as usual.
- Moving the Active Camera: To move the active camera, first select it by right-clicking on the solid rectangular edges while in Camera view. Then, use the same tools you would use to manipulate any other object. For example, press R to enter object rotation mode, or G followed by moving your mouse to dolly the camera.
- Adjusting Camera Angle: To adjust the camera angle, you can use the Roll, Pan, Dolly, and Track controls. For example, pressing R followed by X twice will allow you to perform a vertical pan or pitch (rotation along the local X-axis).
- Previewing Rendered Image Size: To preview how large objects will be in the rendered image or animation, use the "Zoom Camera 1:1" option. This will zoom your view to match the output resolution.
Meijer's Camera Surveillance: What Shoppers Should Know
You may want to see also

How to select your camera
To select your camera in Blender, you can use the following steps:
- Go to "View" in the menu bar and select "Cameras" and then "Active Camera". This will switch your view to the active camera.
- To set the active camera, go to "View" > "Cameras" > "Set Active Object as Camera". Alternatively, you can go to the "Scene" tab in the Properties panel and set the active camera there.
- You can also use the shortcut "Ctrl" + "Alt" + "0" to look through the camera from your current viewpoint, regardless of the camera's position.
- If you want to place the camera at your current view, try using the shortcut "Ctrl-Alt-0", or go to View" > "Align View" > "Align Active Camera to View".
- To add a new camera, press "Shift" + "A" and select "Camera" from the list of options.
Remember that the active camera is the one that will be used for rendering and is usually defined at the scene level, but it can also be set for a specific viewport.
Infrared Cameras: Can They Detect Metal?
You may want to see also

How to rotate your camera
To rotate your camera in Blender, you can try the following methods:
- Press R to enter object rotation mode. By default, the camera will rotate along its local Z-axis, which is known as a camera "roll".
- For a vertical pan or pitch, press R, then X twice to rotate along the local X-axis.
- For a horizontal pan or yaw, press R, then Y twice to rotate around the camera's local Y-axis.
- Press G, then MMB (middle mouse button) or Z twice to dolly the camera.
- Press G, then move your mouse. You can use X or Y twice for purely horizontal or vertical tracking.
- Click the border of the non-shaded view window and use the G shortcut to move the camera and R to rotate.
- Go to View > Navigation > Walk/Fly Navigation. Walk navigation is similar to a first-person shooter, while fly navigation is like piloting a plane.
- Use the translate controls to position the camera by right-clicking on the camera, then pressing G.
Strategic TV Camera Placement for Soccer: Capturing the Action
You may want to see also

How to zoom in and out of your camera view
To zoom in and out of your camera view in Blender, you can use the following methods:
Using the Zoom Camera 1:1 Feature
In the Blender 4.2 Manual, it is suggested to use the Zoom Camera 1:1 feature to preview how large objects will appear in the rendered image/animation. This feature can be accessed by going to View > Navigation > Zoom Camera 1:1. This will zoom the view so that the camera frame matches the output resolution.
Adjusting the Focal Length
Another method is to adjust the focal length of the camera. This can be done by going to the Camera tab and changing the Focal Length value. Lowering the focal length will increase the field of view, allowing you to see more of the scene without zooming out. However, it's important to note that lower focal lengths can distort the appearance of objects. After adjusting the focal length, you may need to move the camera closer to the objects.
Locking the Camera to View
If you want the camera to move with your view, you can lock the camera to your current view. This can be done by going to Sidebar > View and enabling the "Lock Camera to View" option. Alternatively, you can press "Shift + ~" while in camera view. This will allow you to move the camera with first-person navigation.
Using the Mouse Scroll Wheel
You can also use your mouse scroll wheel to zoom in and out of the camera view. Additionally, pressing "Shift + Middle Mouse Button" will allow you to shift the view side to side or up and down.
Smartwatches with HD Cameras: The Ultimate Wrist Upgrade
You may want to see also
Frequently asked questions
Go to View > Cameras > Active Camera or View > Viewpoint > Camera.
Go to View > Cameras > Set Active Object as Camera.
Press Numpad0.
Enable Lock Camera to View in the View panel of the Properties region.
Go to the Outliner, find the camera, and click the little closed eye by it.


