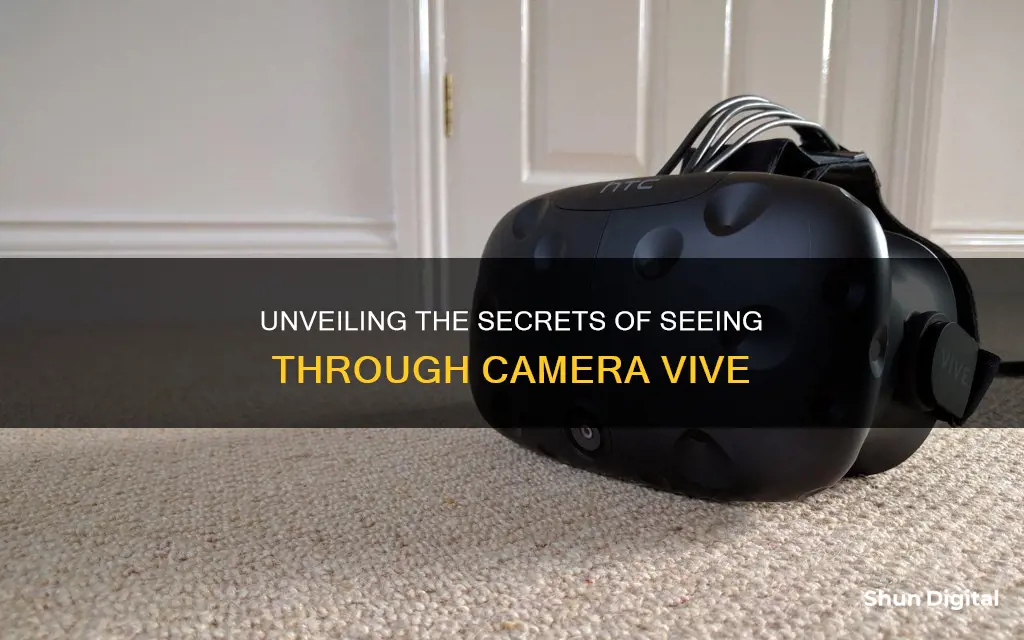
The HTC Vive has a front-facing camera that can be used to see the real world while wearing the headset. This can be useful for finding your phone, picking up a drink, or even just avoiding stepping on your cat! To enable the camera, you need to open the SteamVR app on your computer and go to Settings > Camera. From there, you can click Enable Camera and select your preferred camera permissions. You can choose to automatically activate the camera in the Dashboard, when you hit Chaperone boundaries, or with a button-activated mode for Room View. Once you've made your selections, restart SteamVR and you're ready to go!
| Characteristics | Values |
|---|---|
| How to enable the camera | Open SteamVR, go to Settings, click on the Camera tab, click Enable Camera, select your camera permissions, and restart SteamVR |
| How to change the refresh rate of the camera | The refresh rate can be altered by adjusting the Camera Rate slider found in the Camera section of SteamVR settings |
| How to record camera footage | With the Vive plugged into your PC, launch OBS Studio, click the + button in the Sources section, click Video Capture Device, and click Start Recording |
| How to use the camera | Double-click the SteamVR menu button on either controller to toggle TRON mode on/off, click the SteamVR button to bring up the menu, or double-tap the system button |
What You'll Learn

How to enable the camera
The HTC Vive's inbuilt camera can be used to look at the real world while wearing the headset. This can be useful for interacting with the surrounding world, such as talking to someone, answering the phone, or having a drink.
The camera is disabled by default due to potential loss of tracking on lower-end hardware. To enable the camera, follow these steps:
Step 1: Open SteamVR
Open the SteamVR app on your computer. You can find it on your desktop, Start menu, or taskbar.
Step 2: Go to Settings
Once the app has loaded, navigate to the Settings tab. This can usually be found by clicking on the dropdown arrow next to SteamVR.
Step 3: Click on the Camera Tab
In the Settings tab, find and click on the tab marked "Camera".
Step 4: Click Enable Camera
In the Camera settings, look for the box that says "Enable Camera" and check it off.
Step 5: Select Your Camera Permissions
After enabling the camera, you can choose from several different options to determine the camera's permissions. You can choose to automatically activate the camera in the Dashboard, when you hit Chaperone boundaries, or manually with a button-activated mode for Room View.
If you want to use Room View, you will need to press the System Button twice in a row, as if double-clicking a mouse button.
Step 6: Restart SteamVR
Once you have selected your permissions and enabled the camera, restart the SteamVR app and begin your next virtual reality experience.
Now you can use the camera on your HTC Vive VR headset!
Paranoia and the Fear of Being Watched
You may want to see also

How to change the refresh rate
To change the refresh rate on the HTC Vive, you will need to access the display settings. Here is a step-by-step guide:
- Open the VIVE Console app on your computer.
- Click on the menu and select "Settings".
- From the settings menu, select "Display settings".
- Disable the auto-display settings by clicking the "Auto On/Off" switch.
- Choose the mode that corresponds to your desired resolution and refresh rate.
- If your graphics card supports it, you can select "Extreme mode" for a refresh rate of 120 Hz.
- Other modes are also available, including high or lower-resolution modes.
It is important to note that the refresh rate is dependent on the capabilities of your graphics card. The VIVE Wireless Adapter, for example, supports a maximum resolution of 3264 x 1632 at a 90 Hz refresh rate when used with the VIVE Pro 2.
Additionally, it is worth mentioning that the refresh rate of the HTC Vive is 90 Hz, and lowering the frame rate from the PC side will not affect the headset's sync, which is locked at 90 Hz.
Accessing and Viewing CC Camera Footage: A Step-by-Step Guide
You may want to see also

How to record footage
To record footage with a Vive headset, you will need to access the Quick Menu. This can be done by pressing the VIVE button on your controller. From the Quick Menu, you can select the record option, which is represented by the icon. This will begin recording your gameplay.
Once you have finished recording, you can browse your files in the headset to find your screen recordings. To do this, open the Quick Menu again and select 'Browsing files in the headset'. This will allow you to locate and view your recordings.
It is also possible to project your screen to an external device. To do this, make sure your device is connected to the headset, then open the Quick Menu and select 'Projecting the screen to an external device'.
Additionally, you can access your real surroundings on the headset through the VIVE Cosmos cameras. To do this, open the VIVE Console app on your computer and click Settings > Camera. You can then choose to show your real surroundings by pressing the VIVE button twice on your right controller. Alternatively, you can enable this feature automatically when you step over the play area boundary.
Watching Camera Footage on PC: Easy Steps to Follow
You may want to see also

How to use the camera
To use the camera on your HTC Vive, you must first enable it through the SteamVR app on your computer.
Enabling the camera
- Open the SteamVR app on your computer.
- Click the dropdown arrow next to SteamVR.
- Click "Settings" > "Camera".
- Click "Enable Camera".
- Close and reopen the SteamVR app.
- Click the dropdown arrow again, then "Settings" > "Camera".
- Select your preferred camera permissions, such as Allow Camera in Dashboard or Allow Camera for Chaperone Bounds.
- Click "Restart SteamVR".
Using the camera
Once the camera is enabled, you can use it in three modes:
- Allow Camera for Dashboard: The camera will be activated when the SteamVR Dashboard is opened. A small colour feed of the camera will appear next to the right-hand controller when you press the Home button.
- Allow Camera for Chaperone Bounds: The camera will be activated automatically when you approach the edges of your play area. This is a simplified representation that highlights the edges of surrounding objects when exiting your VR boundaries.
- Allow Camera for Room View: The same simplified camera view can be activated manually by double-clicking the System button. This is useful for interacting with the real world without removing the headset.
You can also use the camera by double-clicking the SteamVR menu button on either Vive controller to toggle TRON mode on/off, or by clicking the SteamVR button and selecting the camera from the circle buttons on the lower right side of the menu.
There is also a physical button on the Vive headset that can be used to toggle the camera on/off. It is located on the left side of the device.
Meijer's Camera Surveillance: What Shoppers Should Know
You may want to see also

Camera permissions
To activate the front-facing camera on the HTC Vive, you must first open the SteamVR app on your computer. Once the app has booted, go to the Settings tab and select 'Camera'. Here, you will see the option to enable the camera. After enabling the camera, you will be able to select your preferred camera permissions.
You can choose to automatically activate the camera in the Dashboard, when you hit Chaperone boundaries, or you can opt for a button-activated mode for Room View. To use Room View, you will need to press the System Button twice in a row, similar to a double click. After you have made your selection, restart the SteamVR app and you will be ready to go.
It is important to note that any permissions you initially granted or denied when installing an app can be changed later in the Settings. To do this, go to the Lobby, select Settings, and then choose the app whose permissions you want to change. The types of permissions that can be granted or denied include camera, location access, storage, and microphone permissions. Simply select 'Allow' or 'Deny' next to the permission types.
Tracking Hockey: TV Cameras and the Puck
You may want to see also
Frequently asked questions
Open the SteamVR app on your computer and click on Settings > Camera. Click Enable Camera and then restart the SteamVR app.
You can activate the camera by double-clicking the System button anytime to show your real surroundings. You can also press the SteamVR button once to bring up the menu, which will display a small screen attached to your controller that shows the camera view.
The refresh rate can be altered by adjusting the Camera Rate slider found in the Camera section of SteamVR settings. The rate can be incremented between 30Hz and 60Hz, with the higher frequency delivering smoother video.
Yes, with a bit of tinkering, you can record footage using third-party software. For example, you can use OBS Studio by following these steps: launch OBS Studio, click the + button in the Sources section, click Video Capture Device, select your device from the dropdown menu, and then click Start Recording.
The camera can be useful when you need to interact with the real world without removing your headset, such as when talking to someone, answering your phone, or taking a drink. It can also help you avoid obstacles and prevent you from stepping on your cat!


