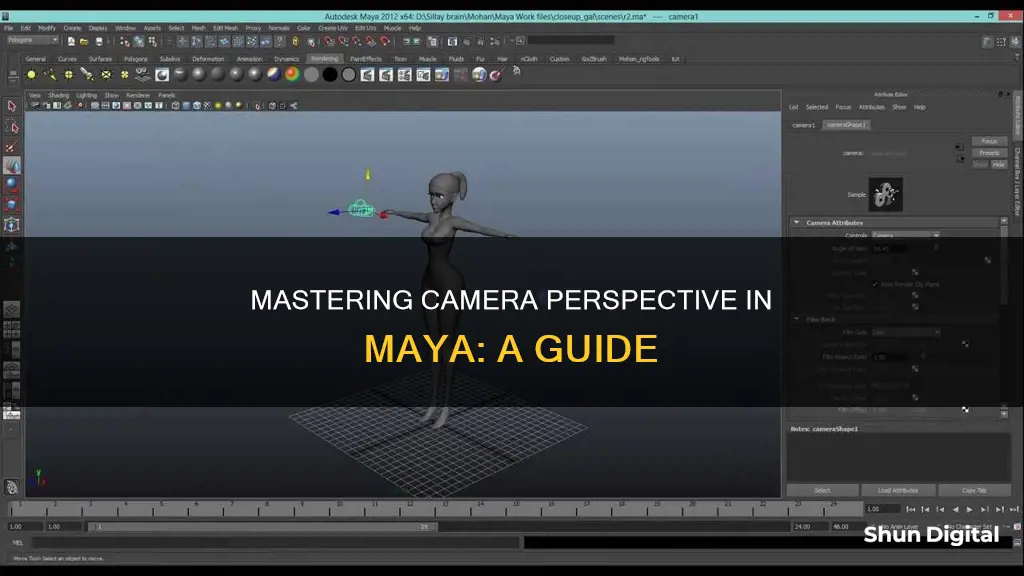
When working with Maya, there are several ways to switch the Viewport to display the point of view of a camera in your scene. This is a useful skill to have when you want to see from the camera's perspective and make adjustments accordingly. To view the cameras in your scene, you can right-click on the Camera icon in the Viewport View panel icons, which will bring up a list of all the cameras used in the scene. You can then select the camera you want to view through. It's important to note that if you have more than one camera, you can switch between them to find the best viewpoint. Additionally, you can use the default cameras while modelling, animating, shading, and texturing objects, but you'll need to create a rendering camera to render a scene.
| Characteristics | Values |
|---|---|
| Number of default cameras | 4 |
| Names of default cameras | persp (perspective), front, side, and top (orthographic) |
| View camera names | View > Select Camera or Viewport View panel |
| Switch camera view | Panels > Perspective/Orthographic submenu or Panels > Look Through Selected |
| Create a new camera for the view panel | Panels > Perspective/Orthographic > New |
| Create a new camera for rendering the scene | Create > Cameras submenu |
| Set a camera's attributes | View > Camera Attribute Editor |
What You'll Learn

Switching camera views
To switch to a different camera view, you can simply hover your mouse over the desired camera's view and hit the Spacebar. This will maximise that particular view. Hitting the Spacebar again will return you to the "Four View".
Another way to switch camera views is to use the "Panels" menu at the top of the viewport. Under "Perspective" and "Orthographic" in the "Panels" menu, you will find a list of all the cameras in the scene. You can select the camera view you want from this list.
To look through a selected camera, you can also click "Panels" and then "Look Through Selected". This also works with objects. If you want to look through another camera, click "Panels" and then select the camera name from either the "Perspective" or "Orthographic" submenus.
Additionally, you can use Maya's Viewcube to change the perspective by hand. If the Viewcube is not displayed, click "Renderer" next to the "Panels" tab and select "Legacy Default Viewport" to display the Viewcube. On the Viewcube, click, hold and move the left mouse button to change the perspective.
The camera functions of pan, rotate and zoom can be accessed by holding the Alt key and dragging the mouse in the Maya window with one of the three mouse buttons held down. Using the left mouse button will rotate, the right mouse button will zoom, and the centre mouse button (clicking the scroll wheel) will pan.
By using these various methods, you can easily switch between different camera views in Maya.
Phillips Smart TV Camera: Where is it?
You may want to see also

Looking through a camera
When working in Maya, there are several ways to switch the Viewport to display the point of view of a camera in your scene. This is a helpful way to look through a camera and navigate a scene.
Viewing Cameras in Your Scene
To view the cameras in your scene, right-click on the Camera icon in the Viewport View panel icons. A list of all the cameras used in the scene will appear. You can also click the camera name on the far right side of the Viewport View panel to view a list of cameras.
Switching to a Different Camera
If you have more than one camera in your scene, you can switch between them. To look through a selected camera, click Panels > Look Through Selected. This also works with objects. To look through another camera, click Panels, and then select the camera name from either the Perspective or Orthographic submenus.
Default Cameras
When you start a new scene in Maya, it comes with four default cameras: perspective, front, side, and top (orthographic). The perspective camera shows the scene using a perspective view, while the orthographic cameras show the scene from a camera that is orthogonal to a specific plane. You can use these default cameras as you model, animate, shade, and texture objects, but you cannot use them to render a scene.
Creating a Rendering Camera
To render a scene, you need to create a rendering camera. The only difference between a default camera and a rendering camera is a flag that allows it to render the scene. To create a new camera for rendering, choose a camera type from the Create > Cameras submenu on the main menu.
Navigating with the Camera
It's important to note that an object's position in the scene will be affected by dollying, tumbling, or zooming while looking through it.
By following these steps, you can effectively look through a camera and navigate your scene in Maya.
Smart TV Camera: Where is it Located?
You may want to see also

Camera setup
When you start a new scene in Maya, you are provided with four default cameras: the perspective camera and three orthographic cameras (side, top, and front). The perspective camera displays the scene using a perspective view, while the orthographic cameras show the scene from a camera that is orthogonal to a specific plane.
To switch between these default cameras, go to the Panels menu and select your desired camera from the Perspective or Orthographic submenu. The camera's name will be displayed at the bottom of the view panel.
If you want to create a new camera, go to Create > Cameras > camera type, where you can select the type of camera you want. The Create Camera Options for that camera type will appear, allowing you to set the desired options before clicking "Create."
To view your scene through the new camera, simply select the camera in the viewport and choose View > Cycle through Cameras in the View panel menu. The camera name will appear at the bottom of the viewport.
You can also control which camera is shown in a view panel. To do this, open the Panels menu and select a camera from the Perspective or Orthographic submenu. If the camera object is visible in the scene, select it and choose Panels > Look Through Selected.
Accessing Live Camera Feeds on Your Mobile Device
You may want to see also

Creating a new camera
When you start a new scene in Maya, you are provided with four default cameras: perspective, front, side, and top (orthographic). The perspective camera shows the scene using a perspective view, while the orthographic cameras display the scene from a camera that is orthogonal to a specific plane.
While these default cameras are useful for modelling, animating, shading, and texturing objects, they cannot be used to render a scene. For this, you will need to create a rendering camera. The only difference between the default cameras and a rendering camera is a flag that allows it to render the scene.
To create a new camera for the view panel in Maya, follow these steps:
- In a view panel, select "Panels" from the menu bar.
- Choose either "Perspective" or "Orthographic" from the submenu, depending on your preferred camera type.
- Select "New" to create a new camera of your chosen type.
In addition to the front and top cameras, the back, bottom, left, and right cameras are also available from this menu.
If you want to create a new camera specifically for rendering the scene, you can do so through the main menu. Here are the steps:
- Go to the "Create" menu on the main menu bar.
- Choose "Cameras" from the submenu.
- Select the desired camera type from the options provided.
Once you have created your new camera, you can adjust its attributes by selecting "View" and then "Camera Attribute Editor" in a view panel.
Remember, you can easily switch between different camera views in your scene by right-clicking on the Camera icon in the Viewport View panel icons and selecting the desired camera from the list. Alternatively, you can click on the camera name at the far right side of the Viewport View panel to access the list of cameras.
The Boss Watches: Cameras Capture Every Move
You may want to see also

Camera attributes
The Focal Length and Camera Aperture values can be set to match those of a physical camera, or adjusted to create a desired effect. The focal length is the measurement between the optical nodal point on the lens and the sensor. It determines how zoomed in the camera is, and how close or far away objects appear. A larger focal length makes objects appear closer and can flatten the perspective effect, while a smaller focal length may exaggerate it. The Film Back > Camera Aperture attribute refers to the portion of the film back that is being exposed and can be set to the sensor size of your camera. The smaller the value, the smaller the angle of view, and the closer objects will appear.
The pivot point is the equivalent of the nodal point in a real camera and is the point around which the camera is rotated and transformed. The default is the centre of the film plane, but most camera rigs have the nodal point in a different location. Moving it further back can create more parallax and a more realistic effect.
The resolution gate and film gate can be displayed and adjusted as necessary. The resolution gate represents the rendering resolution, and the film gate represents the dimensions of the camera aperture. These can be used to ensure objects are framed as desired in the final render output.
Depth of field can be enabled and adjusted so that some objects are in focus while others are blurred. This is a common effect in most scenes, except for landscapes.
Other camera attributes include the ability to create a mask or depth file during rendering, and to adjust the shutter angle to control the blurriness of moving objects.
Samsung Watch: Camera Included or Just a Rumor?
You may want to see also
Frequently asked questions
To switch between cameras in Maya, right-click on the Camera icon in the Viewport View panel icons and select the camera you want to switch to from the list that appears. Alternatively, you can click on the camera name at the far right side of the Viewport View panel to view a list of cameras to select from.
To look through a camera in Maya, select the camera you want to look through and click Panels > Look Through Selected.
To create a new camera in Maya, go to the Panels menu and select Perspective > New or Orthographic > New. You can also choose a camera type from the Create > Cameras submenu on the main menu.
To set a camera's attributes in Maya, choose View > Camera Attribute Editor in a view panel.


