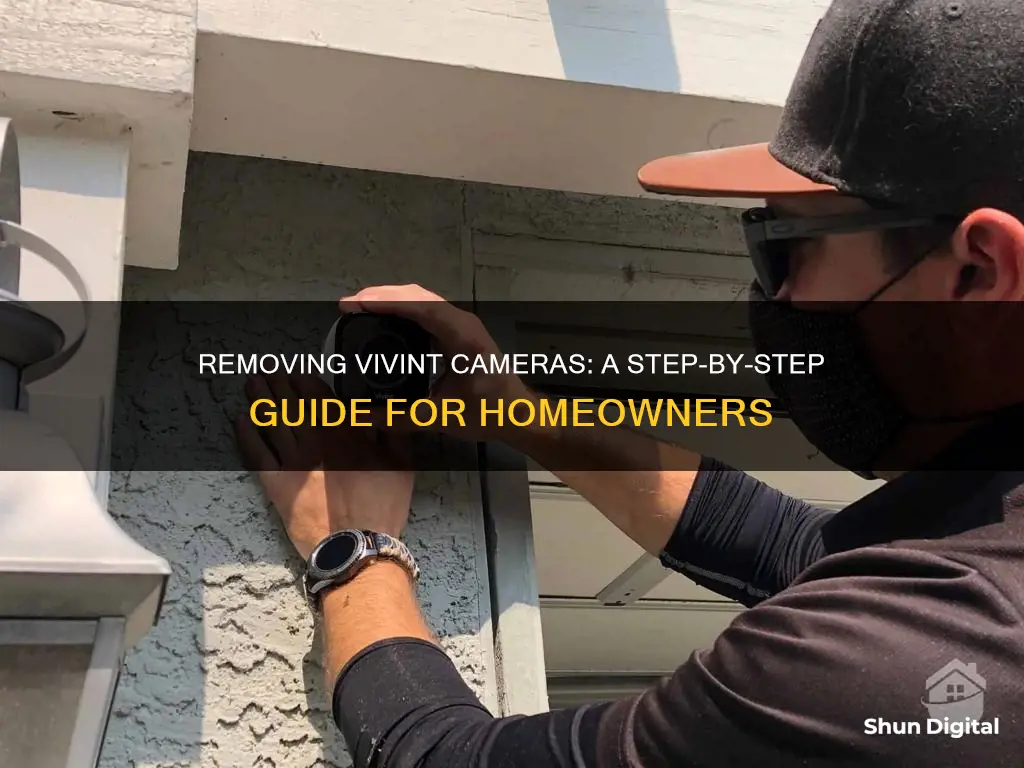
Removing a Vivint camera is a straightforward process, but it's important to be aware of what you're doing to avoid damaging the device or injuring yourself. Before beginning, make sure you have the right tools, such as a screwdriver and gloves, and always disconnect the power source before interacting with any wires to avoid the risk of electric shock. The first step is to remove the camera from the Vivint application and your security system. Then, you can physically disengage the camera unit from the wall by removing the cover, disconnecting the wires, and taking off the mounting bracket.
| Characteristics | Values |
|---|---|
| Step 1 | Remove the camera from the Vivint application and your security system |
| Step 2 | Physically disengage the camera unit |
| Step 3 | Access the Vivint panel settings |
| Step 4 | Open Device Settings |
| Step 5 | Remove the Vivint camera from the system |
| Step 6 | Acquire the required tools, including a screwdriver, gloves, and an electricity tester |
| Step 7 | Disconnect Vivint from the power source |
| Step 8 | Remove the Vivint cover |
| Step 9 | Disconnect all wires |
| Step 10 | Take off the holder/mounting bracket |
What You'll Learn

Removing the Vivint camera from the application
Step 1: Access the Vivint Panel Settings
The first step is to access the device settings on the Vivint panel of your security system. Go to the panel and tap on the settings icon. This will give you access to the device settings.
Step 2: Open Device Settings
Once you are in the settings, locate the "Device Settings" or "Vivint Device Settings" tab. This may vary depending on the model of your panel and firmware of Vivint. Browse the settings to find the appropriate tab and tap on it to access the device settings.
Step 3: Remove the Vivint Camera from the System
In the device settings, you will see all of your Vivint devices listed. Locate the Vivint camera you wish to remove and go to its "Camera settings". Within the camera settings, scroll down until you find the "Remove" button. Tap on it to uninstall the camera from the system.
Alternatively, if you do not have a panel for your Vivint security system, you can also remove the camera through the Vivint app. Open the app and go to Settings > Devices > Vivint camera > Remove.
Important Precautions
Before physically removing the camera from the wall, it is important to take some precautions. First, make sure to disable the alarm on the Vivint smart home system using the smartphone application. This will prevent the alarm from continuously alarming and causing disturbance to your neighbours.
Physical Dismantling of the Camera
After removing the camera from the application, you can proceed with physically disengaging the camera unit from the wall. Here are the steps to follow:
- Acquire the Required Tools: You will need a Phillips-head screwdriver, gloves (optional but recommended for protection), and an electricity tester to check for live wires.
- Disconnect from the Power Source: Go to your circuit breaker and turn off the electricity supply to your Vivint doorbell camera. This will ensure that there is no power reaching the device.
- Remove the Vivint Cover: Use the electricity tester to check for any live electricity flowing to the screws of the camera. If no electricity is detected, use the Phillips-head screwdriver to undo the screws and remove the cover.
- Disconnect All Wires: After removing the cover, all the wires will be exposed. Double-check with the electricity tester to ensure there is no power in the wires. If clear, proceed to disconnect all wires one by one. Take a picture of the wire configuration for future reference when installing a new doorbell.
- Remove the Mounting Bracket: Undo all the internal screws that were exposed after removing the front cover. This will allow you to take out the base and the holder bracket of the camera.
By following these steps, you will be able to successfully remove the Vivint camera from the application and physically dismantle it from the wall. Remember to always prioritise safety and handle electrical components with care. If you have any doubts or hesitations, it is best to consult a Vivint technician for assistance.
Monitoring Remote Areas: Camera Surveillance Techniques
You may want to see also

Physically disengaging the camera unit
Prepare the Necessary Tools:
Firstly, gather the required tools, including a Phillips-head screwdriver, gloves, and an electricity tester. These tools will facilitate the removal process and ensure safety.
Disconnect from the Power Source:
Before initiating any physical disengagement, it is crucial to cut off the electricity supply to the camera. Locate your circuit breaker and turn off the electricity specifically for the doorbell or the camera. This step ensures that there is no power reaching the device.
Remove the Camera Cover:
Using your screwdriver, carefully undo all the screws securing the camera cover in place. Before unscrewing, use the electricity tester to check for any active electricity flow to the screws. If the tester indicates no electricity, proceed to remove the cover.
Disconnect the Wires:
With the cover removed, you will expose all the wires. Utilize your electrical tester again to double-check that there is no power flowing through the wires. If confirmed safe, proceed to disconnect each wire carefully. Taking a picture of the wire configuration can be helpful for future reference or when installing a new device.
Remove the Mounting Bracket:
The final step is to detach the mounting bracket that holds the camera in place. Simply unscrew the internal screws that were exposed after removing the front cover. With the screws removed, the base and the mounting bracket will become loose, allowing you to take out the entire camera unit.
Secure the Exposed Wires:
During the period without a camera installed, it is important to secure the exposed wires. Tie them up and push them gently into the wall, leaving some room to access them later when needed.
By following these detailed steps, you can safely and effectively physically disengage your Vivint camera unit from the wall. Remember to exercise caution when handling electrical components and always disconnect the power supply before interacting with any wires or screws.
Viewing Roku's Camera Feed on Your TV
You may want to see also

Disconnecting the power source
To disconnect the power source, start by switching off the power button and unplugging the course. Keep all the wires aside so they don't tangle. Be extremely cautious when handling the electric board and wires. Do not touch or hold any live wires during the process as it can be life-threatening.
Once you have disconnected the system from the power source, reach for your doorbell camera and double-check if there is any direct current to the circuit using a tester. A tester is a device that looks similar to a screwdriver, and when you touch its pointed part to the course, the light will blink, indicating the source of electric power. It is important to use the tester to detect any power running in the application as there is a chance that electricity is still flowing even if you have unplugged the system.
If there is no electricity flowing, you can proceed to remove the screw of the doorbell cover using your screwdriver and pull it out. Keep the cover aside in a safe place to avoid any accidental damage.
The Evolution of Broadcast TV Cameras: Why So Large?
You may want to see also

Removing the cover
Before you begin, make sure you have the necessary tools, such as a Phillips-head screwdriver, gloves, and an electricity tester. These tools will make the process safer and easier. It is also crucial to disable the alarm system and disconnect the camera from the power source. This can be done by accessing the settings in the Vivint smartphone application. Let your family members know about your task to avoid any confusion.
Now, let's move on to removing the cover:
- Use your electricity tester to check for any active electricity flowing to the camera. This step is important for your safety. Touch the tester to the screws of the camera to ensure no electricity is flowing.
- Once you have confirmed that there is no electricity, use your Phillips-head screwdriver to undo and remove all the screws securing the cover. Place the screws in a safe location.
- After removing the screws, you should be able to gently pull and remove the cover. Set the cover aside in a safe place to avoid accidental damage.
With these steps, you will have successfully removed the cover of your Vivint doorbell camera. Remember to be cautious when working with electrical devices, and always double-check that the power is disconnected before proceeding.
Can Your TV Spy on You?
You may want to see also

Taking off the mounting bracket
To take off the mounting bracket of your Vivint doorbell camera, you will need to remove the screws. This will detach the bracket from the wall. Keep the bracket in a safe place if you think you might want to reassemble the panel.
After removing the backplate from the wall, you will see a small hole and two wires. You can secure these wires with tape, or remove them by gently pulling. It is important not to touch the wires with your bare hands.
Once the mounting bracket is removed, you can then follow the remaining steps to fully disengage the camera from the wall. This includes disconnecting the wires and removing the front cover.
As with any electrical equipment, it is important to ensure the power source is disconnected before beginning work. You should also use gloves to protect your hands.
Understanding TV Cameras: Locating the Iris
You may want to see also
Frequently asked questions
Access the device settings on the Vivint panel of your security system. From there, you will be able to remove the camera from the entire system.
You will need a screwdriver (preferably Phillips-head), gloves, and an electricity tester to ensure there is no active electricity.
First, cut off the electricity to the camera. You can do this by going to your circuit breaker and flipping off the electricity for your doorbell.


