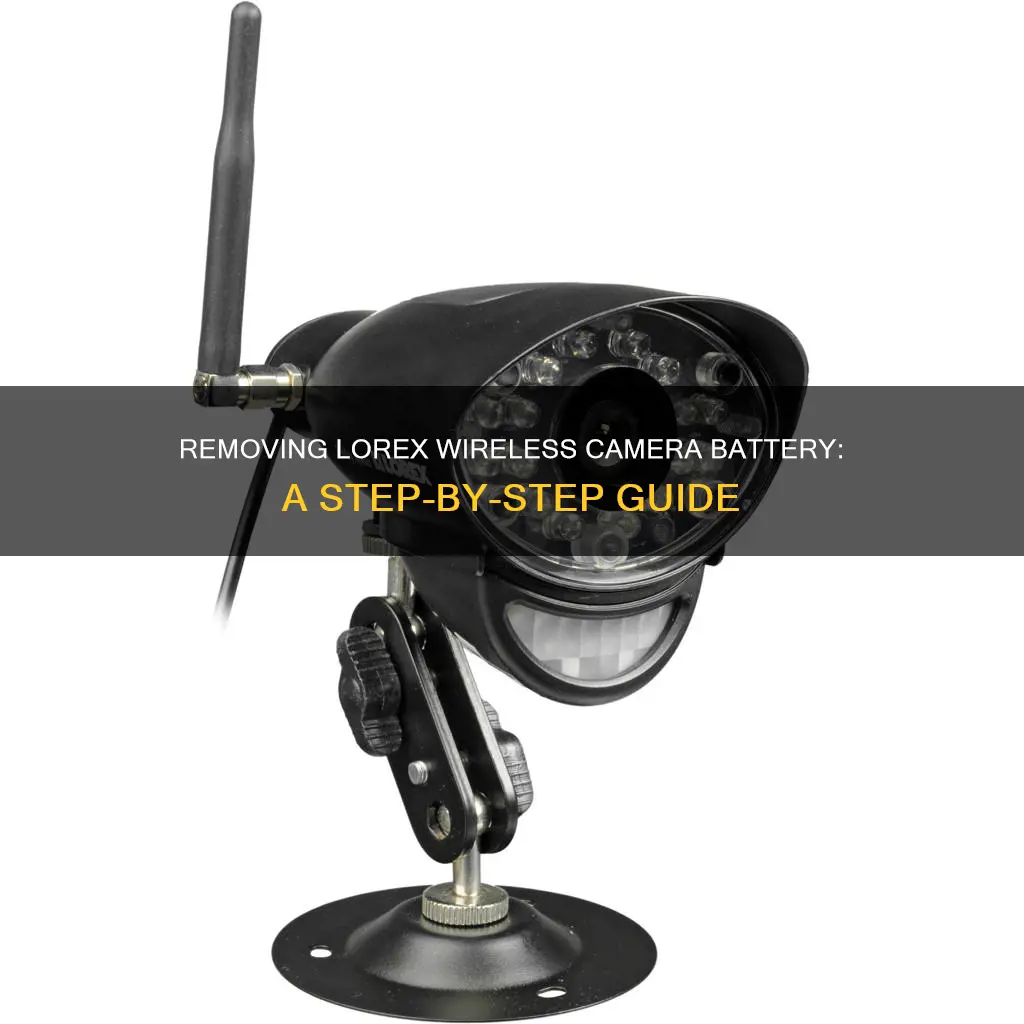
Lorex is a well-known provider of security cameras and systems, offering a range of products from wired to wire-free and Wi-Fi security cameras. The Lorex wire-free security cameras are powered by rechargeable batteries, which can be easily removed for charging. The battery life of these cameras depends on various factors, such as the number of events or notifications, recording length, location, temperature, and camera settings. To ensure uninterrupted security monitoring, Lorex offers additional quick-release rechargeable battery packs and power adapters. This article will provide a step-by-step guide on how to remove the Lorex wireless camera battery and offer insights into enhancing the battery life and overall performance of your security system.
| Characteristics | Values |
|---|---|
| Charging | Charging inside the camera or charging the battery by itself |
| Charging inside the camera | Charge without removing the battery by connecting the charging adapter and cable to the camera's power port on the back of the camera |
| Charging the battery by itself | Slide the battery out from the camera to charge, without ever having to remove the camera. Use the charging adapter and cable to connect to the battery's power port and plug into a power outlet |
| Charging time | 4 to 6 hours to fully charge the camera's battery pack |
| Battery life | 6-9 months, depending on factors such as the number of events or notifications, length of the recording, camera location, ambient temperature, and settings on the camera |
| Battery life in busy areas | 2-3 months |
| Battery life in typical areas | 3-5 months |
| Battery life in quiet areas | 7-9 months |
What You'll Learn

Charging the Lorex wireless camera battery
If you have a Lorex wire-free security camera with a rechargeable battery pack, you can follow these steps to charge the battery:
- Remove the battery pack from the camera: This can be done by twisting the camera's bottom cover counter-clockwise and then removing the battery pack.
- Connect the charging adapter: Take the provided charging adapter and connect it to the battery pack's power port.
- Plug the adapter into a power outlet: Ensure you are charging the battery indoors, as the included power adapter is intended for indoor use only.
- Wait for the battery to be fully charged: The charging time may vary, but it typically takes around 4 to 6 hours for a full charge. The battery pack may come with an LED indicator that turns green when it is fully charged.
For Lorex wire-free security cameras with a built-in battery, you can charge the battery by following these steps:
- Lift the power port cover: This will expose the camera's power port, which is usually located at the back of the camera.
- Connect the charging adapter and cable: Use the provided charging adapter and cable to connect to the camera's power port.
- Plug the adapter into a power outlet: Make sure to charge the camera indoors, as the included power adapter is for indoor use only.
- Wait for the camera's LED indicator to turn solid green: This indicates that the battery is fully charged. You can also keep the camera connected for a constant power supply if desired.
It is important to note that the battery life of your Lorex wireless camera will depend on various factors, including the number of events or notifications, the length of recordings, the camera's location, the ambient temperature, and the camera's settings. Regularly charging your Lorex wireless camera battery will ensure that your security system remains operational and provides you with peace of mind.
Uncover Camera Details: Unraveling Image Metadata Secrets
You may want to see also

Removing the Lorex wireless camera battery
Lorex wireless security cameras use a rechargeable battery that can be easily removed for charging. The battery is typically located at the bottom of the camera and can be accessed by twisting the bottom cover in a counter-clockwise direction.
To remove the Lorex wireless camera battery, start by locating the bottom cover of the camera. This is usually where the battery is housed and can be identified by a small indentation or notch that allows for easy twisting. Place your thumb or finger on this notch and gently twist the cover in a counter-clockwise direction. You may need to apply some force, but be careful not to use excessive force to avoid damaging the camera.
Once the bottom cover is twisted open, you will have access to the battery compartment. Gently pull out the battery, taking care not to touch any other internal components. The battery is usually held in place with a light clasp or locking mechanism, so a gentle tug should be enough to remove it. If you're having trouble, check that you've correctly aligned the battery with the compartment and that there are no obstructions.
After removing the battery, you can proceed to charge it using the provided charging adapter and cable. Connect the adapter to the battery's power port and plug the other end into a power outlet. The charging time varies, but it typically takes around 4 to 6 hours for a full charge. It's important to note that Lorex recommends using only the included charging adapters to ensure compatibility and safety.
By following these steps, you can conveniently remove and charge your Lorex wireless camera battery, ensuring your security camera remains operational and providing you with peace of mind. Remember to refer to the product documentation for specific instructions related to your Lorex camera model.
Removing the VVTi Camera Gear: Step-by-Step Guide
You may want to see also

Charging the battery inside the camera
Charging the battery inside the Lorex wireless camera is a straightforward process. Here is a detailed guide on how to do it:
Firstly, it is important to note that the Lorex wireless camera uses a rechargeable battery that can be charged either inside the camera or separately. When charging the battery inside the camera, start by lifting the power port cover, which is located on the back of the camera. Then, take the included charging adapter and cable, and connect them to the camera's power port. Plug the adapter into a power outlet and allow the battery to charge. The camera's LED indicator will turn solid green when the battery is fully charged. It is recommended to keep the camera connected to power even after the battery is fully charged to ensure a constant power supply.
The Lorex wireless camera also offers the option of charging the battery by itself, without having to remove the camera from its mount. To do this, simply slide the battery out from the camera and connect the charging adapter and cable to the battery's power port. Plug the adapter into a power outlet and wait until the battery's status indicator turns solid green, indicating that it is fully charged. This method allows for convenient charging without disrupting the camera's placement.
It is worth mentioning that the battery pack may not come fully charged when you purchase the camera due to safety regulations. Therefore, it is recommended to fully charge the battery before using it for the first time and setting up the camera. This initial charging process may take around 4 to 6 hours. Additionally, Lorex recommends using only the included charging adapters to ensure compatibility and safety.
The battery life of the Lorex wireless camera can vary depending on several factors, including the number of events or notifications, the length of recordings, the camera's location, ambient temperature, and camera settings. On average, the battery can last between 6 to 9 months, but this duration will be shorter in busy areas with more motion activity. Regular charging of the battery will help ensure that your Lorex wireless camera remains operational and provides uninterrupted security monitoring.
Laptop Camera: Am I Being Watched?
You may want to see also

Charging the battery by itself
Charging the Lorex wireless camera battery by itself is a simple process. First, you need to remove the battery from the camera. To do this, twist the camera's bottom cover counter-clockwise and gently pull out the battery pack. Once you have the battery pack, get the charging adapter and cable and connect it to the battery pack's power port. Plug the other end of the cable into a power outlet.
The battery pack will take a few hours to fully charge. You can tell when it's fully charged when the status indicator on the battery pack turns solid green. The Lorex charging adapter is designed to automatically stop charging when the battery is full, so you don't have to worry about overcharging or damaging the battery.
It's important to note that the battery pack only comes partially charged due to safety regulations, so make sure to fully charge it before using it for the first time. Additionally, the Lorex website recommends only using the included charging adapter to charge the battery pack.
The battery life of the power pack will depend on various factors, such as the number of events or notifications, the length of recordings, the camera's location, the ambient temperature, and the camera's settings. On average, the battery can last between 2 to 9 months. To prolong battery life, avoid installing the camera in high-traffic areas, near trees, or in cold or dark environments.
Fog Penetrating Vision: SWIR-NIR Camera Technology Explained
You may want to see also

Battery life
The battery life of Lorex wireless cameras varies depending on several factors. The primary factor is how often the camera turns on, which is influenced by the amount of motion activity in the surrounding area. Cameras in high-traffic areas will have shorter battery lives than those in low-traffic areas. The length of time the camera records after sensing motion will also impact the battery life. On average, the battery will last for approximately 24 events per day, with each event being a 10-second recording.
Environmental factors such as temperature and lighting can also affect battery life. Colder climates and darker environments can reduce battery life by up to 50%. Additionally, the presence of nearby trees or high-traffic streets can increase the number of potential events captured, reducing battery life.
The Lorex 3-Cell Power Pack uses lithium-ion technology, which offers advantages such as high energy density for longer-lasting power, extended lifespan, rapid charging capability, lightweight design, minimal self-discharge rate, absence of memory effect, and eco-friendliness. This Power Pack can be easily snapped onto the camera's base, allowing for quick removal and replacement without removing the camera from its mount.
The Lorex 2-Cell Power Pack is another option, although it has not been specified how long this battery pack lasts.
Overall, the battery life of Lorex wireless cameras can be extended by strategic placement, avoiding areas with high traffic or excessive motion, and by utilising the features of the Power Packs, such as their long-lasting lithium-ion technology.
Philips 55PFL5601 F7: Is There a Camera Feature?
You may want to see also
Frequently asked questions
The Lorex Wire-Free Security Camera's battery can be easily removed from the camera for charging. Twist the camera's bottom cover counter-clockwise and remove the battery pack.
There are two options for charging the battery pack. You can charge the battery pack by itself by twisting the camera's bottom cover counter-clockwise and removing the battery pack from the camera, then plugging the charging adapter into the battery pack. Or, you can charge the battery pack inside the camera by lifting the power port cover and connecting the charging adapter to the camera's power port.
It takes 4 to 6 hours to fully charge the camera's battery pack using the included charging adapter.
The battery life of a Lorex wireless camera battery pack can last between 6 to 9 months, depending on various factors such as the number of events or notifications, length of the recording, camera location, ambient temperature, and camera settings.


