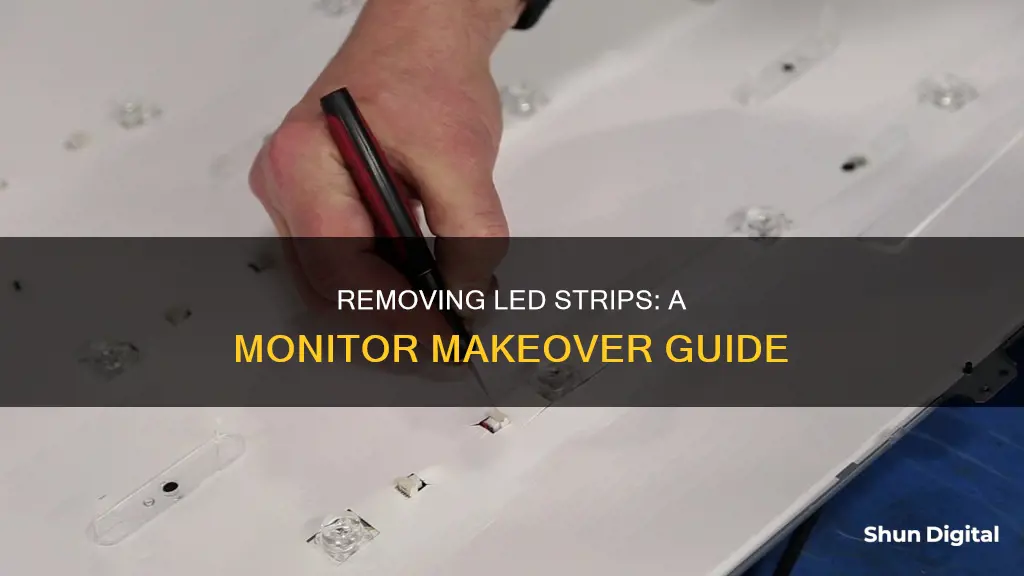
LED strips are a great way to jazz up your room and set the ambiance. However, there may come a time when you want to remove them. This could be because the adhesive isn't as sticky anymore, or maybe the design doesn't fit your room's aesthetic anymore. Whatever the reason, it's important to know how to remove them without causing any damage. In this article, we will discuss the steps to safely remove LED strips from a monitor, as well as provide tips for minimizing residue and reusing the strips.
How to Remove LED Strips from a Monitor
| Characteristics | Values |
|---|---|
| Step 1 | Disconnect the LED strip from the power source |
| Step 2 | Remove mounting devices and old adhesive |
| Step 3 | Carefully peel the LED strip |
| Tools | Hairdryer or heat gun, clean cloth, rubbing alcohol or citrus-based cleaner, butter knife or credit card, WD-40 |
| Surfaces | Drywall, wallpaper, painted wall |
What You'll Learn

Disconnect the power source
Disconnecting the power source is the first step to removing LED strips from your monitor. This is important for safety reasons, as working with LED strips that are still connected to a power source may damage their circuitry.
Before you begin, ensure that you have dry hands. Although LED strips have a low voltage output, and the chance of getting a shock is very unlikely, it is always better to be safe.
Now, simply unplug the LED strip from its power source. This will prevent any potential damage to the strip's circuitry and ensure your safety during the removal process.
Once the power source is disconnected, you can move on to the next steps of removing the mounting devices and old adhesive, and then carefully peeling the LED strip away.
If you are planning to reuse the LED strips, it is important to properly store them. You can roll them and put them back in their original packaging, securing them with a tie or wire to prevent them from unravelling. Alternatively, you can wrap them in a spool, being careful not to fold or bend the strips. Store them in a properly labelled storage bin or box, in a room that is safe from moisture and extreme temperatures.
Is Your Monitor Too Bright? Check with These Tips
You may want to see also

Remove mounting devices and old adhesive
When removing LED light strips, the adhesive used is crucial to understand. Adhesive types vary from sticky residue to heavy-duty glue or command strips. Water-proof adhesive, for instance, won't be affected by a damp cloth.
To remove mounting devices and old adhesive, you'll need to loosen the adhesive. A hairdryer or heat gun is a great tool for this. Crank up the temperature and apply heat to the LED strip. This will loosen the adhesive's grip, making it easier to peel off. Be cautious with the heat application, as too much heat can cause a mess of melted adhesive and lights.
Once the adhesive is warm, start peeling from one end. If it's still stuck, apply more heat. After removing the strip, there may be residual adhesive left behind. To remove this, use a clean cloth dipped in rubbing alcohol or a citrus-based cleaner. Gently rub the area in a circular motion, similar to waxing a car, to remove any leftover stickiness.
For more stubborn adhesive spots, a butter knife or credit card can be used to gently scrape the area without damaging the surface. If you're dealing with a particularly resistant adhesive, WD-40 can be applied to break it down.
It's important to be patient and gentle throughout the process to avoid damaging the LED strips or the surface they're attached to.
Connecting a Monitor to Your Fender Passport Venue
You may want to see also

Peel the strip
Once you have disconnected the LED strip from the power source and removed any mounting devices and old adhesive, it's time to peel the strip.
Peeling the strip can be tricky, as you want to avoid damaging the strip and the monitor. Start by warming up the adhesive with a hairdryer on a low setting. This will help to loosen the adhesive and make it easier to peel off. Be careful not to use the hairdryer for longer than one minute, as you could end up damaging the LEDs and the circuitry.
Next, use a thin tool, such as a coin, card, or dull knife, to help you loosen the strip. Start at one corner of the strip and gently apply steady pressure to peel it away from the monitor. Go slowly and be careful not to start in the middle, as this could damage the paint on the monitor.
If the strip is particularly stubborn, you can try using a small amount of rubbing alcohol or a citrus-based cleaner to help loosen the adhesive. Alternatively, you can use a product like WD-40 to break down the adhesive. Just be sure to test any chemicals on a small, inconspicuous area first to avoid damaging the monitor.
Finally, take your time and be gentle throughout the process. Removing LED strips can be a delicate task, but with patience and the right tools, you can successfully remove them without causing any damage.
EarCheck Monitor: Where to Buy This Middle Ear Essential
You may want to see also

Clean the surface
Before removing LED light strips from a monitor, it is important to clean the surface. Here is a step-by-step guide:
- Prepare the monitor: Ensure the monitor is turned off and unplugged from its power source. Allow it to cool down for a few minutes. This will reduce the risk of electrocution and make it easier to clean without leaving streaks.
- Use a dry cloth: Start by wiping down the monitor with a dry microfiber cloth. Microfiber cloths are soft, absorbent, and gentle enough to effectively clean electronic items without causing damage. Gently rub the cloth in circular motions across the surface, picking up dust and oil.
- Dampen the cloth: If necessary, dampen the microfiber cloth with distilled water. Avoid using too much water, as you don't want it to drip. Gently rub the cloth in circular motions, focusing on any particularly dirty areas. Never spray water directly onto the monitor, as it can seep into areas it shouldn't.
- Use a cleaning solution: If there are stubborn stains or smudges, create a mild cleaning solution by mixing a few drops of dish soap with water. Dip a new cloth into this solution, or spray it onto the cloth, and gently wipe down the monitor. You can also use this solution with a cotton swab to reach corners and tight spaces.
- Avoid harsh chemicals: Do not use window cleaners or any cleaning products containing ammonia or alcohol, as these can damage the delicate coating on the screen.
- Vacuum and compressed air: To remove dust and debris from the edges and gaps of the monitor, use a vacuum with a soft-bristled brush attachment. You can also spray the surface with compressed air to blow away any lingering dust particles.
By following these steps, you will effectively clean the surface of your monitor, preparing it for the removal of LED light strips.
Locating Your LG Monitor: Finding the Serial Number
You may want to see also

Store safely
Once you've removed the LED strips from your monitor, you'll want to store them properly to ensure they remain in good condition for future use. Here are some detailed steps to help you store your LED strips safely:
Clean the Strips
Before storing your LED strips, make sure they are clean and free of dust or any residue. Use a soft, dry cloth to gently wipe down the strips, removing any dirt or debris that may have accumulated. This step is important to prevent dust or grime from building up on the strips during storage.
Roll the Strips Gently
Take care when handling the LED strips to avoid tangles. Gently roll the strips, being careful not to twist or kink them, as this can damage the lights. You can roll them around a spool or a similar object with a suitable diameter to prevent sharp bends. Ensure the rolls are secure and won't unravel, which can cause entanglement.
Use Protective Wrapping
To protect your LED strips from physical damage and moisture, wrap them in a protective layer. Bubble wrap is an excellent option as it provides a snug fit and cushioning. Ensure the strips are entirely covered, and consider adding an extra layer of protection if needed.
Choose a Suitable Storage Location
When choosing a place to store your LED strips, opt for a cool, dry, and dark location. Avoid extreme temperature fluctuations, as these can damage the strips. Basements or crawl spaces are ideal, but ensure these areas are not prone to moisture or flooding. If you must store them in a garage, ensure it is temperature-controlled. Attics may not be the best choice due to temperature variations.
Store in a Container
Place the wrapped LED strips in a plastic storage container with a secure lid. This will provide additional protection from dust, moisture, and physical damage. Label the container, indicating the contents, length, and colour of the strips for easy identification.
Additional Tips
- Before storing, check the strips for any damage, missing bulbs, or burnt-out lights.
- If you have multiple sets of strips, consider using different coloured labels or markers to identify each set.
- Ensure the storage location is secure and out of the reach of children or pets.
- Regularly inspect the stored LED strips to ensure they remain in good condition.
How to Track Printer Ink Usage Efficiently
You may want to see also
Frequently asked questions
First, ensure that the LED strip is disconnected from its power source. Next, remove any mounting devices and old adhesive. You can use a hairdryer to warm up the adhesive and loosen its stickiness. Then, carefully peel the strip away from the monitor, starting from one end.
You will need a hairdryer or heat gun, a clean cloth, and, optionally, some rubbing alcohol or a citrus-based cleaner. A butter knife or credit card can also be useful for gently scraping away any persistent adhesive residue.
You can use a clean cloth dipped in rubbing alcohol or a citrus cleaner to remove any remaining adhesive residue.
Before you begin, ensure that your wall paint is dry and that the space around the LED strip is free from imperfections. Work slowly and carefully when peeling the strip away from the monitor, and avoid using too much heat, which could damage the LEDs and circuitry.


