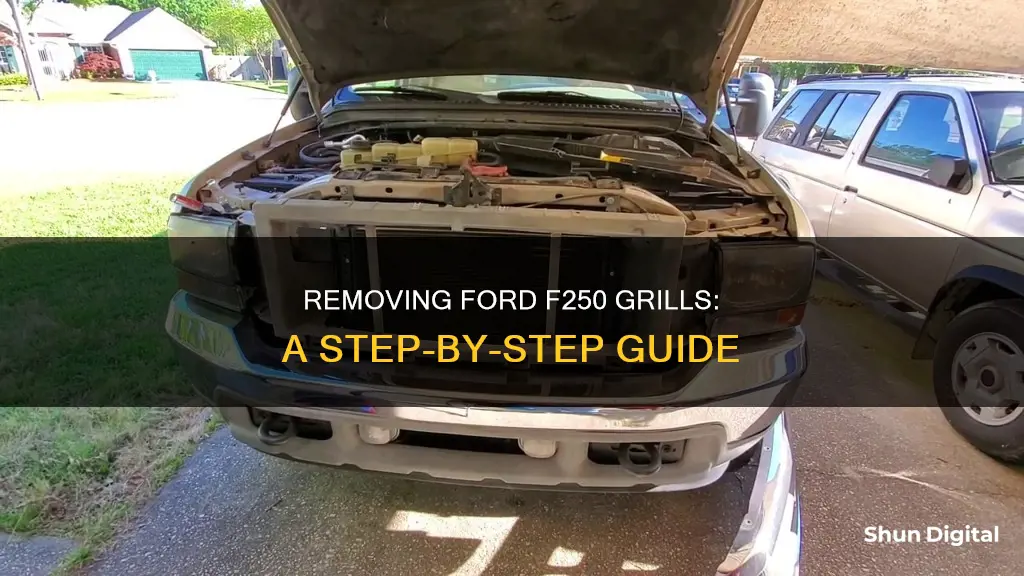
If you want to remove the blue oval emblem from the grill of your Ford F250, you're in the right place. This article will guide you through the process, which varies depending on the model year of your F250. It's important to note that some emblems are attached with industrial-strength double-sided tape, while others are clip-mounted. For the latter, you'll need to access the back of the grill to push the clips inward or outward. For the former, you may need to use dental floss or a plastic razor blade to cut through the adhesive. Let's get started!
What You'll Learn

Removing the Ford emblem from the grill
The Ford emblem on the grill of a Ford F-250 truck is attached in different ways depending on the model year of the vehicle. For example, the 2020-2022 Ford Tremor models have a different grill from the 2012 model.
2020-2022 Ford Tremor
The Ford emblem on the grill of the 2020-2022 Ford Tremor is attached using two different methods, depending on the trim package.
For the Lariat trim, the emblem is attached to the grill using two 10mm bolts located behind a bottom trim piece. To remove the emblem, carefully pry off the trim caps on the bottom corners of the grill to access the bolts. Then, use a 90-degree pick to push down on the tabs holding the trim piece in place, and gently pull the trim piece away from the grill.
For the XLT, Platinum, and Limited trim packages, the emblem is attached using friction clips. To remove the emblem, carefully pry off the trim caps on the bottom corners of the grill and remove the 10mm bolts. Then, pull out the friction clips from the grill to release the emblem.
2012 Ford F-250
For the 2012 Ford F-250, the Ford emblem is attached to the grill using spring clips. To remove the emblem, first, open the hood and mark the grill alignment with tape at the four top grill bolts. Then, remove the driver's side rubber radiator flap push pin located on the grill next to the top of the driver's side headlight. If your truck has a passenger-side push pin, remove it as well.
Next, remove the four bolts holding the top of the grill in place. With a long standard screwdriver, release the spring clips by pushing down on the metal clip through the holes from the side or top of the grill. Once all five clips are released, remove the grill and the emblem attached to it.
1999-2007 Ford Super Duty
For the 1999-2007 Ford Super Duty models, the Ford emblem is attached to the grill using four screws along the top edge of the grill. To remove the emblem, open the hood and remove the screws along the top edge of the grill. Then, pull the grill and emblem out, using a flat-blade screwdriver to lift up the clips at the bottom of the grill if necessary.
2005 Ford F-250
The 2005 Ford F-250 model has a blue oval emblem attached to the grill using industrial-strength double-sided tape. To remove the emblem, use dental floss to cut through the tape, being careful not to apply too much force to avoid cutting your fingers. Then, use a small amount of acetone on a soft cloth to remove any remaining adhesive residue, taking care not to damage the paint.
Alternatively, if the emblem is too tight to run the floss behind, use a plastic razor blade or putty knife to gently work between the emblem and the body panel until you create a gap. Do not use metal objects like screwdrivers, as they can damage the finish.
Running Q-See Camera Cables: Through-Wall Installation Guide
You may want to see also

Removing the plastic valance panel
To remove the push pins, start by prying up the centre portion by about half an inch. This will release the bottom portion of the push pin, making it easy to lift out. Next, slide the panel forward to remove it. Remember to tuck it back under the mount when you reinstall it.
Now, locate the left rear corner of the valance panel. You'll see that it tucks under an air intake mount. When you reinstall the valance panel, remember to tuck it back under this mount.
Clear Camera Fog in SCP: CB with These Tricks
You may want to see also

Releasing the lower metal mounting clips
To release the lower metal mounting clips, you will need to look down between the grille and the grille support. There are four V-shaped notches. You will see four metal mounting clips that insert into slots immediately under the V-shaped notches. Insert a screwdriver into each V-shaped notch and push down on the top of the clip to release it.
The metal mounting clips are different from the plastic push pins that hold the plastic valance panel in place. The plastic valance panel goes from the top of the grill to the radiator support. To remove the push pins, pry up the center portion about half an inch. This releases the bottom portion of the push pin, which makes them easy to lift out.
The metal mounting clips are also different from the spring clips that hold the lower part of the center grill. If these clips are broken, you can try to repair them with an adhesive like JBQuick weld, or you can try to find replacements on eBay or Amazon.
The spring clips can be released with a long standard screwdriver. To remove the bottom grill spring clips, gently pull the top of the grill outward just enough to reach down between the grill and radiator from the side or top of the grill. With the screwdriver, release the spring clips by pushing down on the metal clip through the holes. Start by coming in from the driver's side of the grill and move toward the passenger side. When the last of the five clips is released, remove the grill.
Neighborhood Watch: Cameras Keep a Close Eye
You may want to see also

Unplugging the forward camera harness
To unplug the forward camera harness on a 2017-2019 Ford Super Duty, first slide the grill forward a few inches. This will give you access to the forward camera harness connectors. Then, simply release the connectors.
If you are removing the grill, it is important to note that there are several smaller mounting clips on the backside of the grill. Check to make sure they are all there, as sometimes they fall off or stay in the grill support.
Finding TV Cameras: Techniques for Spotting Hidden Lenses
You may want to see also

Removing the grill
Step 1: Open the Hood and Mark Grill Alignment
Begin by opening the hood of your F250. It is important to mark the grill alignment with tape, especially if you plan to reinstall the grill. Place tape near the top grill bolts to ensure proper alignment when reinstalling. This will help you achieve an even grill-to-hood gap.
Step 2: Remove the Radiator Flap Push Pin
Locate the rubber radiator flap push pin on the driver's side. It connects the rubber radiator flap to the top of the grill, usually near the top of the driver's side headlight. Remove this push pin. If your F250 has a passenger-side push pin, remove that as well.
Step 3: Remove the Top Grill Bolts
The top of the grill is held in place by bolts. Using a 10mm socket, remove these bolts. Remember to mark the grill alignment with tape before proceeding to the next step.
Step 4: Release the Lower Spring Clips
Gently pull the top of the grill outward to access the space between the grill and the radiator. From the side or top of the grill, use a long, standard screwdriver to release the spring clips by pushing down on the metal clip through the spring clip release holes. Start from the driver's side and work your way towards the passenger side.
Step 5: Remove the Grill
Once all the spring clips are released, carefully remove the grill. It is made of plastic but can be surprisingly heavy, so be cautious to avoid damage.
Additional Considerations:
If your F250 has a forward-facing camera and headlight washers, remember to unplug the camera harness and washer fluid tube before removing the grill completely. Additionally, if you have a 2020-2022 Lariat trim F250, the grill removal process is slightly different. You will need to remove the entire lower grille trim piece by disengaging the tabs that hold it in place using a small 90-degree pick.
Mobile Viewing of CC Cameras: Easy Access and Control
You may want to see also
Frequently asked questions
Blue Oval emblems are often attached with industrial-strength double-sided tape. You can use dental floss to cut through the tape, then remove any residue with a cloth soaked in acetone.
First, open the hood and mark the grill alignment with tape at the 4 top grill bolts. Then, pop the driver side rubber radiator flap push pin. Next, remove the 4 bolts that hold the top of the grill in place. After that, release the spring clips by pushing down through the holes with a long screwdriver. Finally, gently pull the grill outward and remove it.
Removing the front grill of a Ford F250 is easiest if you start by removing the front grille. Then, you won't end up damaging anything else.
The plastic valance panel is held in place with two-piece plastic push pins. Pry up the center portion of the push pins about 1/2 inch to release the bottom portion, then lift them out.
To release the mounting clips, look down between the grille and the grille support. You will see four V-shaped notches. Insert a screwdriver into each notch and push down on the top of the clip to release it.


