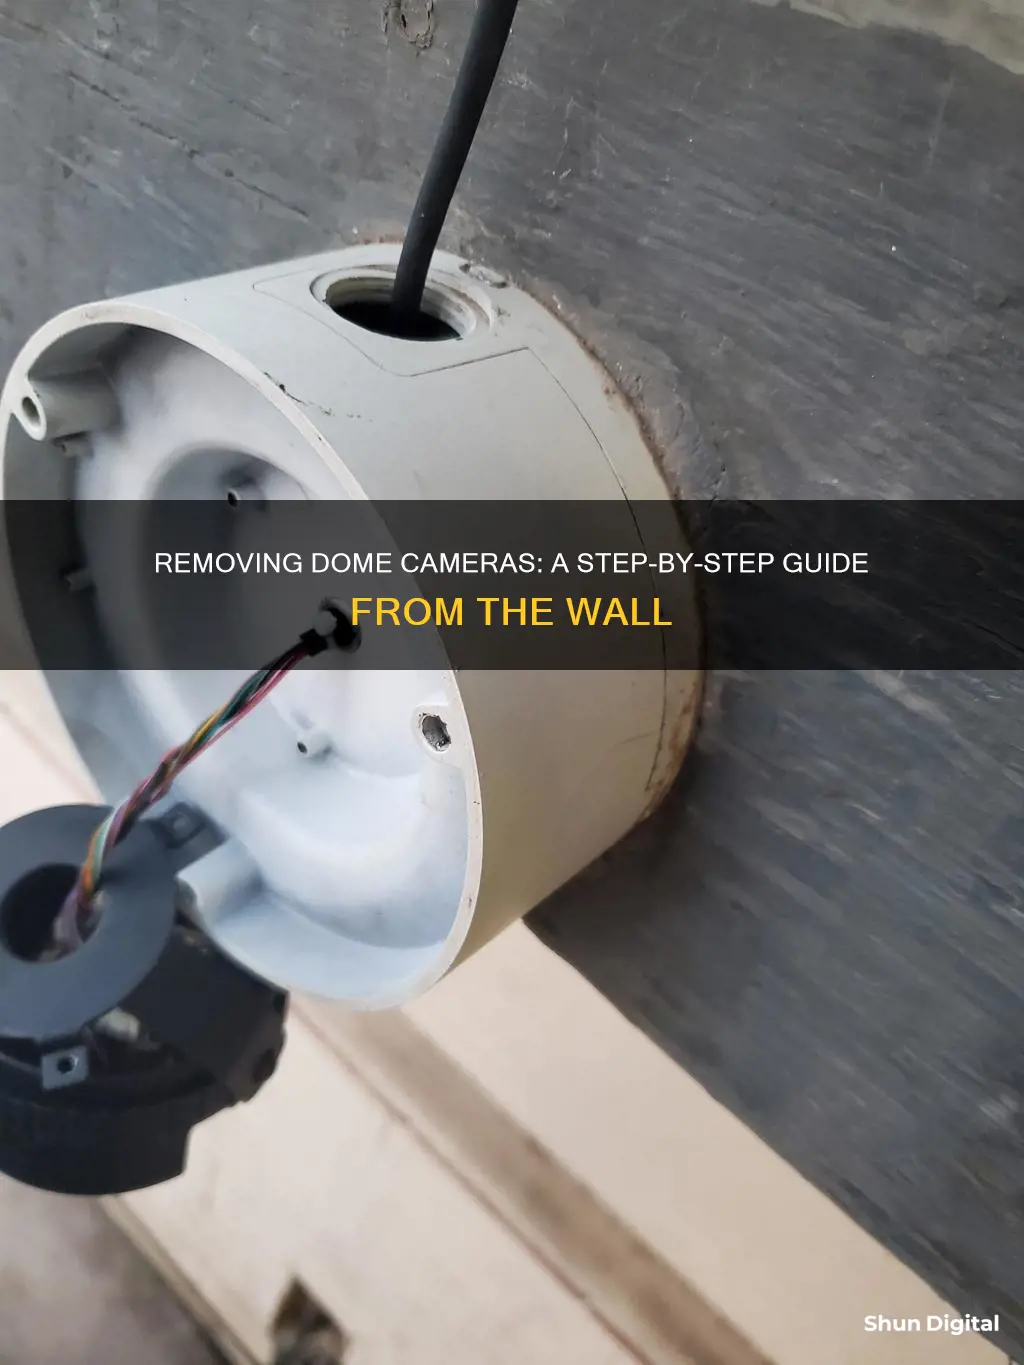
If you're looking to remove a dome camera from your wall, there are a few steps you'll need to follow. While the specifics may vary depending on the make and model of your camera, the process typically involves accessing the camera's base plate, unscrewing any mounting screws, and carefully detaching the camera from its mounting surface. Before beginning the removal process, ensure you have the necessary tools and safety precautions in place, such as a step ladder and gloves, to avoid any accidents.
What You'll Learn

Use a Torx/Hex wrench to loosen the three inner hex screws
To remove a dome camera from a wall, you will need to use a Torx/Hex (Allen) wrench to loosen the three inner hex screws. This step is necessary to access the base plate screw openings in order to successfully unmount the camera.
First, locate the three inner hex screws. These screws are found inside the dome enclosure and are used to secure the dome cover (enclosure) to the base of the camera.
Next, take your Torx/Hex wrench and carefully insert it into the first inner hex screw. Apply gentle force in a counter-clockwise direction to loosen the screw. It is important to use the correct size of the wrench to avoid damaging the screw head. Ensure that the wrench is firmly engaged with the screw before applying torque.
Once the first screw is loosened, repeat the process for the remaining two inner hex screws. You may need to adjust your grip and the amount of force applied for each screw, depending on how tightly they are fastened.
After all three inner hex screws have been loosened, you can proceed to carefully lift or pry the dome cover (enclosure) away from the base of the camera. This will expose the base plate screw openings, allowing you to continue with the unmounting process. Remember to keep the screws in a safe place so that you can reuse them if needed.
By following these steps, you will be able to efficiently and safely loosen the three inner hex screws of your dome camera, enabling you to access the necessary components for removal from the wall.
Smart TV Cameras: A Privacy Concern or Feature?
You may want to see also

Remove the dome cover from the camera's base
To remove the dome cover from the camera's base, you will need to perform the following steps:
First, use a Torx/Hex (Allen) wrench to loosen the three inner hex screws (enclosure fixed screw) that secure the dome enclosure. These screws should be included with your camera. Once these are loosened, you can carefully lift and remove the dome cover from the base of the camera. This step is necessary to access the base plate screw openings and properly mount the camera.
Next, ensure that the base plate is completely removed from the dome cover and the body of the camera. This is important, as it will allow you to properly align and secure the camera during installation. Place the included sticker onto the surface where you plan to mount the camera. This sticker will have marked openings for the standard installation screws.
By removing the dome cover from the camera's base, you can now proceed with the flush mount or in-wall installation process. Remember to follow the specific instructions provided by your camera manufacturer for a safe and proper installation.
If you are performing a flush mount installation, you will need to drill holes and insert expansion bolts. On the other hand, if you are performing an in-wall installation, you will need to drill a hole for the power cable and data cable, ensuring that the data cable is bare to fit the weatherproof RJ-45 cover.
Mastering Camera Views in Cinema 4D: A Guide
You may want to see also

Drill holes for the expansion bolts
To remove a dome camera from a wall, you will need to first drill holes for the expansion bolts. This will require a power drill and a 3/16th drill bit. The first step is to place the included sticker onto the surface where the camera is mounted. This sticker will have marked openings for three standard screws. Line up the sticker so that it is in the correct position. Once the sticker is in place, you can begin drilling.
Using your power drill and 3/16th drill bit, drill three holes on the marked Xs on the installation sticker. These holes will need to be large enough to allow for the insertion of the included expansion bolts (plastic wall anchors). Make sure that the holes are drilled straight and that they are large enough for the expansion bolts to fit snugly. Once the holes have been drilled, you can insert the plastic wall anchors.
Take the provided plastic wall anchors and insert them into the holes. Gently tap them into place with a hammer until they are flush with the surface. It is important to ensure that the anchors are secure and will not move or shift once the camera is mounted. Once the anchors are in place, you can line up the camera's base plate with the installation sticker. Make sure that the three screw holes on the camera's base plate line up with the holes on the installation surface.
With the base plate and installation surface lined up, you can now insert the screws. The screws will go through the base plate and into the expansion bolts, securing the camera to the wall. Use a power drill and a #2 Phillips head bit to tighten the screws securely. Be careful not to over-tighten the screws as this may strip the threads or damage the camera's base plate. Once the screws are tight, you can move on to the next step of removing the dome camera.
View QT Camera Footage on Your Alexa Show
You may want to see also

Insert plastic wall anchors into the holes
To remove a dome camera from a wall, you will need to follow the installation process in reverse. This will involve removing the screws and the base plate of the camera from the dome. Here are detailed instructions on inserting plastic wall anchors, a step involved in the installation of a dome camera:
Inserting plastic wall anchors is a crucial step in ensuring a secure and stable installation for your dome camera. Here is a step-by-step guide to help you through the process:
- After drilling the holes: Using a 3/16th drill bit and a power drill, drill three holes on the marked locations on the installation sticker. These holes should align with the expansion bolts (plastic wall anchors) included with your camera.
- Inserting the anchors: Take the plastic wall anchors and insert them into the drilled holes. Gently hammer them with a rubber mallet or a hammer to ensure they are firmly seated. The anchors should fit snugly inside the holes, providing a strong base for the camera's mounting screws.
- Alignment: Position the base plate of your camera over the installation sticker, ensuring that the screw holes on the camera's pedestal align perfectly with the holes on the installation surface. This step is crucial to ensure a stable and secure mounting.
- Securing the camera: Once the base plate is correctly aligned, insert the provided screws through the screw holes in the camera's pedestal. Tighten these screws securely using a power drill and a #2 Phillips head bit. This will firmly attach the camera to the mounting surface.
- Final assembly: After the camera is securely attached, carefully attach the dome cover back onto the mounted base of the camera. Retighten any hex screws that hold the dome cover in place. Ensure that the camera's enclosure does not block the image or cause unwanted reflection of IR light.
By carefully following these steps, you can ensure that your dome camera is securely mounted to the wall, providing a stable platform for reliable surveillance. Remember to refer to the specific instructions provided by your camera's manufacturer for the most accurate and up-to-date information.
Removing Silverado Tailgates: A Guide for Camera-Equipped Models
You may want to see also

Align the camera's base plate with the holes
To align the camera's base plate with the holes, you will need to follow these steps:
Firstly, ensure that the base plate is completely removed from the dome cover and body of the camera. This step is crucial as it provides access to the base plate screw openings, allowing for a secure mount. Place the included sticker onto the desired mounting surface. This sticker acts as a guide and should have marked openings for the standard installation screw holes. These stickers are designed to make the installation process easier and ensure an accurate alignment.
Once the sticker is in place, use a power drill and a 3/16th drill bit to create three holes on the marked positions. These holes will accommodate the expansion bolts or plastic wall anchors. Insert the plastic wall anchors into the holes and gently hammer them to ensure they are securely in place.
Now, it's time to align the camera's base plate with the installation sticker. Line up the screw holes on the camera's pedestal with the holes on the installation surface. Ensure that the cable is positioned in the notch on the base plate to prevent it from being caught between the mounting surface and the base plate. This step is crucial to avoid damaging the cable and ensuring a neat installation.
Finally, insert the provided screws into the aligned holes. Use a power drill with a #2 Phillips head bit to tighten the screws securely, ensuring that the camera is firmly attached to the mounting surface.
By following these detailed steps, you can effectively align the camera's base plate with the holes during the installation process, ensuring a secure and accurate mount for your dome camera.
Is Your Smart TV Watching You?
You may want to see also
Frequently asked questions
Unfortunately, I do not have enough information to answer this question.
I do not have enough information to answer this question. However, a Torx/Hex (Allen) wrench is used to open the dome enclosure.
I do not have enough information to answer this question. However, the first step in installing a dome camera is to place the supplied drill template on the mounting surface.
First, use a Torx/Hex (Allen) wrench (included) to loosen the three inner hex screws (enclosure fixed screw). Second, remove the dome cover (enclosure) completely from the base of the camera.
After removing the camera from the wall, you should clean the area where the camera was mounted.


